|
|
 |
|
|
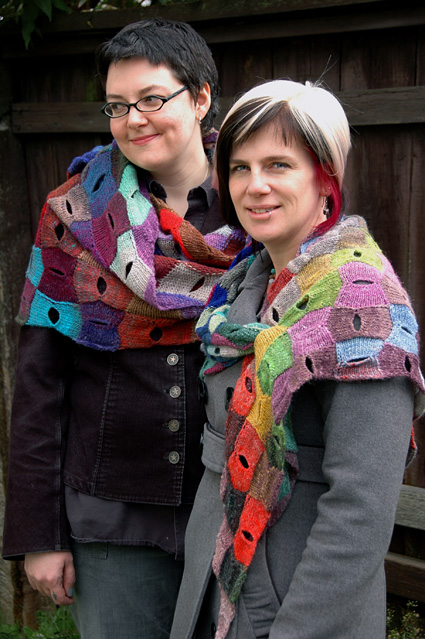 |
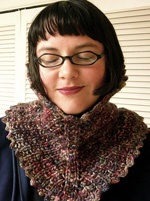
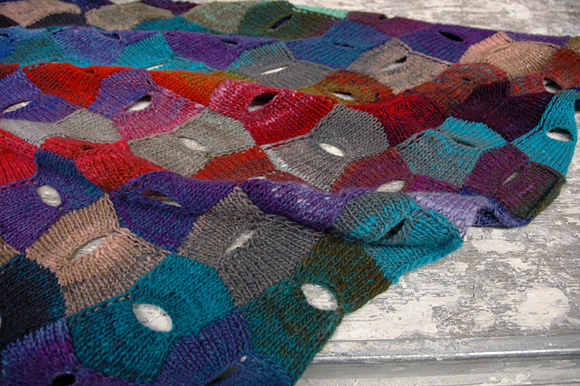
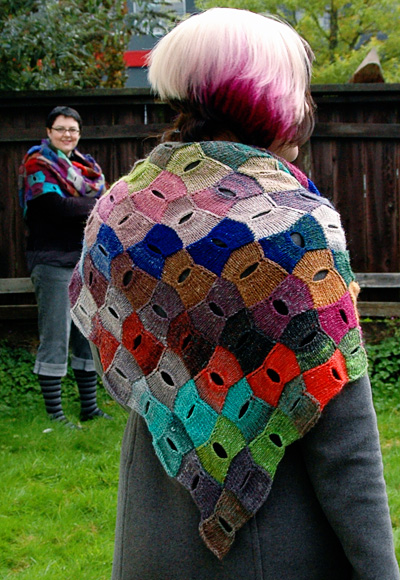
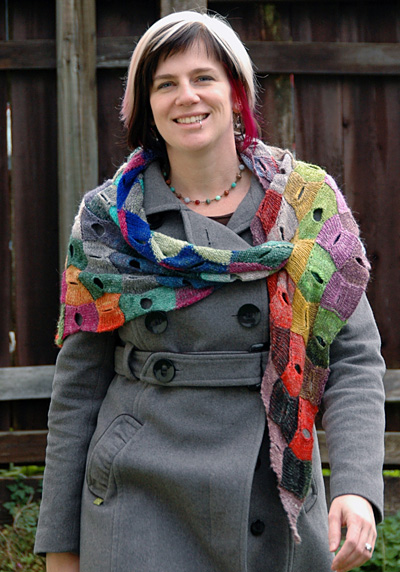
Entrelac and Noro yarns are a match made in heaven. Each of these shawls is worked using three different colorways of a Noro yarn: the larger shawl is worked in Kureyon, the smaller shawl in Silk Garden Sock. I knit the shawls without worrying too much about how the colors combined... I just let the color progressions unfold naturally, even when I initially disliked the combinations and arrangements that seemed to be developing. Some of the juxtapositions seemed chaotic and awkward while I was knitting, but when I was finished, these combinations made the finished shawls more vibrant and interesting than they would have been if I'd tried to arrange the colours to make them more even or more obviously pleasing. The differing tier lengths of the triangular shape ensured that no two colors met the same way twice. A large, firm buttonhole worked in the center of each square and triangle adds visual interest; when blocked, the entrelac squares stretch out into distorted, tesselating hourglass shapes. |
| The
holes also make the shawls more versatile to wear, as corners
can be pulled through holes to fasten the shawl in many different
ways. |
|
|
|
 |
|
SIZE smaller shawl shown above right |
|
FINISHED MEASUREMENTS |
|
MATERIALS Larger Shawl [shown above left] Notions |
|
GAUGE |
Smaller shawl: 18 sts/28 rows = 4” using
US #7/4.5mm needle, after blocking |
|
|
PATTERN NOTES |
|
Choosing Colors: Don't worry too much about trying to make the colors in the shawl match or harmonize. I chose colorways that I felt would have one or two points of commonality, but that would also be very different. For example, all colorways in the large shawl had some variation of teal or aqua, but beyond that, they had little in common: #250 is mostly blue and purple, #226 is quite bright and full of contrasts, and #252 is fairly muted and neutral, with surprising pops of (mostly pastel) color. I felt that #250 and #226 were an obvious match, since they both contain predominantly jewel tones. #252 is the colorway that brings this shawl to life, as the oddness of the mint green, peach and brown contrast with the red, purple and blue of the other colorways. At the same time, the grey and teal provided moments where the tiers of #252 harmonized with the other rich tones of the shawl. It's okay if many of the shades in the colorways you choose will clash, and if you can't imagine how they will combine. That's a big part of the fun of this project! Don't be afraid to choose a colorway that is much lighter, brighter or darker than the others; the unusual colors will be distributed throughout the shawl in unexpected ways, creating a coherent overall effect. And don't worry if you think the shawl looks strange or awkward after the first few tiers. Keep going! As each color is repeated in subsequent tiers, the colors will create their own unique harmony.
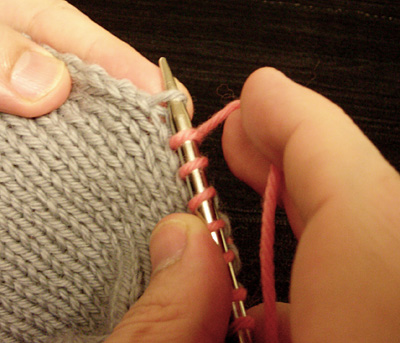
One-Row Buttonhole: Directions for Spit-Splicing can be found here. kfb: Knit into front, then back, of next st. Picking Up Stitches: Picking up sts this way ensured
that the WS of the pick-up row looks
almost like a normal row of purl bumps,
instead of forming the small ridge
that often forms on the WS of the work
when picking up sts. |
|
DIRECTIONS 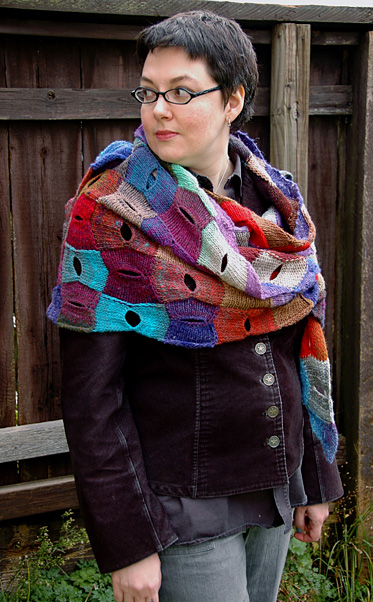
Using A, CO 2 sts. Row 1 [WS]: P2. Repeat Rows 1-22 14 times more. You will have worked a
total of 15 triangles. Last [16th] Triangle: SECOND TIER First Square: Row 1 [RS]: Sl 1, k11.
 With WS facing and continuing from last row of previous square, pick up and p 12 sts along side edge of adjacent shape from previous tier; this will be approx. 1 st picked up for every 2 rows, and 1 st in corner between 2 shapes. Slip last picked-up st to left needle; p2tog (last st of current square purled together with 1 st of shape from previous tier). Work Rows 1-22 as for First Square. Continue working squares in this way until all sts of
previous tier have been worked. There will be 15 squares
in this tier. THIRD TIER First Square: Row 1 [WS]: Sl 1, p11. Next Square: Continue working squares in this way until all sts of
previous tier have been worked. There will be 14 squares
in this tier. FOURTH TIER FIFTH TIER SIXTH TIER SEVENTH TIER
 Using B, work as for second tier. There will be 9 squares in this tier. NINTH TIER TENTH TIER ELEVENTH TIER TWELFTH TIER THIRTEENTH TIER FOURTHEENTH TIER FIFTEENTH TIER FINAL SQUARE |
|
FINISHING |
| ABOUT THE DESIGNER |
|
|
|
Pattern & images © 2010 Mandy Moore. Contact Mandy |