|
MATERIALS
Fiber
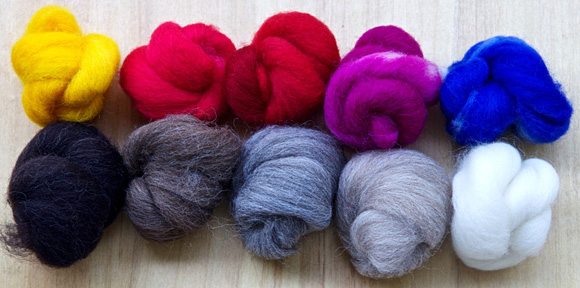
Shetland Combed Top from Jamieson and Smith
 One 4.4-oz (125 g) sample pack of 5 natural colors (white, fawn, gray,
moorit and black) One 4.4-oz (125 g) sample pack of 5 natural colors (white, fawn, gray,
moorit and black)
One 3.5-oz (100 g) pack of white
A small project like my Ogiku Tam uses a mere 2 oz (57 g) yarn.
If you start with a 4.4-oz (125 g) sample pack of 5 natural colors plus
a 3.5-oz (100 g) pack of white top, you will be perfectly on the safe side.
Preparation: carded
Drafting method: semi-worsted
Ply: 2-ply from a center pulled ball
Carding and spinning tools
Louet Junior drumcarder
Spinning wheel: Ashford Joy
Wheel system: scotch tension
Built-in lazy kate
Ashford niddy-noddy
New Wool ball winder
Spinning specs:
Ratio (singles/plying): 8:1 ration both
for spinning the singles and plying
Spinning : Z twist
Plying : S twist
Wraps per inch: 17
Twist angle: 15°
Yardage used: 123m (135 yd) total
Yarn classification: DK.
Commercial alternative : Jamieson’s Spindrift
Dyeing supplies and tools:
Ashford Acid dyes in scarlet, yellow,
hot pink, purple and blue. 0.04 oz (1g) powder of each color
White vinegar
Digital scale
Spray bottle
Plastic bowls
Plastic spoon to stir dyes
Plastic wrap
Microwave safe dish
Stencil brush
INSTRUCTIONS
Dyeing
First, you need to dye part of the white wool top into several
bright saturated colors. 2.5 oz (70 g) will be enough. Divide
the white top by breaking it and weighing the pieces. Try to
make
1 1.4-oz (40 g) chunk (for red)
1 0.5-oz (15 g) piece (for purple)
3 0.2-oz (5 g) pieces (for yellow, pink
and blue)
Soak the fiber in lukewarm water with a few drops of dishwashing
detergent for at least half an hour. Rinse and press gently.
Cover your working space with plastic wrap and cut one large
piece of wrap for each chunk of fiber. Lay each chunk of fiber
on top of one length of wrap.
From this point onward, respect basic security rules:
- wear plastic gloves whenever dealing with dye
- wear a mask when using dye in powder form
- work in a well ventilated space
- never use any tool for cooking after it has been in contact
with dye
- beware of children: synthetic dyes may look like inviting
drinks to them, but they are toxic.
- avoid discarding large quantities of dyestuff in your sink
or outdoors (put it in a tightly lid bottle and keep it in
a safe place for further use).
Mix the dyestock:
Measure or weigh 0.04 oz (1 g) dye powder.
In a plastic glass or bowl, add two spoons hot water and paste
thoroughly. Then add 0.4 cup (100 ml) hot water and mix. Dyestock
can be stored in plastic bottles for several months.
Apply the dye:
This project requires no color mixing.
To get the special heathery look of Shetland yarn, you will
blend colors by carding them instead of mixing the dyes. Blending
always tones colors down, that is why I recommend dyeing bright
saturated colors in the first place. They may not appeal to
you, and they will be very far from the subtle shades of Shetland
knitting, but don’t worry, this will come in time!
Use pure dyestock in the following colors:
yellow, hot pink, purple, blue and scarlet.
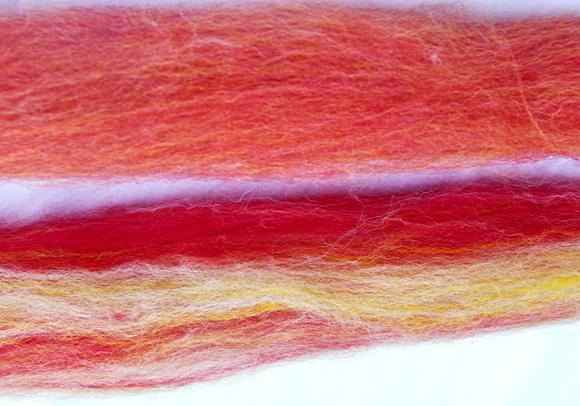
Apply the dye by painting spots on the
wet fiber with a stencil brush. Clean your stencil brush with
water when changing color. You may need to paint both sides of
the top to get an even distribution of color. But the fiber will
be carded anyway and white spots won’t show in the end,
so don’t waste your time on the painting job.
“Cook” the painted top:
Spray generously with white vinegar.
Fold the wrap, seal both ends and roll. Stack all the rolled
packs into a microwave safe dish and cook at 800-900 w, 3 times
3 min, at 10min intervals. Very carefully open the wraps: beware
of the steam that will come out! Let cool naturally. When the
fiber is at room temperature, rinse in lukewarm water, without
agitating, until the water is clear. Gently press in a dry
towel and hang to dry.
Carding:
Now comes the fun part, where you will
card colors together to produce two whole ranges of colors
ready to spin. I use my drumcarder, but you may as well use
handcards, because you are dealing with very small amounts
of each color.
It is a very simple and intuitive process:
all you need is to card different colors together several times,
so that they blend together. Start with the main color and add
contrasting colors in small quantities. Card once. Remove from
the carder and divide the batt in two. Card a second time. Divide.
Card a third time and fine tune the color. If needed, card more,
until your batt is evenly blended.
Depending on your dyeing, your color blends will come out different
and it is not easy to give exact proportions (weight indicated
here are a minimum). Here are rough guidelines to blend the 2
color ranges you need in this project.
Neutrals:
White (0.2 oz/6 g batt): white + a hint
of fawn and gray
Light tan (0.2 oz/6 g batt): white +
fawn, gray, a hint of moorit and yellow
Gray (0.5 oz/14 g batt): gray + white
+ tan and blue
Light brown (0.3 oz/9 g batt): moorit
+ white + a hint of gray, black, yellow and blue
Brown (0.3 oz/9 g batt): moorit + white
and black
Reds:
Orange red (0.2 oz/6 g batt): red + yellow
+ fawn
Pink red (0.1 oz/3 g batt): red + pink
+ white + fawn
Red (0.1 oz/3 g batt): red + moorit +
a hint of yellow, pink and purple
Dark pink red (0.1 oz/3 g batt): red
+ moorit + pink + a hint of purple and blue
Purple red (0.2 oz/6 g batt): red + purple
+ blue + black
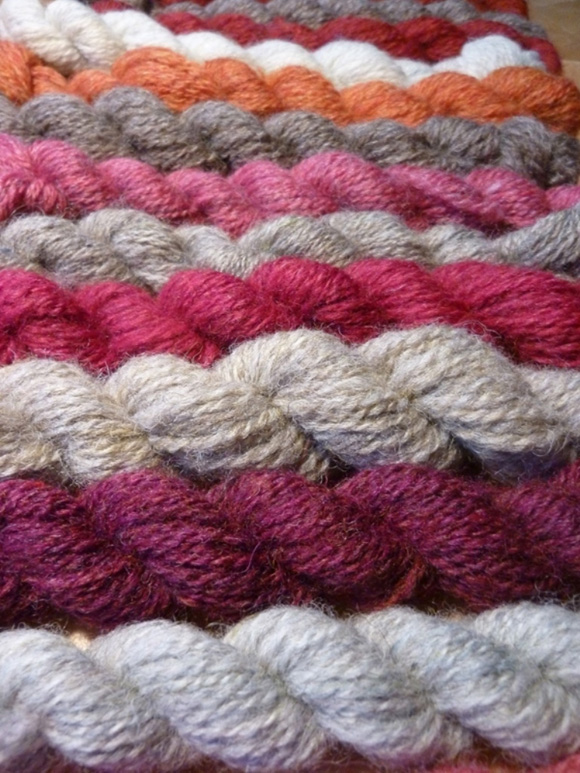
Check each color range displaying the batts side by side. You
want them to match but also to look different from each other.
If two batts look too similar, fine tune adding very little amounts
of contrasting colors.
Even if you believe that you are not born with a good sense
of color, you will do fine if you follow a few simple principles:
- Stay modest but confident. You are
not trying to equal Ms. Starmore or
other Fair-Isle geniuses at first,
you are just playing within simple
ranges of colors, that will probably
match beautifully whatever you do.
And remember that naturals come directly
from the sheep: however bad you think
you are at colors, you simply cannot
spoil those!
- Start with small quantities of contrasting color. For instance,
if you add purple to a base of red, start with half the amount
of purple you think you need. Card once or twice, compare with
the other shades in the color range, and fine tune adding more
purple if you feel so inclined. You can always add a contrast
color, but removing it is impossible: all you can do is trying
to drown it in a large amount of the main color or put your
blend aside and start again from scratch.
- The special look of Shetland yarn results from thoroughly
blending several colors together, including neutrals. You will
be able to change a shade of red dramatically adding yellow
or pink. But remember that you still want red: don’t
overdo the blending as far as changing hue.
Spinning:
Elongate each batt. Spin ratio 8:1 with
a semi-worsted method (trapping air within the yarn). You can
spin several colors on the same bobbin, alternating sequences
of contrasting colors (for example orange red/gray/dark pink
red/light tan, etc.). Regularly check the thickness of your
single. To do this, attach a piece of commercial Shetland yard
(Jamieson Spindrift or another brand of Fair-Isle yarn) to
your wheel. Let an arm length of your single ply on itself,
cross it over your test yarn, close your eyes and slowly slip
your hand along both. Your hand will feel differences in thickness
that your eyes would not easily see. Remember that Shetland
wool tends to bloom a little when washed, so avoid spinning
thicker than your test yarn. Slightly thinner would be safer.
Make a center pulled ball for each color and ply at the same
ratio as spinning. Wash, press in a dry towel and hang to dry
naturally.
 Admire your homemade Fair-Isle kit and knit
with it!
Admire your homemade Fair-Isle kit and knit
with it!
|