|
|
 |
|
Tweet
|
|
|
|
|
||||||||||||||||||||||||||||||||||||||||||||||||||||||||||||||||||||
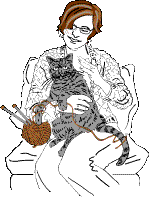
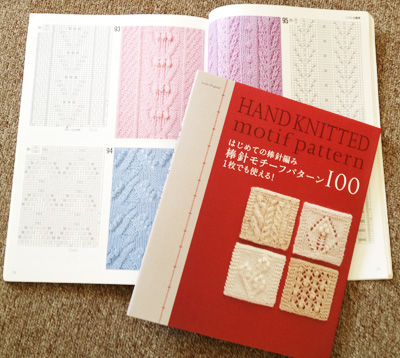
Japan Style I've been obsessed with Japanese knitting for a few years now. And clearly, I'm not alone. Classes on understanding Japanese knitting patterns are among my most popular workshops. I can't stop admiring (and buying) Japanese knitting books. I want to use stitches from Japanese stitch libraries in my own designs. I love the consistency and cleanness of Japanese knitting charts, the sparse whiteness of the pages, and the clarity of symbols that are coded representations of the stitches to be knit. The aesthetics of the books and the knitted garments blend elaborate ornament, fine detail, and clean elegance in a way that has a different feeling than design from the West. Although the patterns are written entirely in Japanese, they are not impossible for English-speaking knitters to read. Very light on text and very heavy on charts and schematics, with a cheat sheet of translations, any adventurous knitter can enter the world of Japanese knitting. Understanding Japanese patterns is based on learning how to follow charts and schematics. Knitting these designs for ourselves often requires learning how to resize a garment. The stitch patterns themselves are complex, because Japanese designers combine many simple elements into very elaborate pattern stitches, but if you understand basic US chart symbols, you're well on your way to learning to follow Japanese knitting charts. Rumor has it that the Samurai knitted in Japan centuries ago, but it is more likely that knitting came to Japan, as it did to the Americas, in the hands of European missionaries. Whatever the origins of the craft, Japanese knitters have since developed their own meticulous and elegant knitting style that is admired around the world.
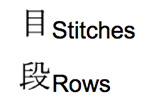
Measurements Sizing Gauge Nearby you will find the stitch and row gauge, which you can identify by these two symbols:
If you see more than one set of numbers listed, it means you are to work a gauge swatch in several different pattern stitches. To identify what stitch pattern is used for the gauge takes a little more sleuthing. You will have to match up the text next to the gauge information to the titles on the charts. Sometimes these are marked by A, B, C and so forth, and sometimes the pattern stitch names are in Japanese characters. You can also use the photo and charts to help identify which stitches are used in which areas on the garment. Here are the Japanese stitch names for the few stitch patterns that are not usually charted: Knitting Needle Sizes This symbol indicates needle size (the X would be replaced by a number):
You may find this near the gauge info. It will be also on the schematics for the knitted pieces, to indicate what size needle is used to knit each portion of the garment.
The smaller needle sizes are very close to US sizing, but as the needles get larger, the sizes get further and further apart. The largest Japanese needles are only identified by their metric measurements, in millimeters, and they have no sizes. Yarn The Garment Schematics The Spice Trail from the East cardigan I've designed is inspired by Japanese style and uses a motif I found in one of my Japanese stitch libraries. I've charted the motif and written out the pattern in the familiar English-language style. In a future column, I'll create a sampler scarf designed using stitches from Japanese stitch library and with a visual pattern just like the kinds you find in Japanese pattern books, and we will go through the process of reading the "pattern" together step by step. Going Further |
||||||||||||||||||||||||||||||||||||||||||||||||||||||||||||||||||||
| |
||||||||||||||||||||||||||||||||||||||||||||||||||||||||||||||||||||
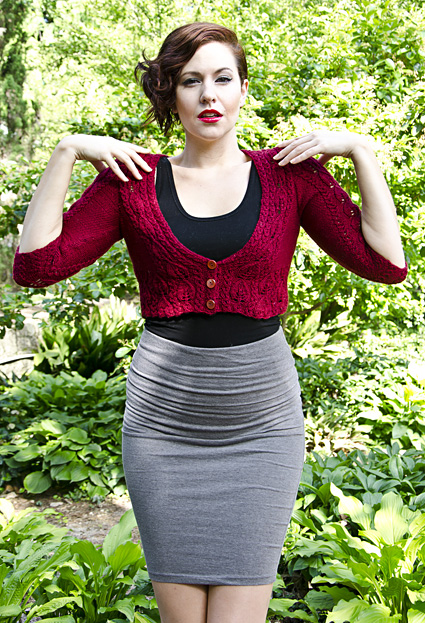 |
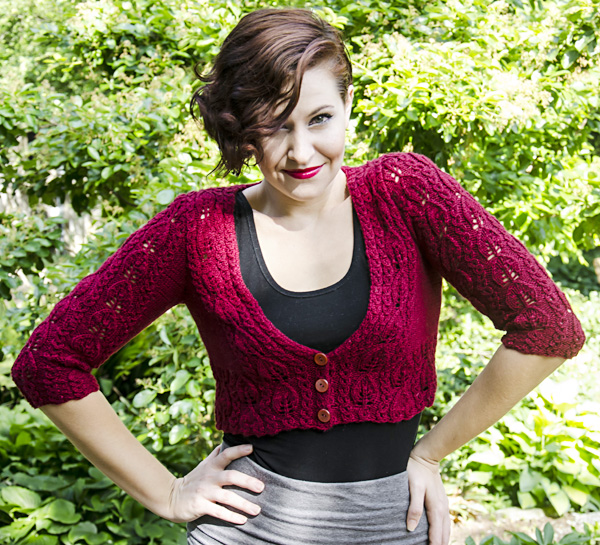
by Donna Druchunas This pattern is my idea of what makes Japanese patterns special, on a simplified level (believe it or not!). I've taken two pattern stitches from my Japanese stitch libraries, and worked them into a sweater design in a very detailed and specific way to create a vintage-looking, classicly-styled cropped cardigan with three-quarter length sleeves. A Japanese designer would probably have added additional detail such as bobbles, textural elements or more elaborate finishing to this design. |
|
 |
||
SIZE |
|
MATERIALS Notions |
| GAUGE |
23 sts/32 rows = 4 inches in stockinette stitch |
|
PATTERN NOTES |
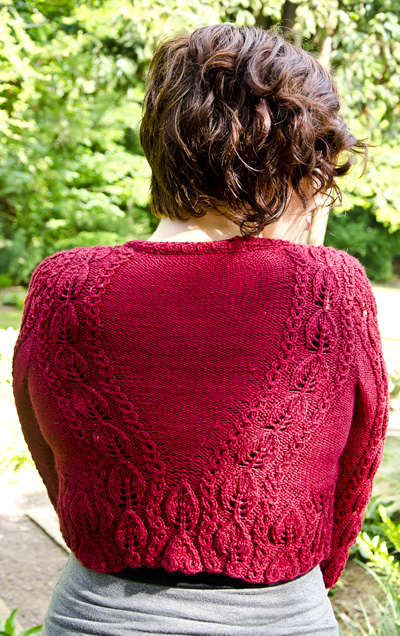
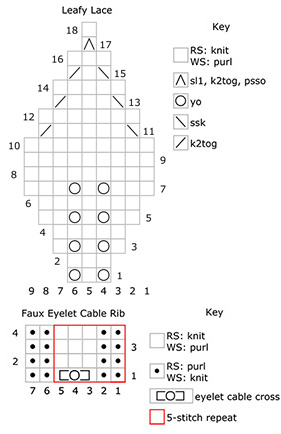
M1p: make 1 purlwise: Insert tip of left needle from back to front under the bar that runs between the stitch you've just worked and the next st; purl this bar through the front. 1 st increased. Reverse Stockinette Stitch (rev St st) Leaf Panel (shown at right, top) Faux Cable Eyelet Rib (shown at right, bottom)
|
|
DIRECTIONS |
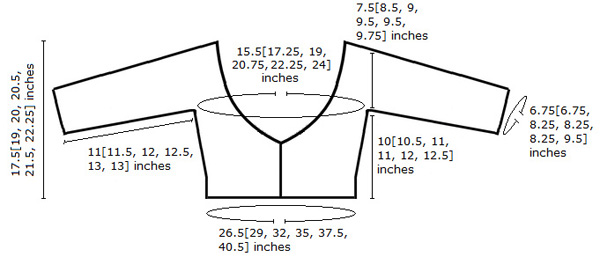
 CO 92[102, 112, 122, 132, 142, 152] sts. Row 1 [WS]: K2, [p3, k2] across. Work 3 rows of Faux Cable Eyelet Rib. Set up Leaf Panels Setup row 2 [RS]: Work Rib as est for 7[12, 17, 22, 27, 32, 37] sts, [work Leaf panel Row 1, Rib 7, work Leaf panel Row 9, Rib 7] 3 times, work Leaf panel Row 1, Rib 7[12, 17, 22, 27, 32, 37]. Work as set until a total of 28 Leaf panel rows are complete, ending when center leaf has 1 st rem. 95[105, 115, 125, 135, 145, 155] sts. Continue working sections outside markers and center section in rev St st and marked panels as est for remainder of back. Move Leaf and Rib panels out toward shoulders as foll: Note: st counts will vary because of the shaping of the Leaf motif, so absolute stitch counts are not given. Read ahead carefully as armhole shaping and pattern are worked concurrently. Rep last 4 rows 13[15, 16, 18, 18, 20, 21] more times. Once this is complete, work as follows: Shape Armholes: After armhole shaping and panel-shift rows are complete, 2[3, 3, 5, 9, 10, 12] sts rem outside the markers at the armhole edges. Work even in patts as est until armhole measures 7.5[8.5, 9, 9.5, 9.5, 9.75, 10] inches. Shape Neck and Shoulders Place markers around the central 31[37, 39, 43, 43, 47, 49] sts. Count the rem sts on each side and divide as evenly as possible by 3. Note number of sts used for each BO. Next row [RS]: BO one third of right shoulder sts, work to end of row. Right Front Set up Leaf Panels Setup row 1 [WS]: Work 7[12, 17, 22, 27, 32, 37] sts in est rib, p3tog, Rib 7, p4, m1p, p4, Rib 7, p3tog, Rib 12. 44 [49, 54, 59, 64, 69, 74] sts. Setup row 2 [RS]: Rib 12, work Leaf panel,Row 1, Rib 7, work Leaf panel Row 9, Rib 7, work Leaf panel Row 1, Rib 7[12, 17, 22, 27, 32, 37]. Work as set until a total of 28 Leaf panel rows are complete, ending when center leaf has 1 st rem, Next row [RS]: Rib 7 for band, place marker (pm), Rib 5, work Leaf panel as set, Rib 5, pm, purl to end of row. 52[57, 62, 67, 72, 77, 82] sts. Neck Shaping Note: st counts will vary because of the shaping of the Leaf motif, so absolute stitch counts are not given. Read ahead carefully as armhole shaping and pattern are worked concurrently. Shape Armholes Work even in patts as est until armhole measures 7.5[8.5, 9, 9.5, 9.5, 9.75, 10] inches, ending with a RS row. Shape Neck and Shoulders: Back Neckband Extension Left Front Set up Leaf Panels Setup row 1 [WS]: Work 12 sts in est Rib, p3tog, Rib 7, p4, m1p, p4, Rib 7, p3tog, Rib 7[12, 17, 22, 27, 32, 37]. 44 [49, 54, 59, 64, 69, 74] sts. Setup row 2 [RS]: Rib 7[12, 17, 22, 27, 32, 37], work Leaf panel Row 1, Rib 7, work Leaf panel Row 9, Rib 7, work Leaf panel Row 1, Rib 12. Work as set until a total of 28 Leaf panel rows are complete, ending when center leaf has 1 st rem, Next row [RS]: P26[31, 36, 41, 46, 51, 56], pm, Rib 5, work Leaf panel as set, Rib 5, pm, Rib 7 (front band). 52[57, 62, 67, 72, 77, 82] sts. Neck Shaping Shape Armholes Work even in patts as est until armhole measures 7.5[8.5, 9, 9.5, 9.5, 9.75, 10] inches, ending with a RS row. Shape Neck and Shoulders: Back Neckband Extension 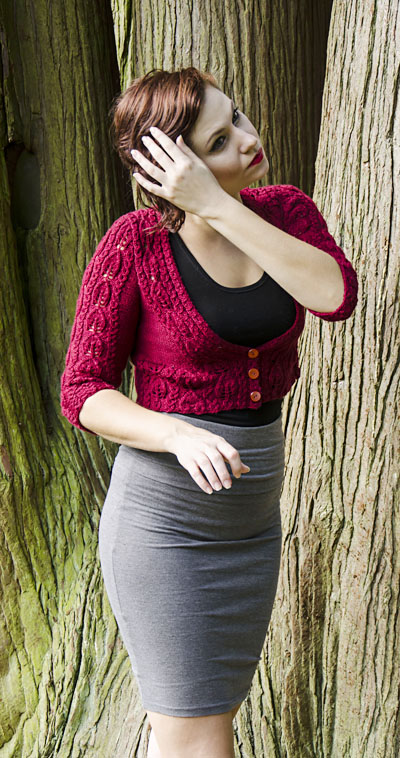 CO 47[47, 57, 57, 57, 67, 67] sts. Place markers around center 33 sts. Row 1 [WS]: K2, [p3, k2] across. Work 11 rows of Faux Cable Eyelet Rib. Set up Leaf Panels Setup row 2 [RS]: Work Rib as est to marker, work Leaf panel Row 9, Rib 7, work Leaf panel Row 1, Rib 7, work Leaf panel Row 9, rib to end of row. Continue in est patts, working Leaf panels as set and repeating the 18-row pattern. Work 1 row even. Inc row [RS]: P1, m1p, work in patt to last st, m1p, p1. 2 sts increased. Repeat Inc row every RS row 1[4, 4, 6, 6, 0, 0] more times, then every 4th row 13[12, 14, 15, 15, 17, 19] times. 22[24, 31, 34, 34, 35, 37] sts on each side of center panel. Work even until sleeve measures 11[11.5, 12, 12.5, 13, 13, 13.5] inches, ending with a WS row. Shape Cap |
 |
| FINISHING |
Block pieces to measurements. With WS facing whip stitch back neck band to back neck, unravelling any unnecessary rows. Join ends of bands with Kitchener stitch or three-needle BO. Lightly press seams with steam, being careful not to singe yarn or flatten the fabric. Sew 3 buttons evenly spaced to lower left front band, positioning them so that they are opposite eyelets on right front band. Eyelets function as buttonholes. Weave in ends. |
| ABOUT THE DESIGNER |
 Visit Donna's website at sheeptoshawl.com.
|
| Pattern & images © 2013 Donna Druchunas. All rights reserved. Contact Donna |

 Please read all instructions before you begin, as stitch counts change over the Leaf panel, and the Leaf and Rib section is moving at the same time as the armhole shaping is worked.