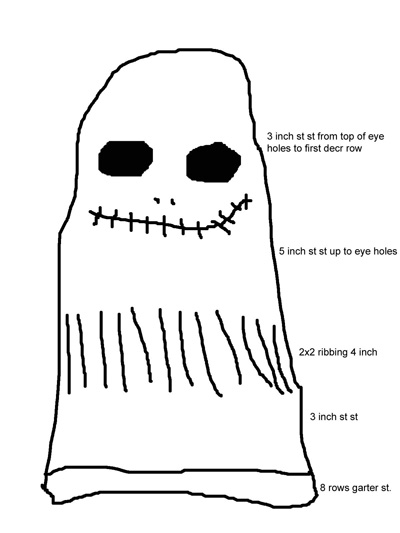
|
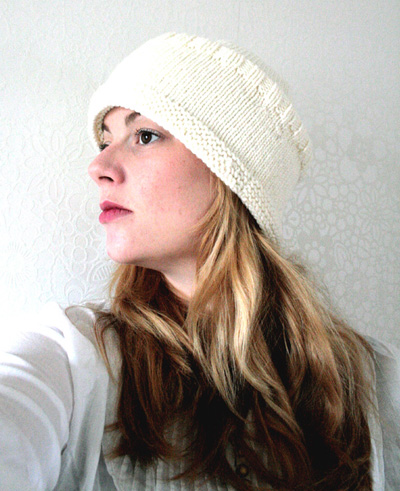  NECK/BRIM NECK/BRIM
Using circular or double-point needles, CO
100 sts.
If using double-point needles, divide
sts evenly between needles.
Place marker and join to begin working in the
round, being careful not to twist
Work 8 rounds
in garter st.
Work 3 inches in stockinette st.
Work 4 inches in 2x2 Rib. Work measures 8
inches.
FACE/HEAD
Next Round: [K2,
k2tog] to last 4 sts, k4. 76 sts.
Work 4 inches in stockinette st.
Work measures
12 inches.
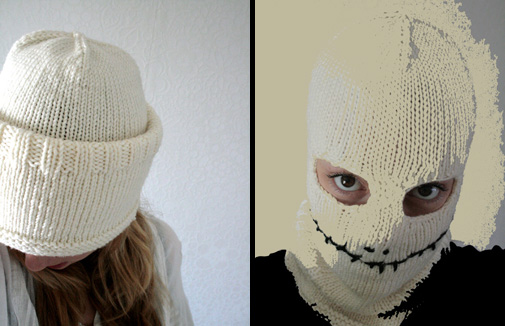
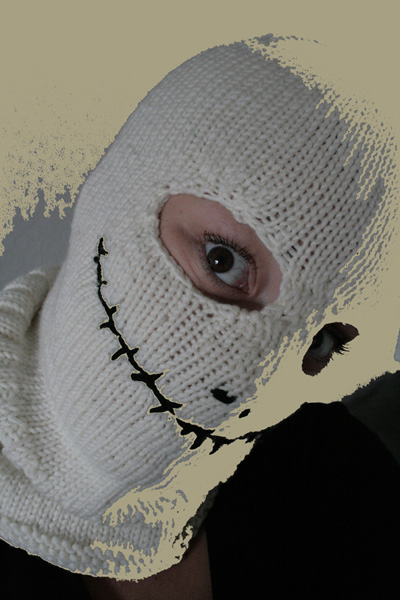
Shape Eyeholes:
Next Round: BO 2 sts, k11 (12 sts
on right needle after bound-off sts) and place
these sts on st holder; BO 2 sts, k to end.
60 sts.
Row
1 [WS]: P2tog, p to last 2 sts, ssp.
Row 2 [RS]: Ssk, k to last 2 sts, k2tog.
Row 3 [WS]: P all sts.
Row 4 [RS]: Work as for Row
2. 56 sts.
Rows 5-6: Work in stockinette st.
Row 7 [WS]: P1, m1, p to last st, m1, p1.
Row 8 [RS]: K all sts.
Row 9 [WS]: Work as for Row 7.
Row 10 [RS]:
K1, m1, k to last st, m1, k1. 62 sts. Break
yarn. If you are using double-point needles,
divide these sts between 3 needles so that
you have 2 free needles. If using circular
needle, leave sts on needle.
 Place held sts on a double-point needle and
rejoin yarn with WS facing. Place held sts on a double-point needle and
rejoin yarn with WS facing.
Work Rows
1-9 as
above. At the end of Row
4, there will be 6
sts.
Row 10 [RS]:
K1, m1, k to last st, m1, k1, CO 2 sts, k
the 61 sts on the circular needle or other
double-point needles, CO 2 sts; join to resume
working in the round, k6. 76 sts.
This point
will now be beginning of round. If using
double-point needles, place 19 sts on each
needle.
Work 3 inches in stockinette
st.
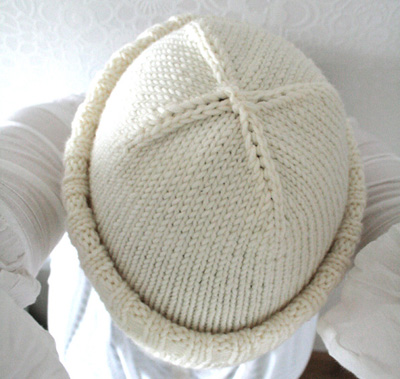
CROWN
If using circular needle,
switch to double-point needles, placing 19
sts on each needle.
Decrease
Round: [K2tog, k to last 2 sts on
needle, k2tog] 4 times. 8 sts decreased.
K 1 round.
Repeat these 2 rounds 3 times more. 44 sts.
Work Decrease
Round 5 times.
Break yarn, draw
through remaining 4 sts and pull tight.
|