| Most spinners who have reached the stage of obsession begin at some point to fantasize about getting even closer to the Source of Yarn. Spinners who had been content to buy prepared wool top start to frequent sheep and wool festivals and buy raw fleeces. Those who were already at the raw fleece stage begin to consider whether half a dozen sheep wouldn’t be a good solution to the lawn problem. Even hardened city dwellers may start to groom the family pet more often than needed.
I had experienced the sheep-as-lawnmower stage vicariously when I lived in a rural area and a good friend kept a few sheep. She dealt with the associated problem of having a ram break out of his fencing on a regular basis, and I made off with all the delicious chocolately brown fleeces. I even had a small chance to indulge my plant fiber fantasies by growing a plot of flax one summer. I can safely say that raising silk was the one experience for which I did not long. I enjoyed reading all sorts of accounts, current and historical, about the process of feeding those amazing caterpillars and watching them spin their cocoons, but I fell firmly into the no-bugs-in-my-house camp.
My daughter’s adventurous first-grade teacher announced at the beginning of the school year that they would be ordering silkworms and trying to raise them in the classroom as part of their science unit on lifecycles. Well, this was as good as having a neighbor with a sheep: all the interesting parts without having 500 silkworms in the living room. I let her teacher know that I was a spinner and would be willing to help out in any way that I could. After the silkworms arrived, I began arriving early to pick up my daughter. How big were they today? My daughter dutifully fielded my frequent questions about what the silkworms did all day.
For those of us who missed Mrs. N’s totally cool first-grade class, here is lifecycle of Bombyx mori, the cultivated silkworm, in a nutshell: the eggs are kept in cold storage until mulberry leaves, their exclusive food source, are available. The eggs are then incubated and take anywhere from three to ten days to hatch. Although they start out as small as the head of a pin, the larvae eat voraciously and continuously, except when they are molting. Silkworms go through five molts, called instars, during their 30-day lifecycle. By the time they finish their fifth instar, the caterpillars are the size of your pinky finger and ready to spin their cocoons. The silk is stored inside their bodies as a liquid protein and is extruded through a specialized tube called a spinneret. It takes about 60 hours for a silkworm to spin its cocoon from the outside inward. Once the cocoon is complete, the silkworm molts once more and becomes a chrysalis. If the cocoon is not stifled (a rather descriptive euphemism), the moth will emerge in 10 to 17 days.
 Still curious about the details? Go and read Michael Cook’s in-depth article on the little spinners here: “Silk is the Bomb[yx]. He’s raised them for years and speaks with the authority of a seasoned silkworm shepherd. I’ll wait for you. Done? Inspired? Good.
Serendipity worked her magic, and during the silkworms’ residence in my daughter’s classroom, I was able to attend a local demonstration and talk by Robin Russo, who raised silkworms in her home for more than a decade. She showed lots of pictures of the various stages of silk manufacture and described many adventures of life with a house full of silkworms. When Robin plunged her stick into a pot of soaking cocoons and began to demonstrate silk reeling, she made it look really easy. Dangerously easy. I started thinking crazy thoughts: hey, I could offer to demonstrate silk reeling for the first-graders. Why not? Never mind that I had only seen this done once. Never mind that I had no time to practice. As my husband (a high school teacher) likes to remind me: you may not know much, but you know more than the kids do. I made the offer and then waited for the silkworms to spin their little houses of transformation.
A winter storm that knocked down power lines also caused the heating system to fail, and thus the hundreds of silkworms came to an untimely end in February. Never fear, I told her teacher, I can order some cocoons by mail and we can reel the silk anyway. I was consoled by the thought that if it didn’t work, the kids would probably be more interested in flinging the cocoons around the classroom than in reeling the stuff anyway.
I have no doubt that those who raise silkworms and reel silk regularly get much better results and may pale visibly when reading my instructions, but this off-road guide is intended for anyone who wants to try reeling silk as an experiment. You can do this for a class or guild, for a rainy day activity with your kids, or just for the heck of it. It takes very little equipment, no practice, and in less than two hours and for less than fifteen bucks, you can have a bit of hand reeled silk.
This is what you’ll need:
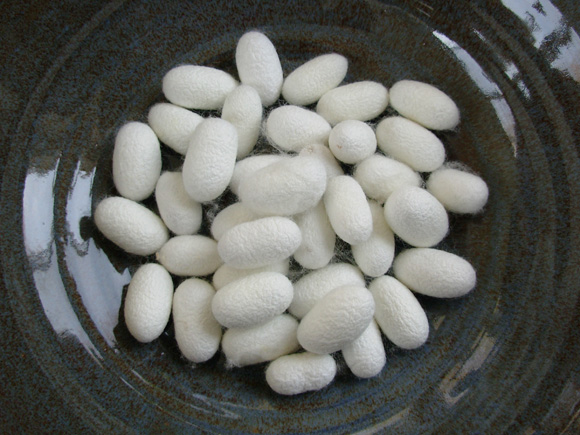
- An ounce of white cultivated silk cocoons
- Large pot (a dye pot is a good option; to my knowledge, the cocoons present no hazard to your everyday cookware, and in some cultures silkworms are even used as food, but I like to make it a rule of thumb that bugs stay out of my soup pot)
- Pot holders
- Old toothbrush, bottle brush, or veggie brush
- Old wooden chopstick
- Stove or portable burner if you will be doing this away from your kitchen
- Niddy noddy or reel
(Alas, those who believe it is unethical to shorten the life of the silkworm by stifling the cocoons won’t be able to reel silk. Silk can only be reeled from whole cocoons that maintain the continuous thread created by the silkworm. If the silkworm is allowed to transform and break out of the cocoon, the continuous fiber is broken in the process. In some cultures, the dead bugs are fried and eaten as a snack after the cocoon is unwound, but I draw the line at eating bugs. “Peace silk” cocoons—those from which live moths have emerged unharmed—are also available and can be degummed and carded at home. Skip ahead to the degumming instructions if you choose this route. My carnivorous wool- and silk-wearing self apologizes in advance for offending any vegan readers.)
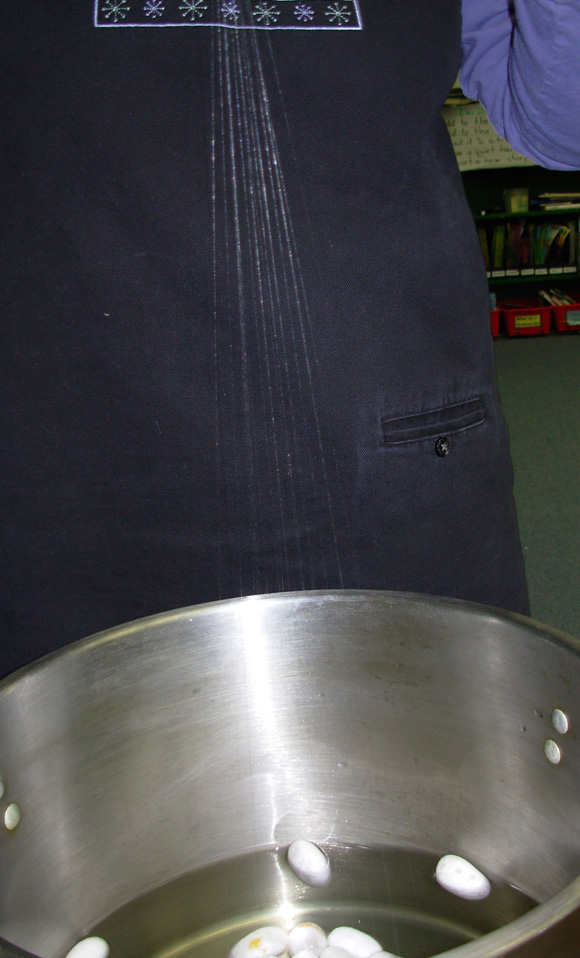
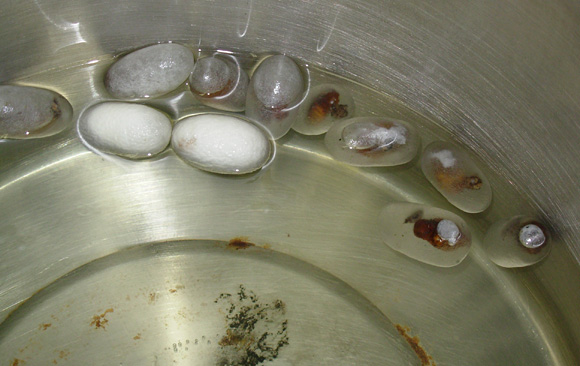
Fill your pot with about five inches of water and add 20 to 25 cocoons. They will float on the surface, bobbing around like so many lifeboats. As they begin to warm up and absorb water, they will eventually sink down a bit. They fizz a bit as they soak up the water. Put the pot over low heat and gradually bring to a simmer. Do not let the water boil! I found that my cocoons needed a full 45 minutes to soften up.
I began this process on the stove at home and then wrapped the pot in towels and transported it to the school, where a portable burner was waiting. The water needs to be kept at a simmer or the cocoons will cool off and the silk will become difficult to unwind.
After about 45 minutes of simmering, take the chopstick and swish it around in the water to pick up the ends of the cocoons. You’ll find that at least several ends “catch” on the stick and you’ll be able to grab them with your free hand. There will be a few clumps of waste silk before you find the actual strand—this is the “hammock,” the little bit of silk the caterpillar uses to hold the cocoon in place. You can put it aside to degum and spin later. As you pull off the waste silk, the “true” end should show itself.
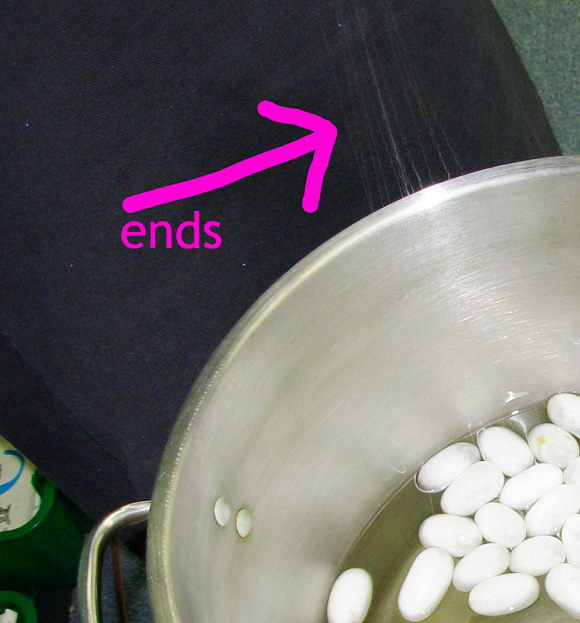 Out of the 24 cocoons in my pot, I caught maybe 30 percent of the ends with the chopstick. Then it’s time for the big guns: take the bottle brush or toothbrush and gently brush and prod the recalcitrant cocoons to see if you can free the ends. In the end, I found ends for 18 of the 24 cocoons; clearly, I was no match for Robin Russo, who made finding the ends seem so completely effortless. But take heart and remember, you are on a fiber adventure—the results do not need to be perfect. Find enough ends to create an easily visible strand when grouped together and move on.
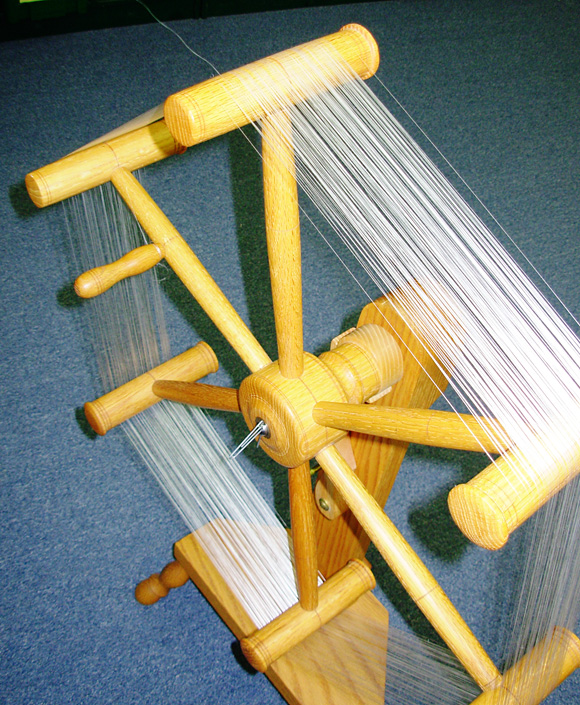
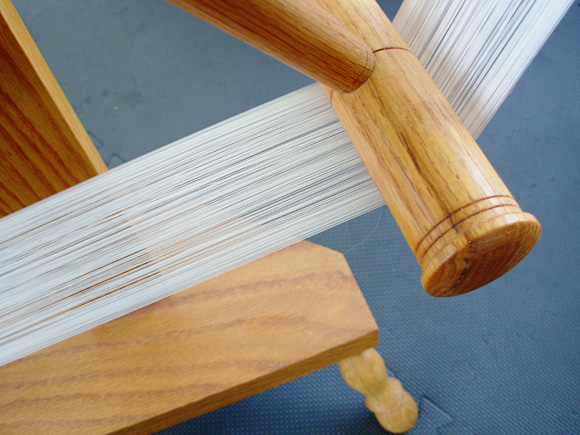
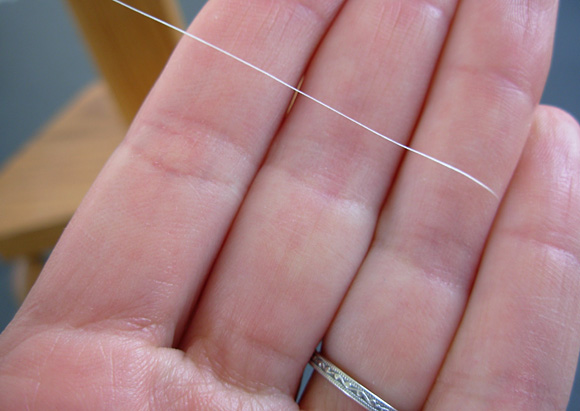 Once you’ve found as many ends as you can, enlist the help of an assistant who will guide the unreeling cocoons with his or her hands while you work the reel or niddy noddy. In a pinch, you can thread the ends through the handle of the pot as a guide. Group the ends you’ve found together and begin to reel the silk as though it were a single strand of thread. Now comes the amazing part! You will actually be able to watch the cocoons spinning around as they unwind.
The oft-repeated fact is that each cocoon contains about a mile of continuous thread. I can believe it because it took a good 45 minutes of constant reeling to reach the innermost ends of the cocoons.
Once you’ve uncovered the deceased silkworms, you’re done reeling.
 Reeled silk is generally not intended for handspinning, something I never knew until I attended Robin Russo’s talk. The process of throwing (adding twist to the reeled silk strands) is pretty time consuming, although I suspect that in the Eastern tradition, it requires more experience than equipment. "Although I've never tried to throw silk at home, Michael Cook tells me it's as easy as plying though much more
time-intensive since you're working with very fine threads. For a two-ply, just like with regular spinning, he twists the reeled silk in one direction, and then takes the two strands and plies them together in the opposite direction. Throwing the silk before degumming and dyeing helps to keep it from tangling. You can use a spindle or wheel. He also cautions that wet silk shrinks as it dries, so make sure your reel or niddy noddy is not a fragile one or it can be damaged. Look for Michael's article on reeling silk in an upcoming issue of Spindlicity. You can also use the long strands as is, just reeled, in embroidery -- take a peek at Michael Cook's stunning hand-raised silk in embroidery.
The silk available to the U.S. handspinning market in the form of silk top or silk bricks is actually waste silk (sometimes called “spun” silk). Reeled silk from whole cocoons is the highest quality of silk available and is used for creating fabric in its natural, unspun state. Several strands (the number depends on the intended use) are reeled together and some twist can be added in a process called “throwing,” but there is no need to spin the raw fiber to create thread: the silkworm has done an admirable job already. I found this information strangely humbling.
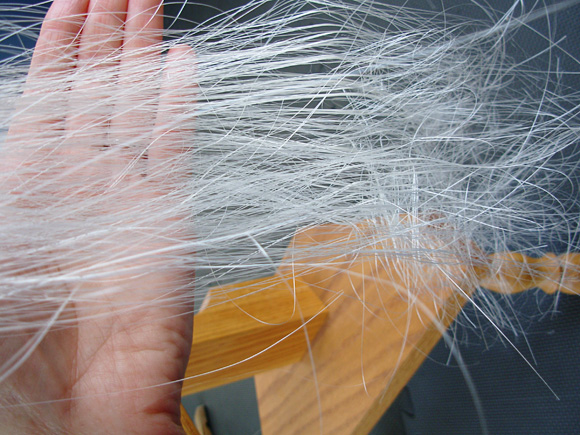
Leave the silk in place on the reel or niddy noddy until it dries.
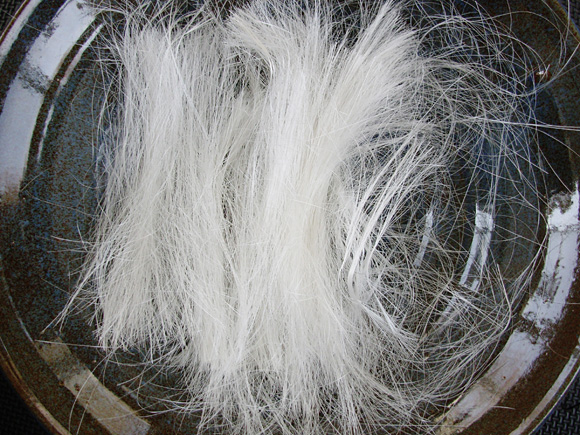
Take a pair of scissors and cut the silk from the reel into spinnable lengths of about five inches. The threads will be shiny and stiff because the sericin (bug juice) remains on the strands.
Degumming
To remove the sericin, you will need to degum the fiber with soap and washing soda (available in most grocery stores). Synthetic detergents are not good for the silk fibers, so I used pure soap: Dr. Bronner’s liquid castile soap. If you can’t find Dr. Bronner’s, you can grate a bar of castile soap or look for real soap flakes (but watch out for detergents masquerading as pure soap flakes). Michael Cook swears by Orvus paste.
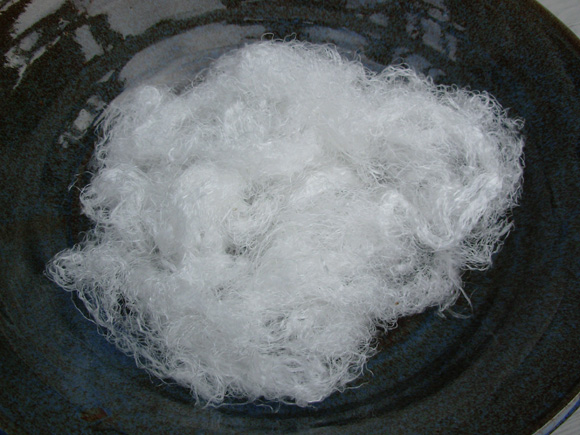
I poured about a gallon of water into my pot and added 2 tablespoons each of soap and washing soda since I was degumming less than an ounce of silk. I brought the soapy water to a boil, lowered the heat to a simmer, and then added the cut silk and let it simmer for about half an hour. To keep it from getting tangled, I did not prod or stir it. After 30 minutes, I poured the water and silk into a colander over the sink, rinsed the silk under gently running water, rinsed the pot, added a gallon of clean water and a teaspoon of vinegar, and carefully lowered the silk into to the pot. The vinegar solution returns the silk to the acidity that it prefers. I rinsed the fiber gently in the colander once more and then spread it to dry on some dish towels.
|

|
|
Reel: Solid oak, handmade by Rick Reeves
|
The resulting silk can be carded with any fiber you choose and spun. This is a great time to dig that little bag of cashmere or other precious fiber out of your spinning stash and create a homemade blend. I recommend using hand cards designed for cotton, which are perfect for all fine fibers. I promise that after an afternoon of reeling silk, you’ll have a completely new appreciation for bugs! |