|
|
 |
|
|
|
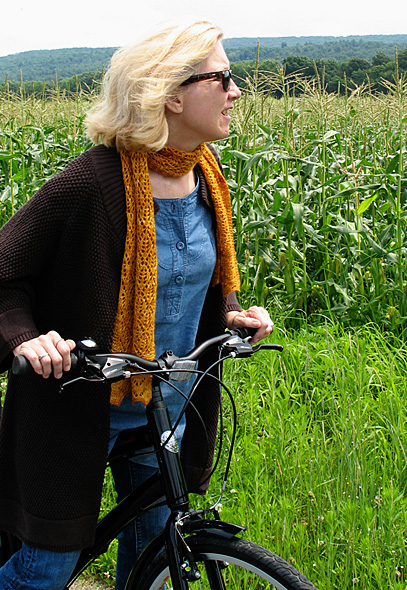
Kernel is kind of a mutt. When I opened the package containing a skein of amber-colored Mini Maiden yarn that I’d ordered, I knew immediately I wanted to use the yarn to design a lace scarf for fall - the color had “fall” written all over it. But once I started swatching, I realized that the stitch patterns I had planned to use weren’t really right for this subtly variegated yarn. I had fallen head over heels in love with the Mini Maiden, though. So I ditched my original design idea and started over. Isn’t that how love goes sometimes - we make ourselves over to suit the beloved? The final design combines aspects of several different swatches, which is why I think of it as a mutt. And the lace pattern in the central panel of the scarf reminds me of corn kernels - thus the scarf’s name. |
|
|
|
|
SIZE |
|
FINISHED MEASUREMENTS |
|
MATERIALS Tools |
|
GAUGE |
|
PATTERN NOTES |
|
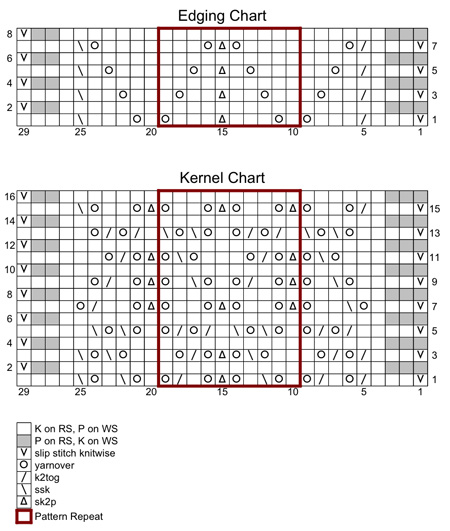
sk2p: Sl 1, k2tog, pass slipped st over. 2 sts decreased. Lower edging is worked first, followed by a beaded garter-stitch band. Body of scarf is worked next, and part of a second beaded band. Upper edging is worked, including part of a beaded band; this edging is then grafted to scarf body. Placing Beads: The beads are placed on RS rows using a very narrow steel crochet hook. To place a bead on a stitch, first insert the hook through the hole in the bead, and slide the bead onto the shaft of the hook. Slip the stitch off the needle and onto the hook, slide the bead down the hook and onto the stitch. Slip the stitch back to the left needle, then knit it.
|
|
DIRECTIONS
LOWER EDGING Work rows 1-8 of Edging Chart twice, then work Rows 1-7 once more. Outlined pattern repeat is worked three times in each row. BEADED BAND SCARF BODY Work Rows 1-3 of Beaded Band. UPPER EDGING Grafting: Scarf body and upper edging will now be grafted together
in garter stitch. Note: When instructions say “drop st from needle”, this means that the st should be dropped from the knitting needle, not the yarn needle. Step 1: Thread long yarn tail through yarn needle. Insert yarn needle from right to left through first st on front needle; do not drop st from needle. Draw yarn needle under front needle, then insert it from right to left through first st on back needle. Draw yarn through; do not drop st from needle. Step 2: Insert yarn needle from left to right through first st on front needle, drop st from needle. Insert yarn needle from right to left through next st on front needle, draw yarn through; do not drop st from needle. Step 3: Insert yarn needle from left to right through first st on back needle, drop st from needle. Insert yarn needle from right to left through next st on back needle, draw yarn through; do not drop st from needle. Repeat Steps 2-3 until all sts have been grafted. |
|
FINISHING |
| ABOUT THE DESIGNER |
|
An artist, editor/writer, and avid lace knitter, Bonnie Sennott
grew up among cornfields in Illinois, and now lives among cornfields
in western Massachusetts.
|
|
Pattern & images © 2009 Bonnie Sennott. Contact Bonnie |