|
|
 |
|
|
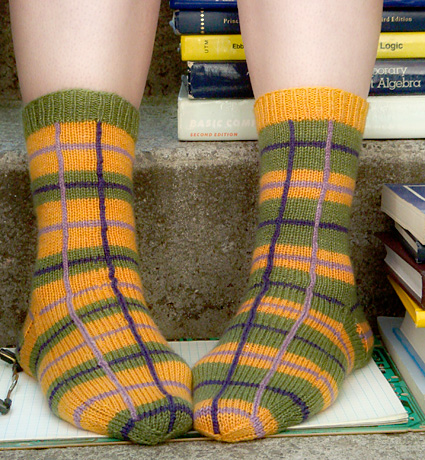 |
No matter how old I get, how far away I am from my school days, the waning of summer always makes me crave new clothes. And new fall clothes, somehow, are always associated with plaids and tartans. I didn't go to a private school, but I am a child of the 1980s, and I have a very soft spot for tartans. This pattern is a nice gentle introduction to colorwork - after all, it's really not much more than some horizontal stripes. The vertical stripes are worked with a single strand of the contrasting color that just rests in the back until you need it. Being slightly perverse, I'm fond of odd-but-related socks, and have provided instructions for getting four different socks of varying degrees of matchiness from 4 skeins of yarn. |
| Not
only do I change the positions of the colors,
but I also change the positions of the vertical accent stripes.
If you insist on making two the same, you can -- but where's
the fun in that? |
|
|
SIZE |
|
FINISHED MEASUREMENTS |
|
MATERIALS Notions |
|
GAUGE |
32 sts/44 rounds = 4 inches in stockinette st |
|
PATTERN NOTES |
|
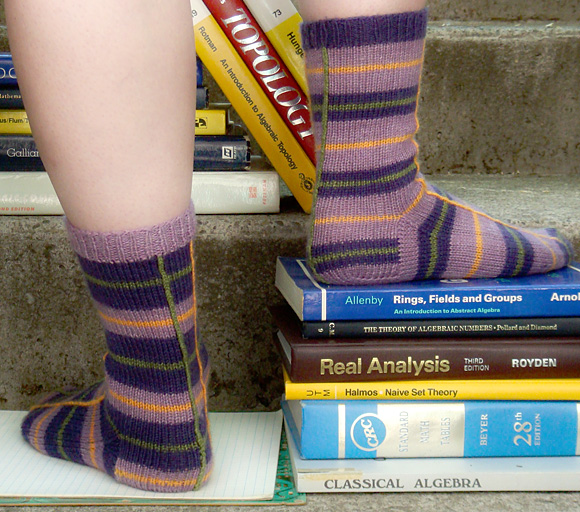
Four skeins will give you four socks of varying "matchiness", as mapped out here. The vertical accent stripes are positioned differently on the left and right socks. The colors of the wide horizontal stripes are designated Colors 1 and 2, the colors of the narrow horizontal and vertical accent stripes are Colors 3 and 4. Orange/green socks [shown above]: Purple socks [shown below]: Of course, you can just knit two socks using the same color pattern if you really want to! If you do this, I recommend that you still work a left and a right sock. If you're working the large size, you'll have just enough of the Color 1. If you have particularly long feet, you might wish to buy an additional skein of the Color 1. Vertical Stripes: When a strand runs out, tie another one on. Make a knot, leaving yourself 3-4 inch tail of both the new and the old strands, and then undo the knots when you're weaving in ends. If desired, work the jogless jog at the beginning of each new stripe. This wasn't done for the socks shown; the beginnings of the rounds are positioned on the inside leg, so they are not very visible when worn. 1x1 Rib (Worked in the round over an even number of sts): |
|
DIRECTIONS 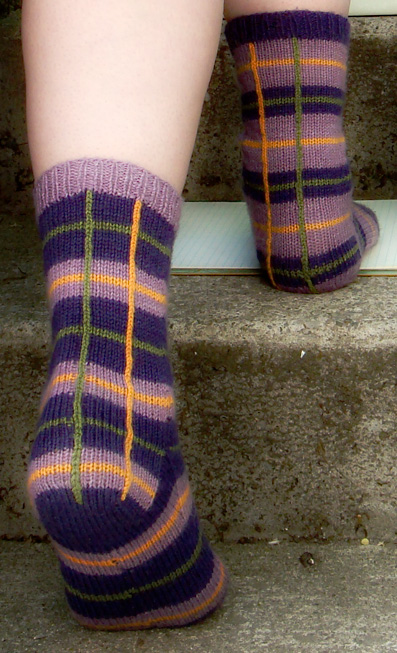
Cuff: Work 12 rounds in 1x1 Rib. Join ball of Color 1, and prepare 2 strands each of Colors 3 & 4 for vertical stripes (see Pattern Notes re. vertical stripes). Leg: Work these 28 rounds once more, then works Rounds 1-10 again. Next Round: Work 28[30, 32] sts as per Round 11. Do not complete round; heel flap is worked back and forth over these sts. Slip remaining 28[30, 32] sts of round to single needle or st holder for instep. Turn work so that WS is facing. Heel Flap: Turn Heel 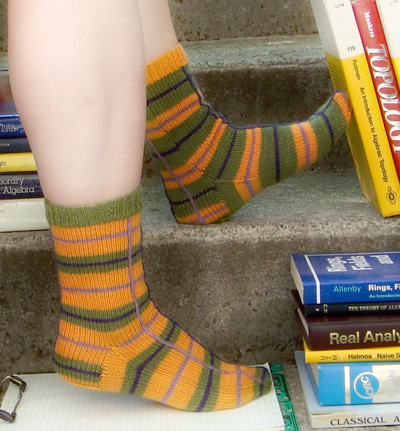 At this point, you will pick up stitches along each side of the heel flap, and resume working in the round. Continuing with Color 1, with RS facing, k 12 sts of heel;
continuing from these sts, pick up and k 14[15, 16] stitches
along adjacent side edge of heel flap, place marker; k
28[30, 32] held sts of instep in pattern, place marker;
pick up and k 14[15, 16] stitches along remaining side
edge of the heel flap; k first 6 sts of heel. 68[72, 76]
sts. Continuing in color pattern as established and maintaining
vertical accent stripes on top of foot, shape gusset as
follows: Foot: Toe: Work Toe Decrease Round. K 2 rounds. Work Toe Decrease Round. K 1 round. Work Toe Decrease Round 6[7, 8] times more. 8 sts. Cut yarn, leaving a tail approx. 8 inches long. Using yarn needle, draw tail through remaining sts and pull tight to close.
Work cuff as for right sock. Leg: Next Round: Work 28[30, 32] sts as per Round 11, then slip these sts to single needle or st holder for instep; k in pattern to end of round. Heel flap is worked back and forth over last 28[30, 32] sts worked. Turn work so that WS is facing. Continue as for right sock. |
|
FINISHING |
| ABOUT THE DESIGNER |
|
|
|
Pattern & images © 2010 Kate Atherley. Contact Kate |