
|
|
 |
|
|
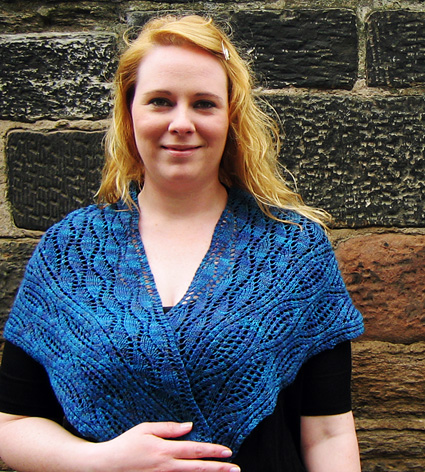
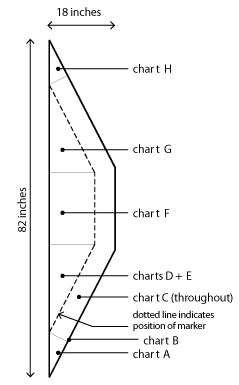
An estuary is a fertile place, a junction between riverine and ocean habitats, where the mixing of fresh and salt water creates a gradated ecosystem which nurtures thousands of species. Estuary is an in-between, watery piece of lace that inhabits the space in between scarf and shawl. If you object to the grandma-ish shape of a triangular shawl, this could be a perfect accessory for you. Knit in one piece from end to end, Estuary features two lace stitch patterns of my own design. The pattern includes simple instructions for how to adjust the sizing to achieve a larger or smaller or longer finished piece, or work the pattern in heavier or finer yarns. |
||
|
|
|
Tweet
 |
|
SIZE |
|
|
FINISHED MEASUREMENTS |
|
MATERIALS Notions |
| GAUGE |
| 24 sts/32 rows = 4" in
Stockinette stitch, unblocked 13 sts = 2.5” wide in Chart C, after blocking Note: Correct gauge is not essential for this project, but may affect total yardage. |
|
PATTERN NOTES |
|
k3tog: Knit 3 together (2 sts dec) sl2-k2tog-p2sso: Slip 2 sts tog k-wise, knit the next two sts from the LH needle together, then pass the two slipped stitches over and off the needles. (3 sts dec)
Charts chart a • charts
b+c • charts
d, e, f • chart
g • chart h
|
|
DIRECTIONS 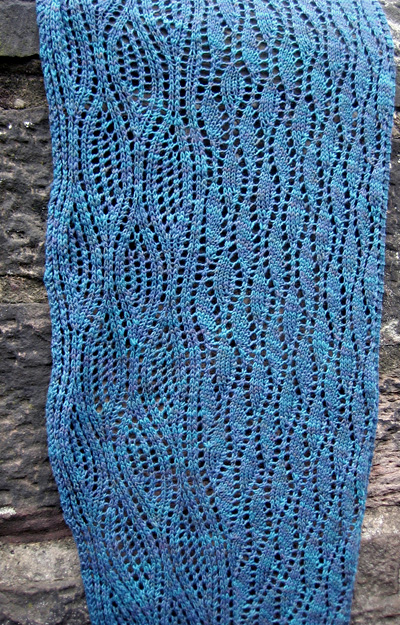
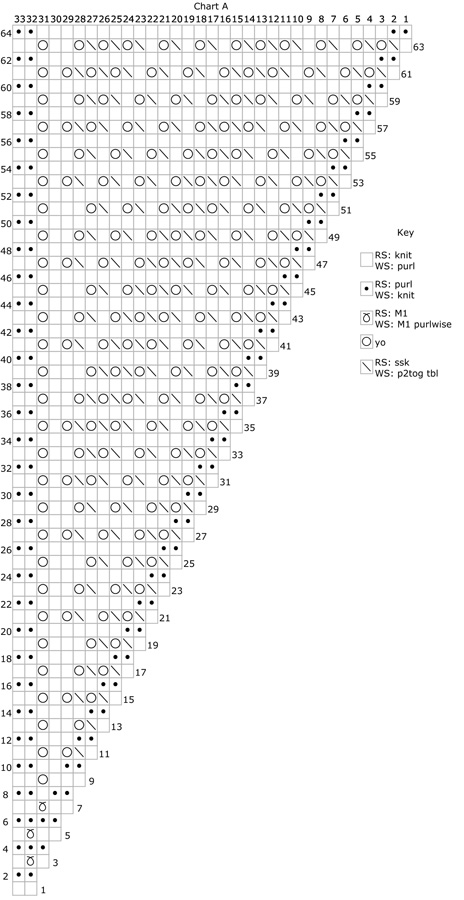
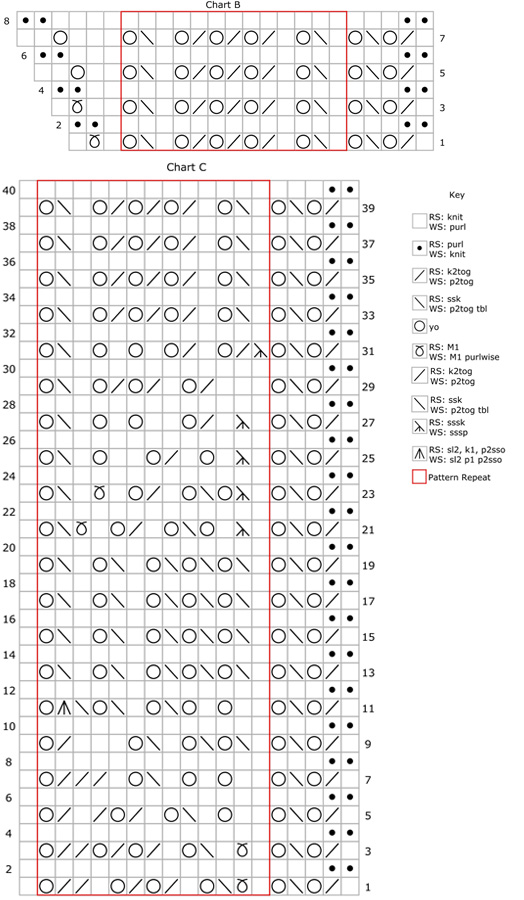
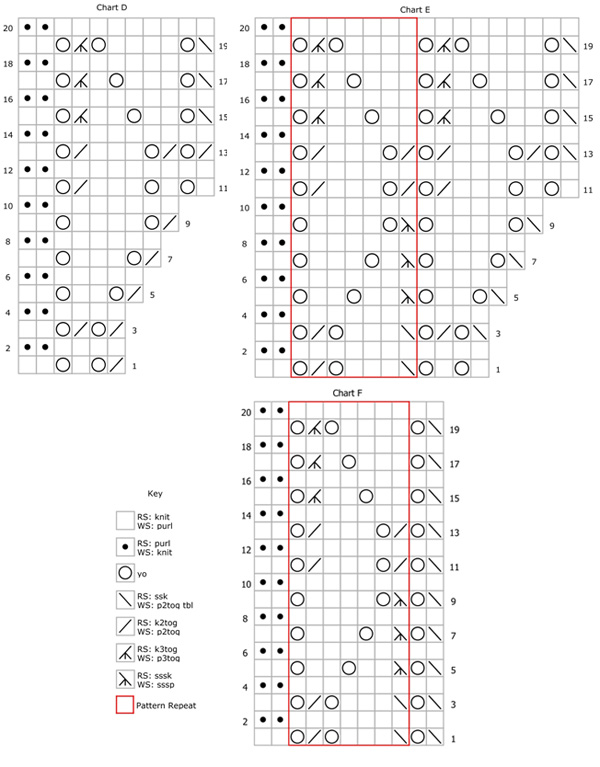
Chart A: Chart B: Work Rows 2-8 of Chart B over all sts once. 37 sts. Begin Charts C and D: Begin Chart E: Next Row [RS]: Work Row 21 of Chart C to marker, slip
marker, work Row 1 of Chart E to end. Begin Chart F: 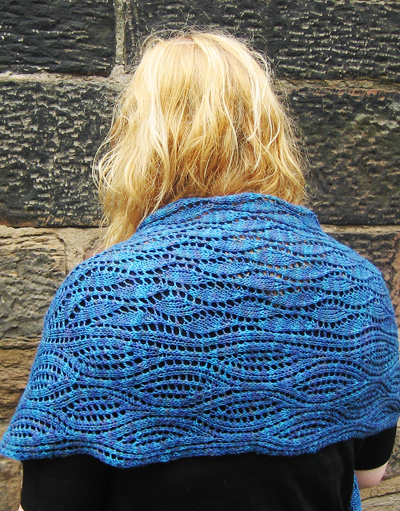
Next Row [RS]: Work Row 1 of Chart C to marker, slip
marker, work Row 1 of Chart F to end. Next row [RS]: Work Row 1 of Chart C to marker, slip marker,
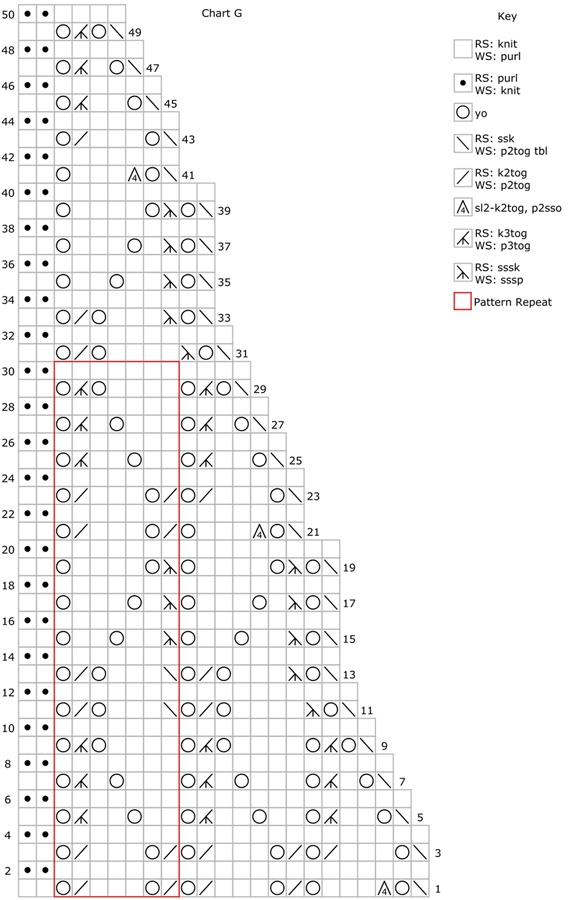
work Row 1 of Chart F to end. Cont as established, working Rows 11-30 of Chart G a total of four times, then finally work Rows 31-40 of Chart G once, ending on Row 20 of Chart C. Note: If you chose to work more repeats of Chart E, you will need to work Rows 11-30 of Chart G more times to correspond, until 13 sts remain after marker.
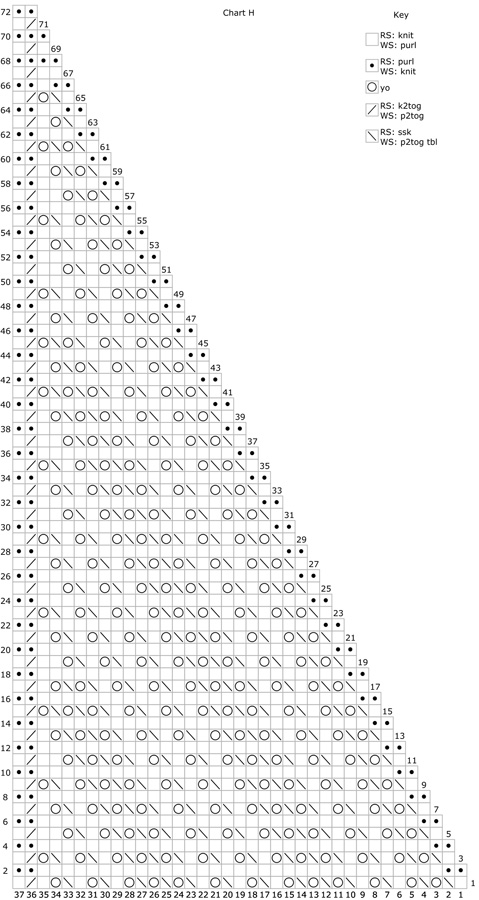
38 sts; 32 sts to the right of the marker and 6 sts to the left of the marker (with RS facing). Begin Chart H: |
|
FINISHING |
| ABOUT THE DESIGNER |
|
With her partner, Alexa Ludeman, she runs Tin Can Knits: a knitting pattern design & publishing company. Tin Can Knits patterns are available here and Emily blogs here. |
|
Pattern & images © 2012 Emily Wessel. Contact Emily |
 SSSK: Slip 3 sts, one at a time, each as if to
knit. Insert
the LH needle into the backs of these
3 sts and knit them all together. (Note:
this is the same as SSK, only slipping
3 sts instead of 2 - 2 sts dec)
SSSK: Slip 3 sts, one at a time, each as if to
knit. Insert
the LH needle into the backs of these
3 sts and knit them all together. (Note:
this is the same as SSK, only slipping
3 sts instead of 2 - 2 sts dec)