
|
|
|
|
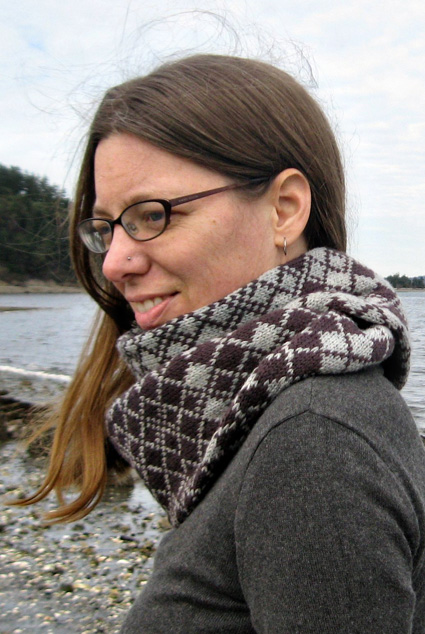
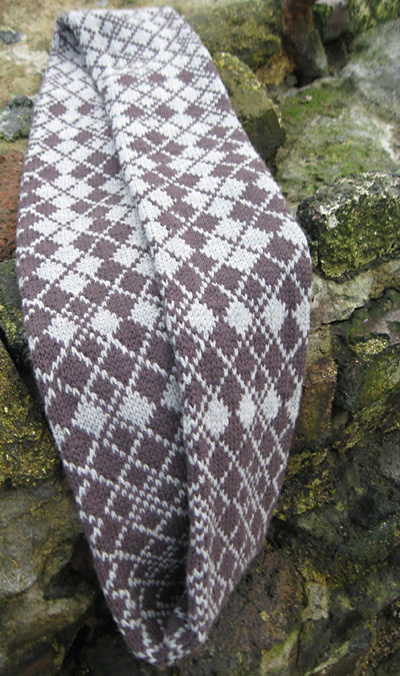
I am not a frequent scarf knitter. I've tried simple and challenging, side-to-side and end-to-end; they have all felt like forced marches sooner or later. So I set out to design a scarf that I would actually enjoy knitting as much as wearing. Damascena is a stranded tubular scarf that plays on the classic argyle color pattern and its variants in just two contrasting shades. The sport-weight yarn makes for steady progress, the same root color pattern keeps things predictable, and the color shifts kick in just frequently enough to save you from boredom. Worn long and loose, it's an interesting gradient from light to dark and back again. Doubled up, you can choose to stack the light and dark inverse patterns or keep the matching argyles front and center.
|
||
|
|
||
|
SIZE |
|
|
FINISHED MEASUREMENTS |
|
MATERIALS Notions |
|
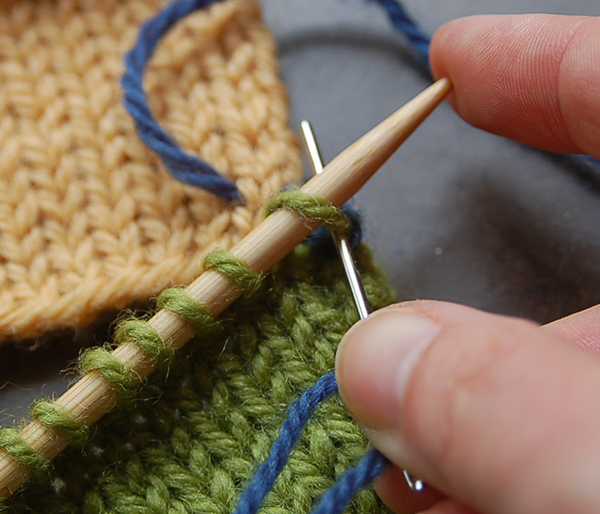
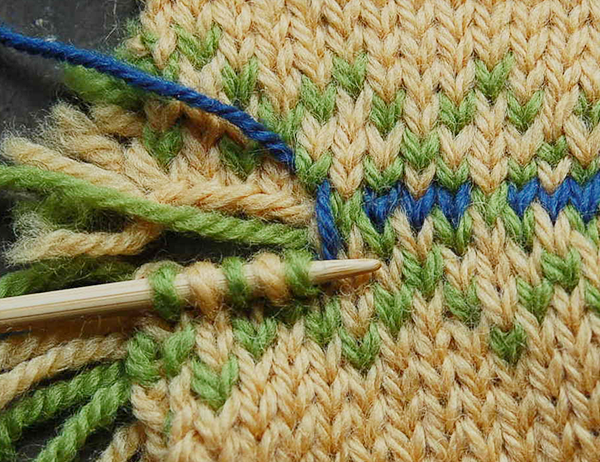
 27 sts/25 rounds = 4 inches in two-color stranded pattern, after blocking 25 sts/37 rows = 4 inches in stockinette stitch PATTERN NOTES This version of grafting is used less commonly than the usual method that joins two sets of live stitches, but it's not any trickier. Set up: Thread yarn on a tapestry needle. Arrange knitting so that the fabric with live stitches is below and cast-on edge is directly above. Identify the row of stitches you will join to above the cast-on edge. In many cases, you will join immediately above the cast-on. Step 1: Insert needle purlwise into first live stitch on needle. Pull yarn through, keeping the stitch on the needle.
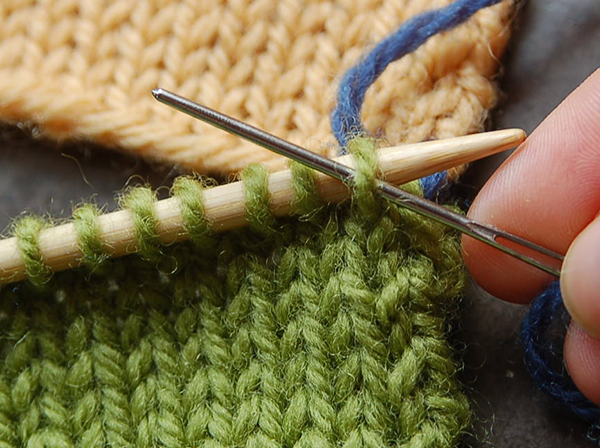
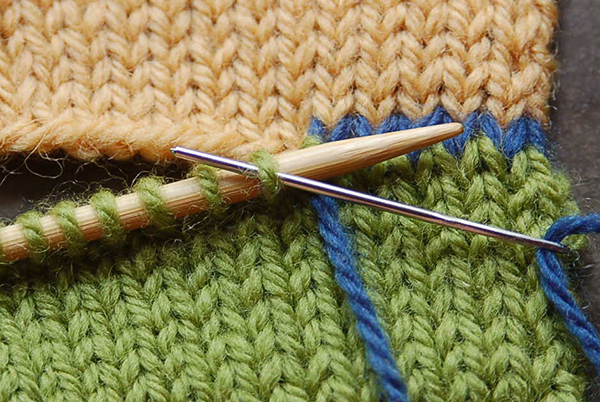
Step 2: Pass the needle from right two left behind both legs of the “V” of the first stitch of the row you are joining to above the cast-on edge.
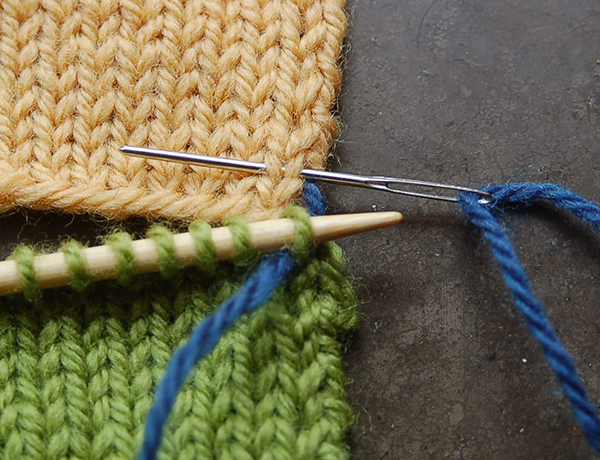
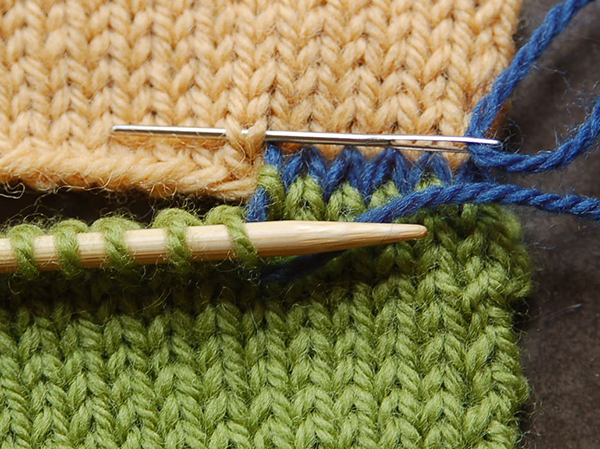
Step 3: Insert needle knitwise into the first live stitch on the needle. Pull yarn through, dropping the stitch from the needle.
Repeat steps 1 to 3 for each stitch. Here it is again:
   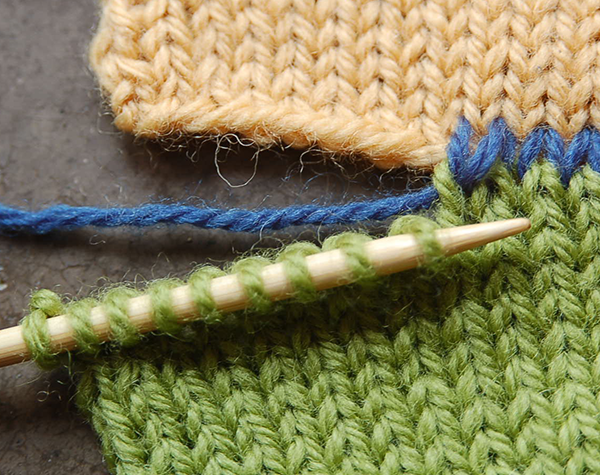
As with any grafting technique, it is helpful to keep your working yarn behind/below the knitting needle holding your stitches. For a truly invisible graft, you will need to match the tension of the fabric. I find it easiest to pause frequently and insert the darning needle into my graft stitches to even out their tension and work out any slack. To graft a row requiring two colors, thread a needle onto each and complete the sequence in the appropriate color for each stitch, changing yarns after step 3 as needed. In the sample below, I have grafted the yellow stitches in blue and the green stitches in green to show how this technique can be used to complete a pattern seamlessly.
|
|
The charts for this pattern are very large and fit on a letter-sized page. Click here and print the resulting page. |
|
DIRECTIONS 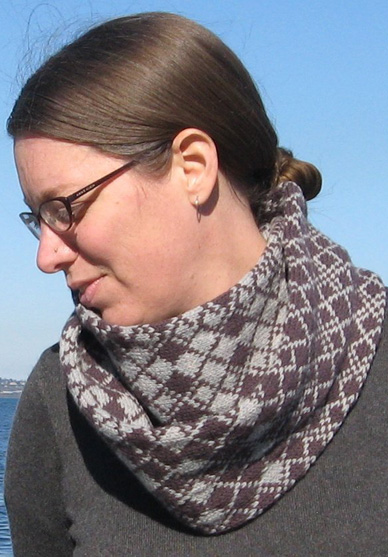
Join CC and work Chart A 4 times around.
FINISHING |
| ABOUT THE DESIGNER |
|
She blogs about homestead life, including knitting, at bethanyjune.com. |
|
Pattern & images © 2015 Bethany Axtman. Contact Bethany |