Knitty: little purls of wisdom
Title
beauty shot

Tangy

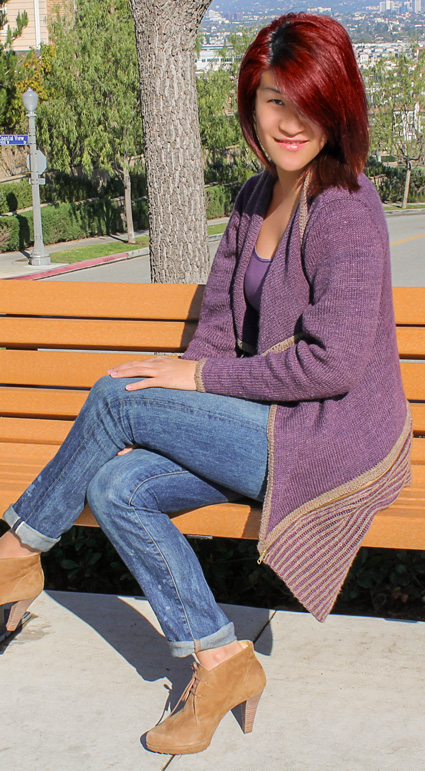
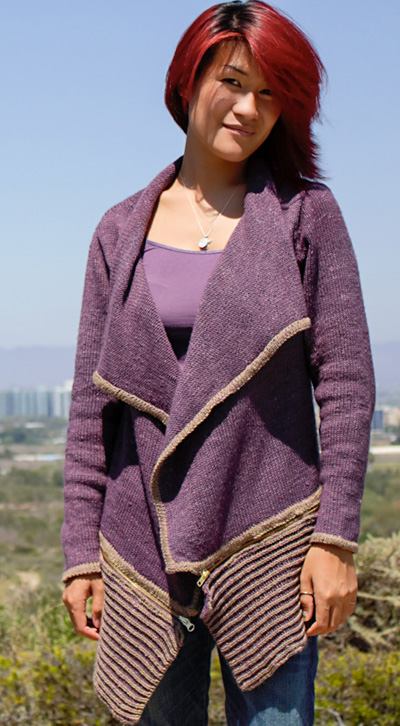
The Desert Belle Wrap is a convertible jacket inspired by the beautiful desert bluebells that bloom in the most inhospitable conditions within the deserts of southern California. Each year, these blue-purple flowers sprout through the cracks of dry soil, transforming the Mohave Desert into a spectacular garden.

Made in a stunning blend of merino wool, baby alpaca, and silk, this sweater features The Fiber Company's Acadia yarn which provides a subtle tweed effect that is both rustic and soft. A separating zipper allows the jacket to be worn long or short depending on the weather and the wearer's mood. The removable brioche bottom mimics the stunning beauty of bluebells peeking through the arid, desert floor.

Wear the cardigan with the panel attached or not for two different looks. The zipper gives weight to the hem and makes the sweater hang nicely with or without the brioche.

The pattern is worked flat and features side seams with asymmetrical shaping, set-in sleeves and a brioche bottom that is attached with a separating zipper. The Stockinette stitch hem is picked up and then knit after blocking the sweater. Seam the Stockinette stitch hem to the live stitches of the contrast color yarn on the wrong side.

spacer model: Cassie Bari
spacer photos: Bebe Thomas
 

SIZE
For women's garments: XS[S, M, L, 1X, 2X, 3X]
shown in size S with 6 inches ease at the garment fronts (overlap)

FINISHED MEASUREMENTS
Chest: 42.25[45.25, 49.25, 53.25, 57.25, 60.75, 64.75]
Note: The Desert Belle wrap is designed to fit with ease. The left front overlaps with the right front by 6[5.75, 5.75, 5.75, 5.75, 5.5, 5.5] inches. To find the right size, measure around the apex of your bust and add the ease noted above.
Length (shoulder to bottom of brioche): 25[26.5, 27, 28, 28.5, 29.5, 30] inches

spacer

MATERIALS
Yarn

The Fibre Company Acadia, 60% Merino Wool/20% Baby Alpaca/20% Silk, (50g/145yds);
spacer [MC] Thistle; 10[11, 12, 13, 15, 16, 16] skeins
spacer [CC] Chipmunk; 2[2, 2, 3, 3, 3, 3] skeins

Recommended needle size
[always use a needle size that gives you the gauge listed below -- every knitter's gauge is unique]
spacer 1 set US #5/3.75mm double-point needles (for sleeve cuff)
spacer 1 24-inch US #6/4mm circular needles (for body)
spacer 1 24-inch US #5/3.75mm circular needles (for Stockinette stitch hem)
spacer 1 set US #3/3.25mm straight needles (for brioche section)

Notions
spacer yarn needle
spacer stitch holder
spacer stitch markers
spacer custom separating zipper (see instructions in Pattern Notes)
spacer fabric pins (for zipper)
spacer sewing needle (for zipper)
spacer polyester thread (for zipper)
spacer zipper foot (if machine sewing the zipper)
spacer sewing machine needle size 75/11 HS (if machine sewing the zipper)

spacer

GAUGE

20 sts/28 rows = 4 inches in Stockinette stitch on larger needles after blocking.
 

PATTERN NOTES
[Knitty's list of standard abbreviations and techniques can be found here.]

spacer
There are 3 needle sizes in use:
The needle to achieve gauge will be referred to as "larger needle".

A needle 1 size smaller will be used for Sleeve Cuffs and Stockinette Stitch Hem, and will be called "medium needle".

A needle 2 sizes smaller than gauge needle will be used for the Brioche Section and will be called "smaller needle".

Adjust the sizes according to your gauge.

Brioche Terminology (from briochestitch.com) courtesy Nancy Marchant

DS: Dark side where the brioche knit columns are in the main color [MC].

LS: Light side where the brioche knit columns are in the contrast color [CC].

Slide: Slide the work to the other end of the needle, do not turn.

Brk1: Knit the stitch that was slipped in the previous row together with its yarn over.

Brp1: purl the stitch that was slipped in the previous row together with its yarn over.

Sl1yo (following a knit or brioche knit stitch): bring the working yarn under the needle to the front of the work, slip the next stitch purlwise, then bring the yarn over the needle (and over the slipped stitch) to the back, in position to work the following stitch.

Sl1yo (following a purl or brioche purl stitch:) working yarn is already in front, slip the next stitch purlwise, then bring the yarn over the needle (and over the slipped stitch), then to the front under the needle, into position to work the following stitch.

Slp: slip 1 stitch purlwise.

Two-Color Italian CO Method Tutorial here.
Italian Bind Off tutorial here.

Zipper shown was custom ordered from Zipperstop with the following specifications:
Zipper Weight & Material: #5 (medium weight) in Metal or Brass (metal is sliver tone and the brass has a polished gold tone). Choose the color of the zipper fabric that best matches the yarn used. A brown zipper with brass teeth and pull is pictured.
Inches: 42[44, 48, 52, 56, 60, 64] inches, approx: the measurements provided are for the bottom edge of the sweater after blocking. However, prior to ordering, measure the bottom edge of the sweater. Order according to the actual measurement along the bottom edge (i.e. if you are not exactly on gauge, you may need a slightly larger or smaller zipper length). It's very important to order according to the actual length.
Zipper Pull Type: Separating zipper with 2 pulls which can detach to allow the bottom to be removed.

DIRECTIONS

spacer
BACK
Using larger needles and MC, CO 48[52, 62, 72, 82, 92, 102] sts.
Note: The first and last stitch are selvedge stitches and are used for seaming. Knit the first and last stitch of each row.

Work in St st for 0.5 inch, ending with a WS row.

Inc Row (RS): K1, RLI, k to last st, LLI, k1 - 2 sts inc'd

Rep Inc Row every 4th row 14[14, 14, 12, 12, 11, 11] more times, then every 12th row 0[0, 0, 2, 2, 3, 3] times. 78[82, 92, 102, 112, 122, 132] sts.

Work even in St st until BACK measures 11[12.5, 12.5, 13, 13, 13.5, 14] inches from CO edge, ending with a WS row.

Shape Armhole:
BO 2[2, 2, 2, 3, 3, 5] sts at the beg of next 2 rows, then BO 1[2, 2, 2, 3, 3, 5] sts at the beg of next 2 rows.

Dec Row (RS): K1, ssk, k to last 3 sts, k2tog, k1. 2 sts dec'd

Rep Dec Row every 4th row 4[5, 5, 7, 8, 10, 11] more times. 62[62, 72, 78, 82, 88, 88] sts.

Work even in St st until armhole measures 6[6, 6.5, 7, 7.5, 8, 8] inches, ending with a WS row.

Shape Shoulder:
BO 4[4, 4, 6, 6, 6, 6] sts at the beg of next 2 rows, then BO 2[2, 4, 4, 5, 5, 5] sts at the beg of next 4 rows, then BO 2[2, 3, 4, 4, 4, 4] sts at the beg of next 2 rows.

Place remaining 42[42, 42, 42, 42, 48, 48] center sts on hold for Back collar.

spacer

RIGHT FRONT
Using larger needles and MC, CO 81[85, 89, 95, 99, 105, 109] sts.
Note: The last RS stitch and first WS stitch is a selvedge stitch and is used for seaming. Knit this stitch on RS and WS rows.

Work in St st for 0.5 inch, ending with a RS row.

Side seam decreases:
Dec Row (WS): P1, p2tog, con't in patt to end of row.

Rep Dec Row every 6[6, 8, 8, 8, 6, 6] row 11[10, 9, 10, 9, 11, 10] more times. 69[74, 79, 84, 89, 93, 98] sts.

Work in established patt until RIGHT FRONT measures 11[12.5, 12.5, 13, 13, 13.5, 14] inches from CO edge ending with a WS row.

Shape Armhole:
BO 2[2, 2, 2, 3, 3, 5] sts at the beg of next WS row, then BO 1[2, 2, 2, 3, 3, 5] sts at the beg of next WS row.

Dec Row (RS): Work in patt to last 3 sts, k2tog, k1. 1 st dec'd

Rep Dec Row every 4th row 4[5, 5, 7, 8, 10, 11] more time(s). 61[64, 69, 72, 74, 76, 76] sts.

Work even until armhole measures 6[6, 6.5, 7, 7.5, 8, 8] inches, ending with a RS row.

Shape Shoulder:
BO 4[4, 4, 6, 6, 6, 6] sts at the beg of next WS row, then BO 2[2, 4, 4, 5, 5, 5] sts at the beg of next 2 WS rows, then BO 2[2, 3, 4, 4, 4, 4] sts at the beg of next WS row.

Place rem 51[54, 54, 54, 54, 56, 56] sts on hold for RIGHT FRONT collar.

LEFT FRONT
Using larger needles and MC, CO 81[85, 89, 95, 99, 105, 109] sts.
Note: The first RS stitch and last WS stitch is a selvedge stitch and is used for seaming. Knit this stitch on RS and WS rows.

Work in St st for 0.5 inch ending with a WS row.

Side seam decreases:
Dec Row (RS): K1, ssk, con't in patt to end of row.
Rep Dec Row every 6[6, 8, 8, 8, 6, 6] row 11[10, 9, 10, 9, 11, 10] more times. 69[74, 79, 84, 89, 93, 98] sts.

Work in established patt until LEFT FRONT measures 11[12.5, 12.5, 13, 13, 13.5, 14] inches from CO edge ending with a WS row.
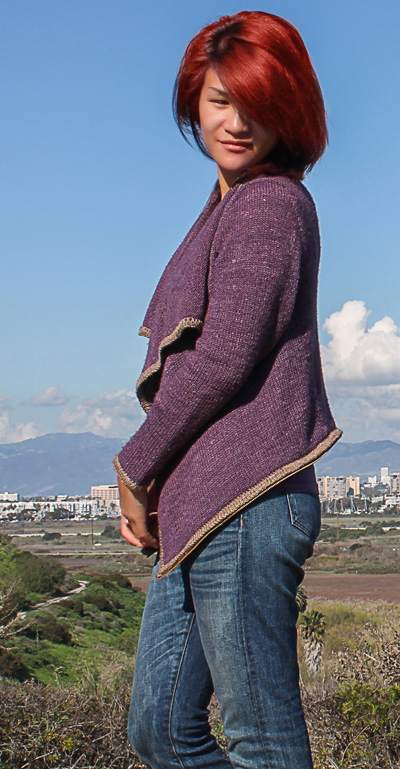
spacer

Shape Armhole
BO 2[2, 2, 2, 3, 3, 5] sts at the beg of next RS row, then BO 1[2, 2, 2, 3, 3, 5] sts at the beg of next RS row. Work 1 WS row.

Dec Row (RS): K1, ssk, cont in patt to end of row. 1 st dec'd
Rep Dec Row every 4th row 4[5, 5, 7, 8, 10, 11] more time(s). 61[64, 69, 72, 74, 76, 76] sts.

Work in patt until armhole measures 6[6, 6.5, 7, 7.5, 8, 8] inches, ending with a WS row.

Shape Shoulder:
BO 4[4, 4, 6, 6, 6, 6] sts at the beg of next RS row, then BO 2[2, 4, 4, 5, 5, 5] sts at the beg of next 2 RS rows, then BO 2[2, 3, 4, 4, 4, 4] sts at the beg of next RS row.

Place rem 51[54, 54, 54, 54, 56, 56] sts on st holder for LEFT FRONT collar.

SLEEVE (Make 2)
Using larger needles and MC, CO 40[42, 46, 48, 52, 56, 60] sts.
Note: The first and last stitch are selvedge stitches and are used for seaming. Knit the first and last stitch of each row.

Work in St st for 3 inches ending with a WS row.

Inc Row (RS): K1, RLI, k to last st, LLI, k1. 2 sts inc'd

Rep Inc Row every 8[8, 8, 8, 10, 10, 12] row 11[10, 10, 10, 10, 10, 8] more times. On WS rows, p1, RLI, k to last st, LLI, p1. 64[64, 68, 70, 74, 78, 78] sts.

Work even until Sleeve measures 18[18.5, 19, 19.5, 19.75, 20, 20.5] inches.

Shape Cap
Next Row (RS): BO 2[2, 2, 2, 3, 3, 5] sts at the beg of next 2 rows. Then, BO 1[2, 2, 2, 3, 3, 5] sts at the beg of next 2 rows.

Dec Row (RS): K1, ssk, k to last 3 sts, k2tog, k1. 2 sts dec'd
Rep Dec Row every RS row 12[11, 13, 14, 14, 16, 12] more times. 32 sts on all sizes.
Work 1 WS row.

BO 1 st at the beg of next 4 rows. 28 sts
BO rem sts in patt.

spacer

FINISHING
Gently block each piece according to the schematic. Sew shoulder seams. Sew sleeves. Then, sew diagonal side seams at back.

Place held collar sts (LEFT FRONT 51[54, 54, 54, 54, 56, 56] sts, BACK 42[42, 42, 42, 42, 48, 48] sts and RIGHT FRONT 51[54, 54, 54, 54, 56, 56]) onto larger needle. 144[150, 150, 150, 150, 160, 160] total sts. Rejoin MC yarn with RS facing.

Work even in St st for 4 inches.
BO in patt.

Block the collar section.

spacer

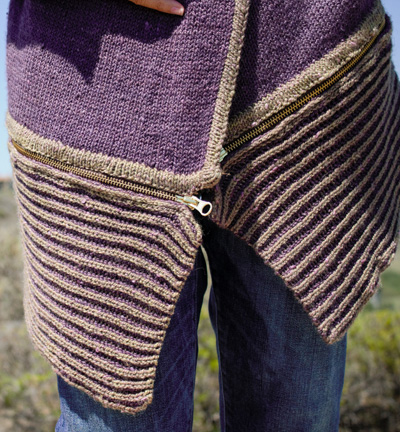
Stockinette Stitch Hem in Contrast Color
Using medium needles and CC with RS facing, pick up along the lower edge of the sweater at a ratio of 1 st for every 1 st (be sure to pick up into the middle of the V of each stitch so that your sts line up).

[*]Next Row (RS): [Ktbl] to end.

Work 3 rows in St st, ending with a WS row.
Purl 1 RS row – this is the fold of the hem.
Work 4 more rows in St st.

Note: If applying zipper at lower edge, stop here, leaving sts on hold. Work the following step AFTER the zipper has been installed.

Fold back the hem edge along the purl row. Sew the hem on the WS to the live stitches. [**]

Using medium needles and CC with RS facing, pick up along the collar edge of the sweater at a ratio of 1 st for every 1 st (be sure to pick up into the middle of the V of each stitch so that your sts line up). Work between [*] and [**] once.

Using medium needles and CC with RS facing, pick up along the front sweater edge from bottom to top at a ratio of 3 st for every 5 rows. Work between [*] and [**] once. Work the opposite front in the same manner.

Using medium size DPNS and CC with RS facing, pick up along the sleeve cuff of the sweater at a ratio of 1 st for every 1 st (be sure to pick up into the middle of the V of each stitch so that your sts line up). Work between [*] and [**] once. Work opposite sleeve in the same manner.

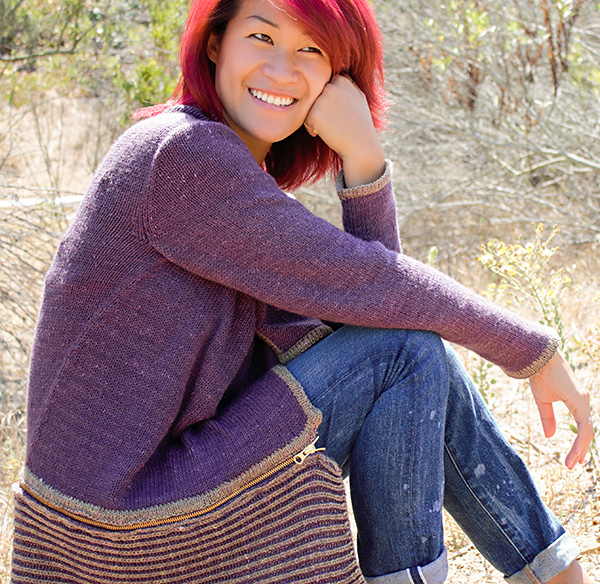
Sweater Bottom

Measure across the bottom edge of the sweater: Right Front, Back and Left Front: this number will determine the length to work to.

Using smaller circular needles, CO 31 sts using the Two-Color Italian CO method (See Notes), beginning and ending with a CC k st.

Set-up Row 1 (DS CC): *p1, sl1yo, rep from * to last st, p1. Slide (do not turn).
Set-up Row 2 (DS MC): Slp, *brk1, sl1yo; rep from * to last 2 sts, brk1, drop MC to back, slp. Turn.

Work in Two Color Brioche Pattern.

Two Color Brioche Pattern
Row 1 LS CC: K1, sl1yo, *brk1, sl1yo; rep from * to last st, k1. Slide.
Row 1 LS MC: (MC is in front) Slp, *brp1, sl1yo, rep from * to last 2 sts,
brp1, drop MC to front, slp. Turn.

Row 2 DS CC: P1, sl1yo, *brp1, sl1yo; rep from * to last st, p1. Slide.
Row 2 DS MC: (MC is in back) Slp *brk1, sl1yo; rep from * to last 2 sts,
brk1, drop MC to back, slp. Turn.

Repeat these 4 rows until piece measures approximately the actual length of the bottom edge of the sweater.

BO using the Italian Bind Off (See Pattern Notes).

Apply Zipper
Using yarn in a matching color, single crochet two rows along the edge of the brioche bottom where the zipper will be applied. With the zipper closed, pin the zipper in place using sewing pins. The knitted fabric should be 0.125 inch from the edge of the zipper teeth to avoid snagging along the zipper edge.

Hand Sewing the Zipper
Single thread the sewing needle using a good quality polyester thread in a matching color. Polyester thread is ideal for knits because it has some stretch.

Hand baste the zipper. Keep basting stitches long and somewhat loose as this is a temporary stitch and will be removed. Remove the pins once the zipper is basted. With WS facing, whip stitch the zipper edge to the live stitches of the sweater. Do not split the live stitches. Rather, work the sewing needle under the leg of each stitch on the WS of the fabric. Cut thread and single thread the needle again.

Attach the thread on the WS and bring the needle through to the RS of the knitted fabric. For the brioche side of the zipper, backstitch with RS facing along the running threads between two rows. For the zipper on the sweater body, backstitch the zipper to the reverse side of the St st hem. Fold back the St st hem along the purl row on the bottom edge. Using yarn in a matching color, sew the hem on the WS to the live stitches.

Machine Sewing the Zipper
Always sew a test swatch before machine sewing the final garment. Some machines work effectively with hand knits under normal settings but others may require adjustment (i.e. changing the thread or bobbin tension, changing out the feed dog plate). Test several methods using the knitted swatch prior to sewing the final garment.

Thread the sewing machine using a good quality polyester thread in a matching color. Polyester thread is ideal for knits because it has some stretch. Attach the Zipper foot. Use machine needle size 75/11 HS.

Hand baste the zipper. Keep basting stitches long and somewhat loose as this is a temporary stitch and will be removed. Remove the pins once the zipper is basted.

Set the stitch length to 3.0mm (medium-length) and select the straight stitch. On the brioche side, you will be stitching in the "ditch" of the brioche (the color that is receding). Sew the zipper keeping the needle close to the edge of the knitted fabric. With WS facing and using a sewing needle and thread, whip stitch by hand the zipper edge to the live stitches of the sweater. Fold back the St st hem along the purl row on the bottom edge. Using yarn in a matching color, sew the hem on the WS to the live stitches.

spacer
ABOUT THE DESIGNER

designernamespacer Bebe Thomas is the founder of Knotty Bebe, an online community that features patterns for knitters and sewers. She launched Knotty Bebe after a post-cancer surgery left her bed ridden for over a month. Bebe has a voracious appetite for knitting, sewing and designing functional, feminine garments. A perfect weekend includes enjoying free time to knit at The Knitting Tree, LA, and hanging with her husband and Weimaraner named Duke. She belongs to the El Segundo Slip Stitchers Knitting Guild.

Find her here on Ravelry.

spacer