|


![Read exactly what FREE PATTERNS really means...respect our designers and authors rights [and thank you]](../images/OFFnavLEGAL.gif)

 
|
|
 <click
for more! <click
for more!


|

 by Kelly Griffith by Kelly Griffith

I'm
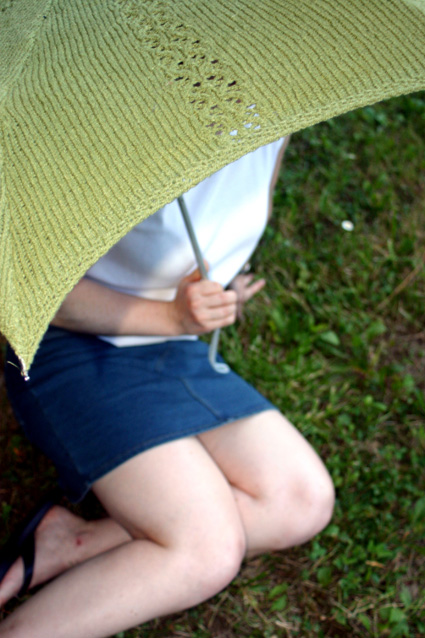
an artist who can sometimes be found knitting with unlikely materials.
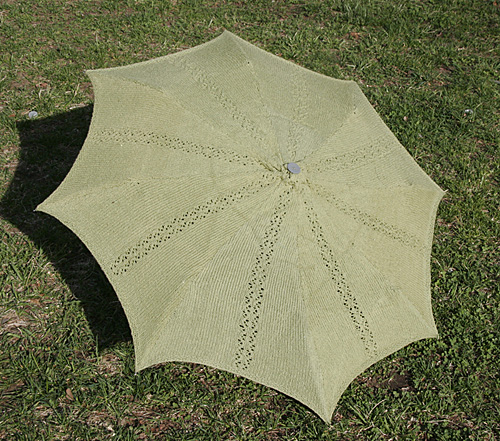
I took it into my head to knit myself an umbrella
out of shredded grocery bags and it wound up in Knitty's 2006
calendar (check out April).
When Amy saw it, she asked me to make
one out of yarn for her and this is the result.
While parasols
are throwbacks to older times, even a modern girl can see the
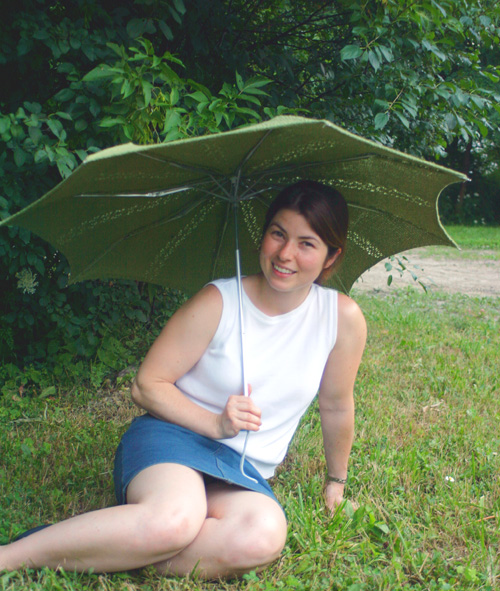
advantage of portable shade. |  model: Emily
Harwood photos: Kelly
Griffith model: Emily
Harwood photos: Kelly
Griffith
| | | |
| | One
Size |
|
fits pocket-size umbrella
[see
Pattern Notes for important information about choosing
an umbrella for this project] |
|
|
Cascade
Fixation [98.3% cotton / 1.7% elastic; 100yd/91m per
50g ball]; color: #5606 Fern; 14 balls
1 set US #6/4mm straight needles
Umbrella (see Pattern Notes re. selecting an umbrella)
Tapestry needle
1 large, flat button (optional) | |
|
| 24 sts/44 rows = 4 inches in
stockinette stitch |
|
|
[Knitty's list of standard abbreviations and techniques can be found here] |
When
selecting an umbrella for this project, it is important
to find an umbrella that is not automatic. You don't
want the kind that has a button which makes the umbrella
pop open, as this sort of mechanism would place too
much stress on the knitted fabric.
SKP: Slip 1 knitwise, knit 1, pass slipped stitch over stitch just knit.
SK2P: Slip 1 knitwise, k2tog, pass slipped stitch over [k2tog] just worked.
Seed Stitch (Worked over an odd number of sts):
Row
1: [K1, p1] to last st, k1.
Repeat this row for Seed Stitch. | |
|
|
Cut the umbrella skin from the frame at the thread points, noting the locations of all thread points. Unscrew the top knob (if there is one), and remove the umbrella skin from the frame.
Measure the length of one panel of the umbrella skin, measuring down the center of the panel (rather than along the seamed edge). Make a note of this measurement and keep it handy.
PANEL (Make 8):
CO 3 sts.
Set-Up Rows:
Rows
1-3: Work in stockinette st, beginning with a RS row.
Row
4 [WS]: [Pfb] twice, p1. 5 sts.
Rows
5-7: Work in stockinette st.
Row
8 [WS]: Pfb, p2, pfb, p1. 7 sts.
Row
9 [RS]: K1, yo, SKP, k1, k2tog, yo, k1.
Row
10 [WS]: P all sts.
Row
11 [RS]: K2, yo, k3, yo, k2. 9 sts.
Row
12 [WS]: Pfb, p to last 2 sts, pfb, p1. 11 sts.
Row
13 [RS]: K1, place marker, k2tog, yo, SKP, k1, k2tog, yo, SKP, place marker, k1. 9 sts.
Row
14 [WS]: P all sts.
Pattern Repeat:
Row
1 [RS]: K to marker, k1, k2tog, yo, k1, yo, SKP, k to end.
Row
2 [WS]: P all sts.
Row
3 [RS]: K to marker, k2, yo, k3, yo, k to end. 2 sts increased.
Row
4 [WS]: Pfb, p to last 2 sts, pfb, p1. 2 sts increased.
Row
5 [RS]: K to marker, k1, k2tog, yo, SK2P, yo, SKP, k to end. 2 sts decreased.
Row
6 [WS]: P all sts.
Row
7 [RS]: K to marker, k1, yo, SKP, k1, k2tog, yo, k to end.
Row
8 [WS]: P all sts.
Row
9 [RS]: K to marker, k2, yo, k3, yo, k to end. 2 sts increased.
Row
10 [WS]: Pfb, p to last 2 sts, pfb, p1. 2 sts increased.
Row
11 [RS]: K to marker, k2tog, yo, SKP, k1, k2tog, yo, SKP, k to end. 2 sts decreased.
Row
12 [WS]: P all sts.
Repeat Rows 1-12 until length of piece is approx. .75 inch less than length of umbrella panel, ending with Row 6.
Work 5 rows in Seed Stitch.
Bind off all stitches in Seed Stitch.
| |
|
|
|
Using
yarn and mattress stitch, sew all 8 panels
together in a circle. They won't lay
flat on the ground when sewn.
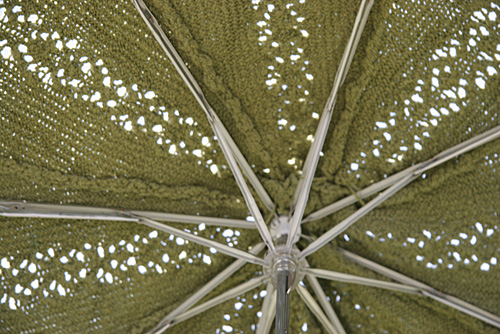
Turn your new umbrella skin wrong side
up and place umbrella skeleton into it.
Using thread, fix skin to frame at frame
joints (similar to the way the old skin
was attached).
Rather than weaving
in my yarn ends, I tied them to the umbrella
frame for added support (as this skin
is much heavier than the original) but
if you think this looks messy, feel free
to weave in your ends and rely on the
thread for support.
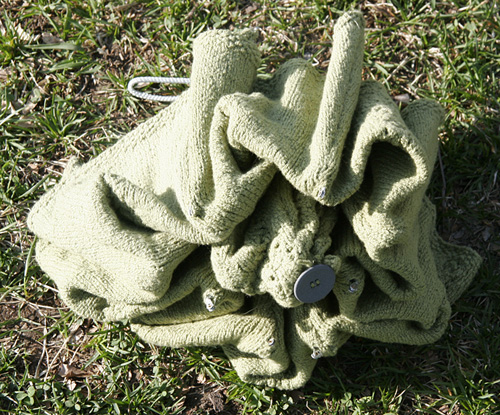
Optional -- take a large button and
sew it to the top of the umbrella where
the top knob formerly sat. |
|
Kelly
Griffith believes
that pale is the new tan and as such
is spending as much time in the shade
as possible.
She lives, knits, photographs weddings,
and stays out of the sun in Boston, MA.
|
| Pattern & images © 2007 by
Kelly Griffith. Contact Kelly |
|
|
|
|
|