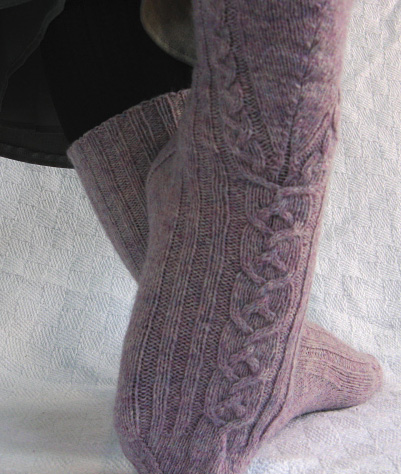
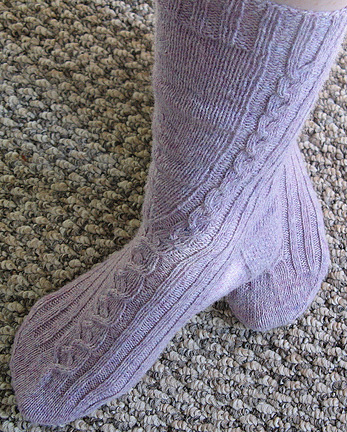
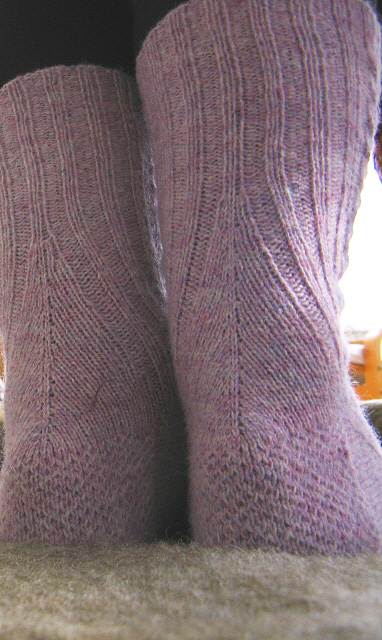
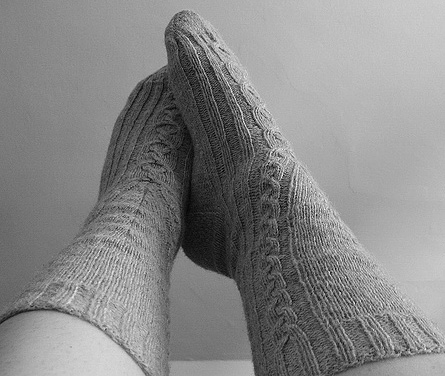
Instructions
for the Long-Tail Cast On can be found here.
Instructions for grafting can be found here.
C4B: Slip next
2 sts to cable needle and hold to back of work;
k2, k2 from cable needle.
C4F: Slip next 2 sts to cable needle and hold to front of work; k2, k2
from cable needle.
RLI (Right Lifted Increase): Use the right needle to pick up the stitch
below the next stitch on the left needle. Place it on the left needle,
then knit into it. 1 stitch has been increased.
LLI (Left Lifted Increase): Use the left needle to pick up the stitch 2
rows below the last stitch on the right needle. Knit into this stitch.
1 stitch has been increased.
2x2 Rib (Worked in the round over a multiple
of 4 sts):
Round 1: [K2, p2] to end.
Repeat this round for 2x2 Rib.
Leg Cable 1 (Worked over 10 sts):
Rows 1-3: P2, k6, p2.
Row 4: P2, C4F, k2, p2.
Rows 5-7: P2, k6, p2.
Row 8: P2, k2, C4B, p2.
Leg Cable 2 (Worked over 10 sts):
Rows 1-3: P2, k6, p2.
Row 4: P2, k2, C4B, p2.
Rows 5-7: P2, k6, p2.
Row 8: P2, C4F, k2, p2.
Instep Pattern (Worked over 16 sts):
Row 1: P2, k12, p2.
Row 2: P2, k2, C4F, C4B, k2, p2.
Row 3: P2, k12, p2.
Row 4: P2, k4, C4F, k4, p2.
Rows 5-7: P2, k12, p2.
Row 8: P2, k4, C4F, k4, p2.
Row 9: P2, k12, p2.
Rows 10: P2, k2, C4B, C4F, k2, p2.
Row 11-13: P2, k12, p2.
Row 14: P2, C4F, k4, C4B, p2.
When working second sock, work Rows 4 and
8 of Instep Pattern as follows:
Row 4: P2, k4, C4B, k4, p2.
Row 8: P2, k4, C4B, k4, p2.
|
|
  CUFF CUFF
Using
Long-Tail Cast On and smaller needles, CO
72 sts.
Divide sts between needles and join to begin
working in the round, being careful not to
twist.
Work in 2x2 Rib until work measures 1.25
inches.
UPPER LEG
Switch to larger needles, and
continue as follows:
Next Round: [K2, p2] 9 times, k26, [p2, k2]
twice, p2.
Repeat this round twice more.
Next Round: [K2, p2] 6 times, k2, work Row
4 of Leg Cable 1, k26, work Row 4 of Leg
Cable 2.
This round sets pattern for upper leg.
Continue in pattern as set for 36 rounds
more, working Rows 5-8 of Leg Cable patterns
once, then Rows 1-8 four times.
LOWER LEG
Note: A row counter is recommended for
the lower leg. In this section, sts will
be increased at center back of leg and decreased
at center front of leg, which will cause
the cables to move from the sides of the
leg towards the center front. The rounds
in which these increases and decreases are
woorked will be called Shaping Rounds; these
rounds will be worked with increasing frequency
as the sock progresses towards the ankle,
so that the cables move in graceful curves.
The number of sts will not change in this
section.
Round 1 (set-up round): [K2, p2] 3 times,
k1, place marker, k1, [p2, k2] 3 times, work
first row of Leg Cable 1, k13, place marker,
k13, work first row of Leg Cable 2.
Note: In the rows that follow, work increased
sts at back of leg in stockinette st. The
stockinette st panel at center front, which
currently contains 26 sts, will be referred
to as 'front panel'. The stockinette st panel
which will form as sts are increased in the
center back rib will be referred to as 'back
panel'.
  Round 2 (Shaping Round): Work in pattern
to first marker, LL1, slip marker, RLI, work
in pattern to 2 sts before second marker,
ssk, slip marker, k2tog, continue in pattern
to end of round. 24 sts in front panel, 4
sts in back panel. Round 2 (Shaping Round): Work in pattern
to first marker, LL1, slip marker, RLI, work
in pattern to 2 sts before second marker,
ssk, slip marker, k2tog, continue in pattern
to end of round. 24 sts in front panel, 4
sts in back panel.
Rounds 3-7: Work in pattern.
Round 8: Work Shaping Round. 22 sts in front
panel, 6 sts in back panel.
Rounds 9-12: Work in pattern.
Round 13: Work Shaping Round. 20 sts in front
panel, 8 sts in back panel.
Rounds 14-17: Work in pattern.
Round 18: Work Shaping Round. 18 sts in front
panel, 10 sts in back panel.
Rounds 19-21: Work in pattern.
Round 22: Work Shaping Round. 16 sts in front
panel, 12 sts in back panel.
Rounds 23-25: Work in pattern.
Round 26: Work Shaping Round. 14 sts in front
panel, 14 sts in back panel.
Rounds 27-29: Work in pattern.
Round 30: Work Shaping Round. 12 sts in front
panel, 16 sts in back panel.
Rounds 31-32: Work in pattern.
Round 33: Work Shaping Round. 10 sts in front
panel, 18 sts in back panel.
Rounds 34-35: Work in pattern.
Round 36: Work Shaping Round. 8 sts in front
panel, 20 sts in back panel.
Rounds 37-38: Work in pattern.
Round 39: Work Shaping Round. 6 sts in front
panel, 22 sts in back panel.
Over Rounds 40 and
45, the purl rib at each
side of the back stockinette st panel will
be changed to stockinette st.
Round 40: [K2, p2] twice, k2, p1, k24, p1,
continue in pattern to end of round.
Round 41: Work in pattern.
Round 42: Work Shaping Round. 4 sts in front
panel, 26 sts in back panel.
Round 43: Work in pattern.
Round 44: Work Shaping Round. 2 sts in front
panel, 28 sts in back panel.
Round 45: [K2, p2] twice, k34, continue in
pattern to end of round.
Round 46: Work in pattern to first marker,
LL1, slip marker, RLI, work in pattern to
2 sts before second marker, p2tog tbl, slip
marker, p2tog, continue in pattern to end.
No sts remain in front panel, 36 sts in back
panel.
Round 47: Work in pattern.
Round 48: Work as for Round 46. 38 sts in
back panel.
Round 49: Work in pattern.
Round 50: Work in pattern to first marker,
LL1, slip marker, RLI, work in pattern to
2 sts before second marker, ssk, slip marker,
k2tog, continue in pattern to end.
Cables at front are now touching; 40 sts
in back panel.
Rounds 51-52: Work in pattern. You will have
just worked Round 4 of Leg Cable patterns.
  HEEL FLAP HEEL FLAP
Work first 10 sts of next round.
Slip following 36 sts to one needle; heel
flap will be worked back and forth over these
sts. Hold remaining 36 sts on needles for
instep.
Work heel flap as follows, slipping all
slipped sts purlwise.
Row 1 [RS]: [Sl 1, k1] 18 times. Turn work.
Row 2 [
WS]: Sl 1, p35. Turn work.
Row 3 [RS]: Sl 1, [sl 1, k1] 17 times, k1.
Turn work.
Row 4 [WS]: Sl 1, p35. Turn work.
Repeat these 4 rows 9 times more, then work
Row 1 once more. 41 rows have been worked.
TURN HEEL
Row 1 [WS]: Sl 1, p20, p2tog, p1.
Turn work.
Row 2 [RS]: Sl 1, k7, ssk, k1. Turn work.
Row 3 [WS]: Sl 1, p8, p2tog, p1. Turn work.
Row 4 [RS]: Sl 1, k9, ssk, k1. Turn work.
Row 5 [WS]: Sl 1, p10, p2tog, p1. Turn work.
Row 6 [RS]: Sl 1, k11, ssk, k1. Turn work.
Row 7 [WS]: Sl 1, p12, p2tog, p1. Turn work.
Row 8 [RS]: Sl 1, k13, ssk, k1. Turn work.
Row 9 [WS]: Sl 1, p14, p2tog, p1. Turn work.
Row 10 [RS]: Sl 1, k15, ssk, k1. Turn work.
Row 11 [WS]: Sl 1, p16, p2tog, p1. Turn work.
Row 12 [RS]: Sl 1, k17, ssk, k1. Turn work.
Row 13 [WS]: Sl 1, p18, p2tog, p1. Turn work.
Row 14 [RS]: Sl 1, k19, ssk, k1. 22 sts.
  GUSSET GUSSET
In this section, sts will be arranged
on 3 needles, which will be designated Needles
1 through 3.
Using new needle (Needle 1), pick up and
k 1 st in each slipped st along adjacent
edge of heel flap and 1 st in gap between
top of flap and held sts of instep. 24 sts
on Needle 1.
Using next needle (Needle 2), work held sts
of instep as follows: [k2, p2] twice, k2,
work first row of Instep Pattern, [k2, p2]
twice, k2]. 36 sts on Needle 2.
Using next needle, pick up and k 1 st in
space between last instep st and top of heel
flap, and 1 st in each slipped st along remaining
edge of heelp flap, then k first 11 sts of
heel. 35 sts on Needle 3.
Slip remaining 11 sts to Needle 1. 106 sts:
35 sts each on Needles 1 and 3, 36 sts on
Needle 2. This point (bottom center of heel)
is now beginning of round.
Round 1: K11, k24 tbl; work sts on Needle
2 in pattern as set; k24 tbl, k11.
Round 2: K to last 3 sts on Needle 1, k2tog,
k1; work sts on Needle 2 in pattern as set;
k1, ssk, k to end of round.
Round 3: K to end of Needle 1; work sts on
Needle 2 in pattern as set; k to end of round.
Repeat Rounds 2 and
3 sixteen times more.
72 sts: 18 sts each on Needles 1 and 3, 36
sts on Needle 2.
FOOT
Continue in pattern, working sts on
Needles 1 and 3 in stockinette st and sts
on Needle 2 in pattern, until work measures
1.75 inches less than desired length.
TOE
K 1 round.
Decrease Round: K to last 3 sts on Needle
1, k2tog, k1; k1, ssk, k to last 3 sts
on Needle 2, k2tog, k1; k1, ssk, k to end
of Needle 3. 4 sts decreased.
Repeat these 2 rounds 6 times more. 44 sts:
11 sts each on Needles 1 and 3, 22 sts on
Needle 2.
Work Decrease Round 7 times more. 16 sts:
4 sts each on Needles 1 and 3, 8 sts on Needle
2.
K all sts from Needle 1 onto Needle 3.
Graft sts on Needle 2 to sts on Needle 3.
SECOND SOCK
When working second sock, notice
differences in Rows 4
and 8 of Instep Pattern
[see Pattern Notes]. |

