|
I love yarn, and I love colour. Handpainted yarns combine
those two loves in a wonderful way. I have a collection of
handpainted yarn that I fondle and want to put into a picture
frame on the wall.
However, handpainted
yarns are notoriously
difficult to work with.
They can pool and flash
unpredictably, making unwanted
patterns up your work.
Or, as you’re knitting up your
project, the colours can
blend unexpectedly, either lessening the impact
of the colours we love,
or creating what can fondly be called "clown vomit".
Almost every knitter
has this problematic
skein of yarn in the stash:
it has all of the colours
you love, but when you try to knit it up, it turns into
a garish mess.
This article’s genesis was in a gift from my husband—a
skein of Socks that Rock in the Husky colourway, which is
yellow, white and purple. It’s a difficult, high-contrast
colourway, and I knew
that it would knit up into striping, pooling, and flashing
socks—a look I didn’t
want.
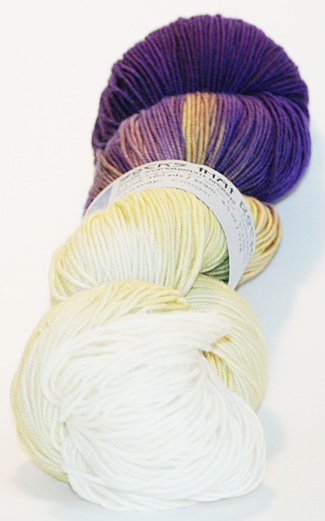
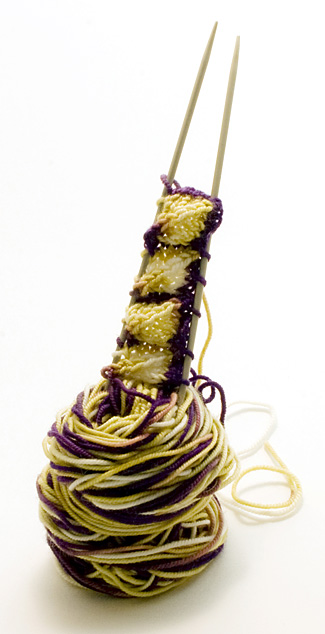
So I wound up the ball and started swatching. I cast on
a few stitches and tried a mitered square, and it turned
into a perfectly framed miter, with the purple on the long
side, and the yellow and white on the inside.
This turned into a wee-hours project, as I did “just
one more square” until I’d finished an entire
sock cuff in less than two days. (This is now the Mitered
Windowpane Socks, a pattern that’s written up for free
on my blog.)
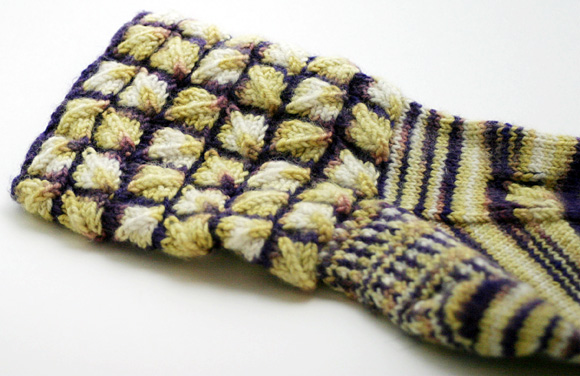
I loved the way the yarn pooled and
made the colours so much more intense and vivid. By figuring
out the average length of one colour repeat in your skein
of yarn, you can build these mitered square “building blocks” into
all sorts of knitted items — sock, mitten or sweater
cuffs, hat brims, or
sweater edgings.
Making a mitered square
To make your first mitered
square, cast on an
odd number of stitches. I’ll use
the number 15 for now, as that’s a fairly common
number for sock yarn
and size US 0-1 needles.
Your numbers will change
depending on your gauge
and the weight of hand-dyed yarn you’re using, so
make sure to swatch. Fortunately, a swatch for this project
is just one mitered square and a few minutes of knitting,
though you may have to try a few different cast-on numbers
to get the right one for your yarn and needles.
Using the loop or “e” cast-on, cast on 15 stitches.
I like to cast on from the darkest colour as it will form
the long end of your mitered square, and give your square
a defined edge. I prefer the loop cast-on for mitered squares
because it’s a single-colour cast-on, it’s very
stretchy, and it’s easy to pick up stitches from this
cast-on.
Knit one row. Purl back
one row. On the third
row, slip the first stitch*, knit 5 stitches, then do a double
decrease: slip two together, knit 1 and pass the two slipped
stitches over the stitch you’ve
just knit. The centre
stitch will form the lovely mitered line across your square.
Then knit the final 6 stitches.
*Note: After the first
row, I always slip the first stitch of every row to make
the stitches easier to pick up for the following squares.
(Row 0 is the cast-on row, and you have to knit the first
stitch of Row 1 in order to tighten up that loose loop.)
Here’s a chart for how to proceed
on each row of a 15-stitch mitered square. If you cast
on more or fewer stitches, adjust accordingly.
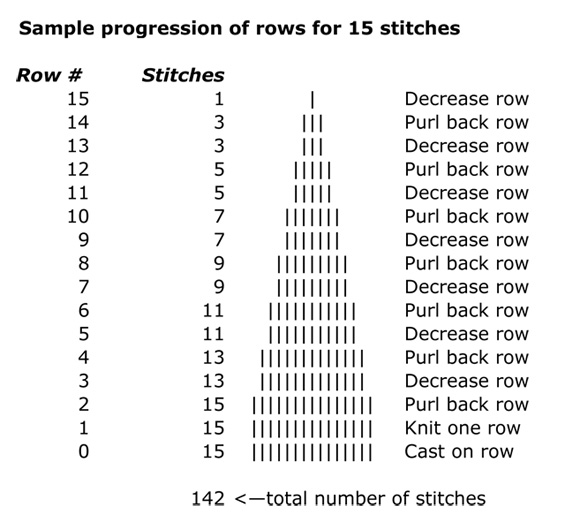
(Above: Socks that Rock, 15 stitch mitered square, on
US 1 needles)
Cheating in
your mitered square
Because handpainted yarns
are unique, they will all have a little bit of unevenness
in the dyeing, and you will probably have to cheat a little
to get the colours aligning into perfect order.
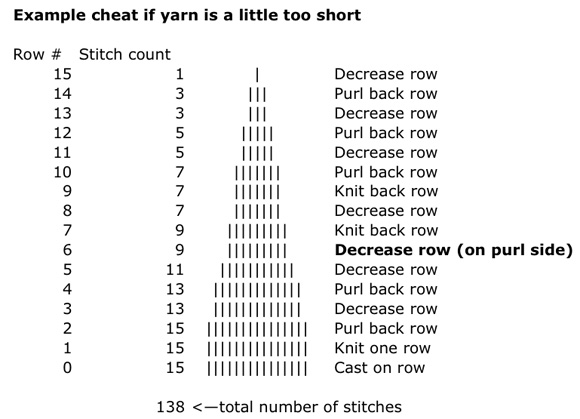
Here’s a chart for cheating the decreases if you get
into the second repeat of yarn a little too early. It’s
easier if you can
teach yourself to knit
backwards in
order to do the decrease
row from the front.
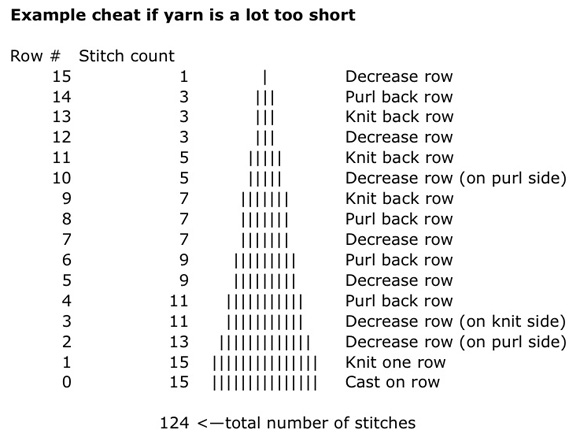
And sometimes you’ve miscalculated
and you need to adjust your square by a lot of stitches.
This sample cheat saves you 18 stitches worth of yarn.
And if you find yourself in the reverse
situation, with a little too much yarn for the next square,
here’s
another cheat chart for
using up the yarn to get you aligned for the next square.

There are many handpainted yarns
in the marketplace, and they won’t all turn into “windowpanes.” I’ve
swatched up a few samples
for this article, and taken photographs of the skein and
the resulting squares to help you figure out how to work
with the yarn and the colours that you love.
I find that yarn with strong
colour contrasts makes
the most interesting
mitered squares. And sometimes, as you’ll see below, you don’t have
to find the “magic number” for your yarn to get
a very interesting set
of colours and textures.
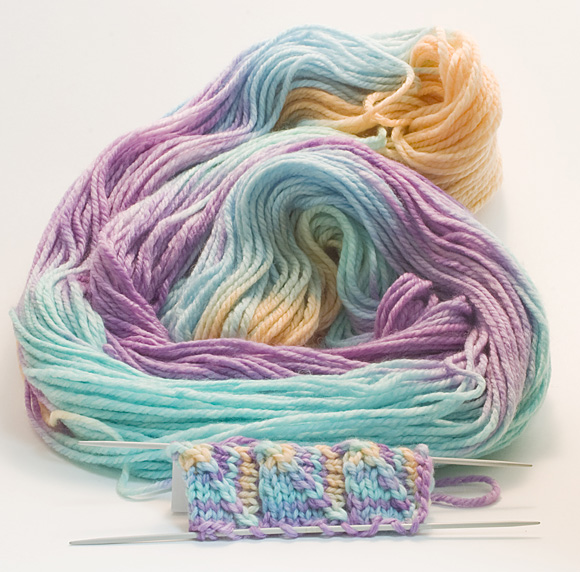
Lorna’s Laces Worsted,
size 5 needles, 15 stitch
squares
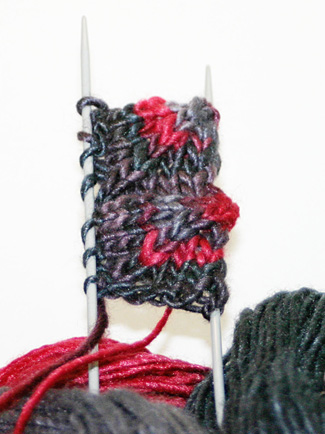
Malabrigo Silky Merino in Vigo colourway, size 5 needles,
15 stitch squares
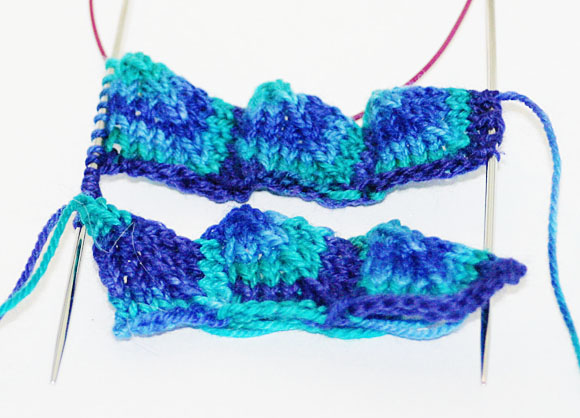
Malabrigo Sock in Caribeno, size
0 needles, 17 stitch square on top, 15 stitch square on
bottom. Sometimes you don’t need to get the skein
repeats to align to get a really interesting look.
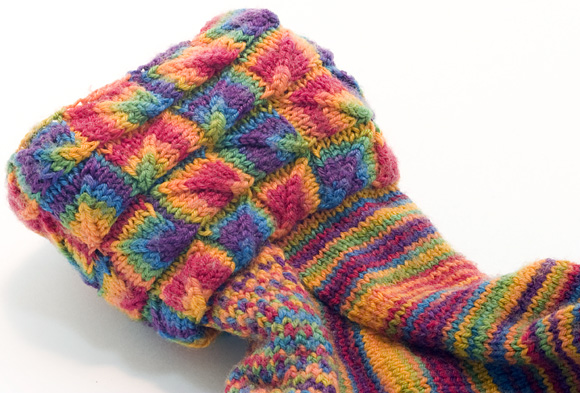
Lorna's Laces Shepherd Sock
Multi, in the rainbow colourway. 15 stitch miter on a
size 0 needle. Again, the repeats didn’t align
here, but the rainbow colours pop so much more vividly
on this sock cuff than in the rest of the foot.
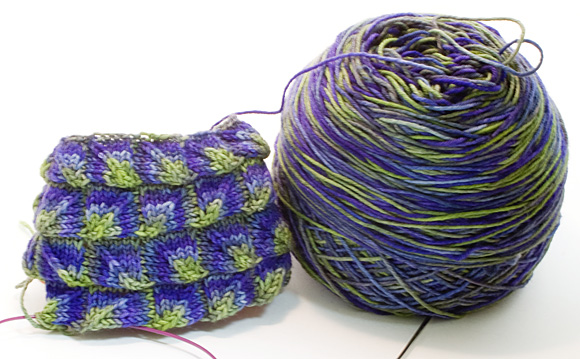
Wollmeise Sockenwolle 100% superwash, in Krauterbeet.
13 stitch miter on a size 0 needle.
|

