|
|
 |
|
|
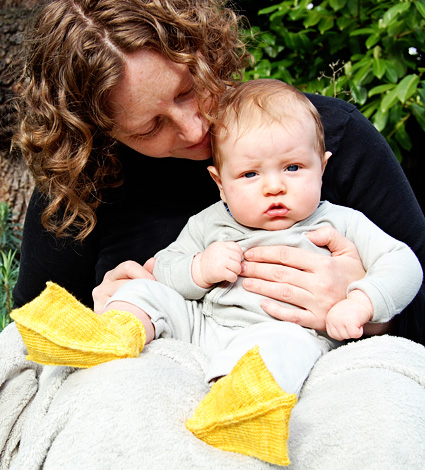 |
After I had a baby and started knitting socks for her, I realized that many of the functional constraints for socks didn’t apply, because she didn’t walk. This opened up a whole new world of ideas, of which this design is one example. I came up with the idea for duck socks from the book Cute Knits for Baby Feet by Sue Whiting. Indeed, the book is full of cute patterns, and her simple “Quack!” pattern inspired my goal to develop a more realistic, somewhat outrageous design. The pattern below is where I finally ended up. My daughter has now outgrown her duck socks and is walking, and
thus I had to come up with a toddler version based on a different
web-footed bird. You can find that one on my blog. |
|
|
|
|
SIZE |
|
FINISHED MEASUREMENTS |
|
MATERIALS Notions |
|
GAUGE |
|
PATTERN NOTES |
|
These socks are intended to be worn by babies who are not yet walking. For a variation designed for an active toddler, please visit my blog. Instructions for Judy's Magic Cast
On can be found here. Instructions for the Turkish Cast
On can be found here: Instructions for Jeny's Surprisingly
Stretchy Bind Off can be found here. LLI (Left Lifted Increase): Use the left needle to pick
up the stitch 2 rows below the last stitch on the right
needle. Knit into this stitch. 1 stitch has been increased.

|
|
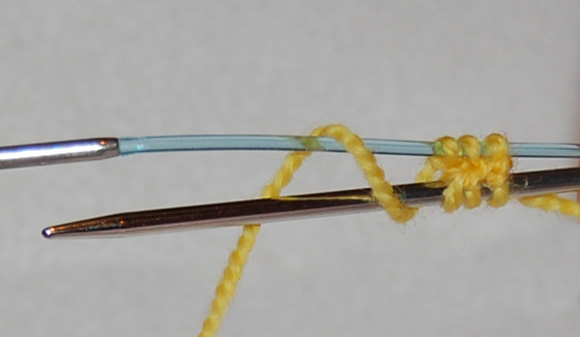
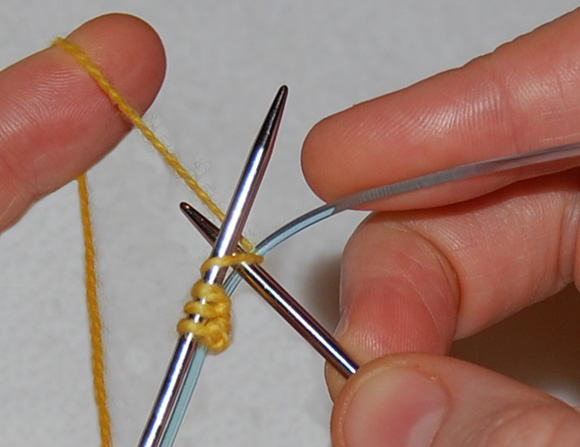
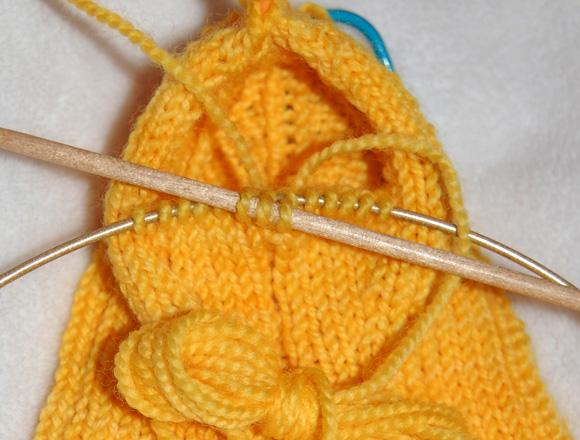
DIRECTIONS As you shape the center point and webbing, sts will be cast on at each side of sts on needle. Use Turkish Cast On method for this, as shown in photos below. Note that cast on is worked around one needle and one cable instead of two needles; this helps tighten the new CO sts.
Round 2: CO 2 sts (1 st on each needle), k2 (first st
to be knit is new CO st), p1, k1; CO 2 sts (1 st on each
needle), k2, p1, k2. 10 sts.
Shape Webbing: Begin Side Toes: Shape Foot:
 Round 1: P1, k8, LLI, k2, p1, k2, RLI, k8; p1, k8, k2tog, p1, ssk, k8. 44 sts: 24 sts on first needle, 20 sts on second needle. Rounds 2-3: [P1, k11] twice; [p1, k9] twice. Round 4: P1, k8, LLI, k3, p1, k3, RLI, k8; p1, k7, k2tog, p1, ssk, k7. 44 sts: 26 sts on first needle, 18 sts on second needle. Round 5-6: [P1, k12] twice; [p1, k8] twice. Round 7: P1, k8, LLI, k4, p1, k4, RLI, k8; p1, k6, k2tog, p1, ssk, k6. 44 sts: 28 sts on first needle, 16 sts on second needle. Rounds 8-9: [P1, k13] twice; [p1, k7] twice. Round 10: P1, k8, LLI, k11, RLI, k8; p1, k5, k2tog, p1, ssk, k5. 44 sts: 30 sts on first needle, 14 sts on second needle. Note that center st on first needle is knit, instead of purled. HEEL Row 1 [WS]: P8, k1, [p6, k1] twice, p8. Break yarn. With RS facing, divide remaining sts between 2 needles, placing first 9 sts on first needle and last 10 sts on second needle. Transfer sts to st holder, slipping sts purlwise and alternating sts from each needle as follows: [sl 1 st from second needle to holder, sl 1 st from first needle to holder] 9 times, sl last st from second needle to st holder. Alternating sts in this way closes back of heel; later on, applied I-cord will be worked over these sts. TOES Side Toes:
Using double-point needle, CO 3 sts.
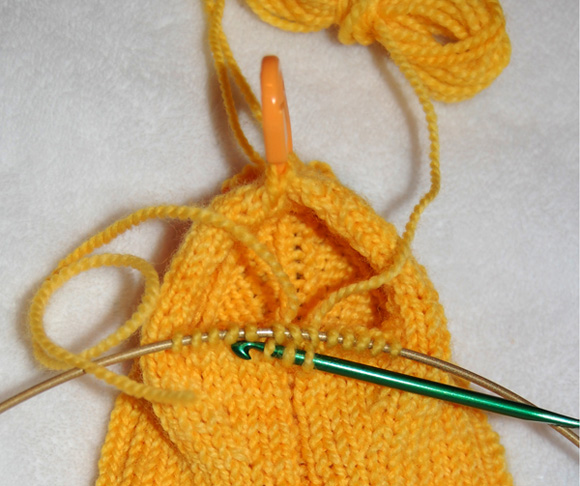
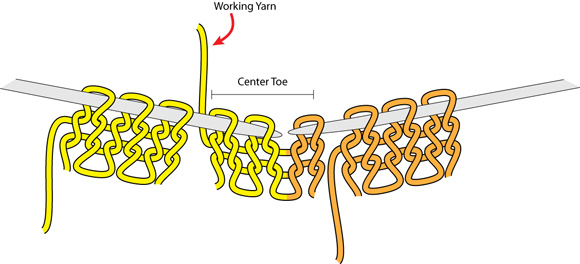
Center Toe: Note: Read next paragraph through and see photos below before proceeding. Using crochet hook and with work positioned as shown, draw a loop of yarn through each of the center 3 held instep sts (see below); ensure that tail of yarn is at left, with working yarn at right. Place these sts on double-point needle and bring yarn to front of work as shown.
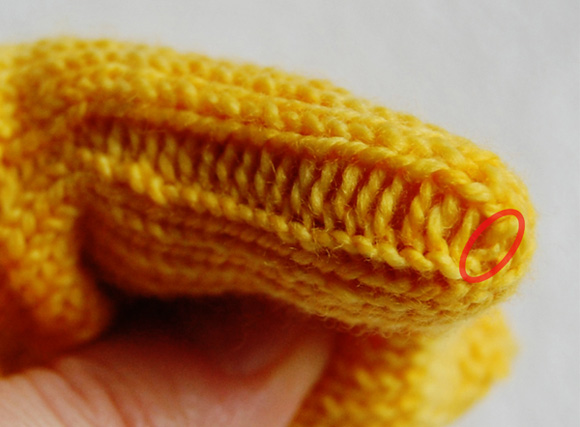
Rotate work so that toes are pointing away from you. Place needle in left hand and slide sts to tip, ready to work I-cord; k3. Use tip of right needle to pick up next p st in column. Next Row: Slide sts to other end of needle, switch needle
back to left hand, bring yarn around back of work; k2,
k2tog tbl (last st of I-cord worked together with picked-up
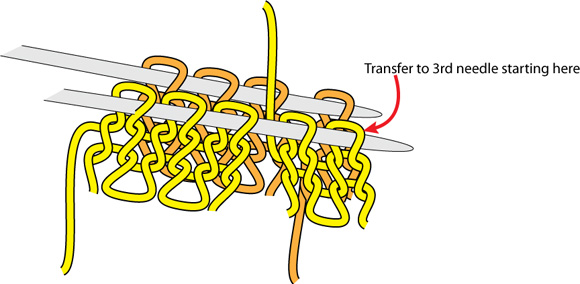
st). Use tip of right needle to pick up next p st in column. There will be 3 held sts from each side toe to each side of sts on needle. Transfer these sts to needle, placing sts of side toes at either side of center toe sts. Divide sts between 2 needles as shown below, with first 4 sts on first needle and last 5 sts on second needle. Transfer sts to circular needle, alternating sts from each needle as you did at end of heel section. Working yarn will be attached to second st on needle.
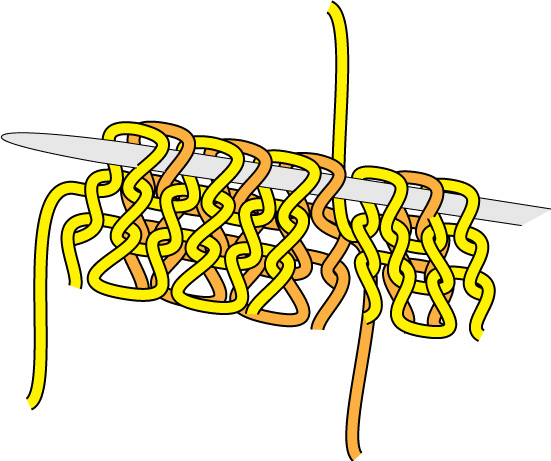
Transfer heel sts to same needle, after toe sts. 28 sts. Close Back of Heel: Next Row: K2, k2tog tbl. Sl sts purlwise back to left
needle. CUFF |
|
FINISHING |
| ABOUT THE DESIGNER |
|
You can find her on Ravelry as jenyc and she blogs at curiousknitter.com. |
|
Pattern & images © 2010 Jeny Staiman. Contact Jeny |