|
|
 |
|
|
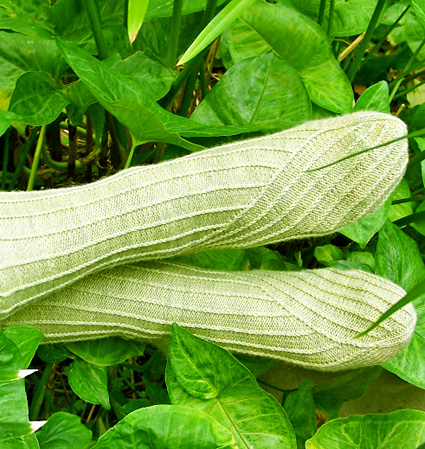 |
“Come on baby let's do the twist. Take me by my little hand and go like this.” Chubby Checker Like a good story, Twisted starts out predictably and then takes a turn. These reversible socks look great in any yarn but are particularly stunning when made with colorful, hand-painted sock yarn. The purled background with a Twisted-slip rib breaks up color pooling. An unusual pattern on the heel adds both texture and color distribution. As a final surprise, the ribbing on the foot begins on the outer gussets and twists around to the big toes.
|
You can even wear them inside out to show the details on the knit side.You’ll have to choose which side you prefer. It’s a tough choice but either way your feet will look fabulous. Not only is Twisted reversible and suitable for almost any sock yarn, it also provides an incredibly wide range of sizes for men, women and children. Finally, for a professional finish, directions for making sock blockers are included. |
|
 |
|
|
SIZE When choosing sock size keep in mind the following general guidelines:
If your sock needs to accommodate proportionally larger ankles or feet prone to swelling (edema) then choose one size larger than you would based on foot width alone. |
|
FINISHED MEASUREMENTS |
|
MATERIALS
Note: 100g of sock yarn will make
4 to 5 XXS socks and 3 to 4 XS socks. Notions |
|
GAUGE |
| The number of stitches per
row is more important than the number of
rows per inch. The yarns used had equal stitch gauges but different
row gauges. Gauge swatches were worked in stockinette stitch
in the round.
38 stitches/50 rounds = 4 inches with Simply Sock before blocking. 38 stitches/45 rounds = 4 inches with Tofutsies before blocking. 38 stitches/52 rounds =4 inches with Ella
Rae before blocking. 38 stitches/ 51 rows=4 inches with Cotton Fine before blocking. |
|
PATTERN NOTES |
|
Twisted-slip rib (worked in the round) Yfwd: Bring yarn to the front, as if
to purl. Editor's note: the following pair
of increases are not the same as Cat
Bordhi's RLinc and LLinc.
|
|
DIRECTIONS 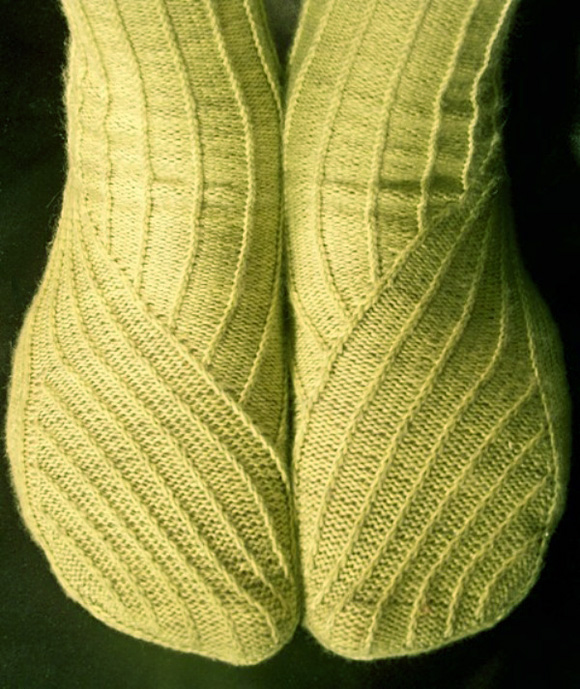 ^ Simply Socks Yarn Company solids [color: wasabi] shown on size 10 feet^ Loosely CO 40[48, 56, 64, 72, 80] stitches. Join to work in the round being careful not to twist stitches. Note or mark the beginning of the round. Work in Twisted-slip rib until cuff measures 4.5[5.5, 6.5, 7, 7.5, 8] inches from cast on edge. End with round 1. Heel Flap Set up row for Right Sock: Turn work. Sl1, p19[23, 27, 31, 35, 39] stitches. Heel flap is worked over these 20[24, 28, 32, 36, 40] stitches. Row 1 [RS]: Sl1, [k1, yfwd, sl1], rep until 1
st remains, p1. Turn Heel: Size XXS Only Size XS Only Size S Only Size M Only Size L Only Size XL Only 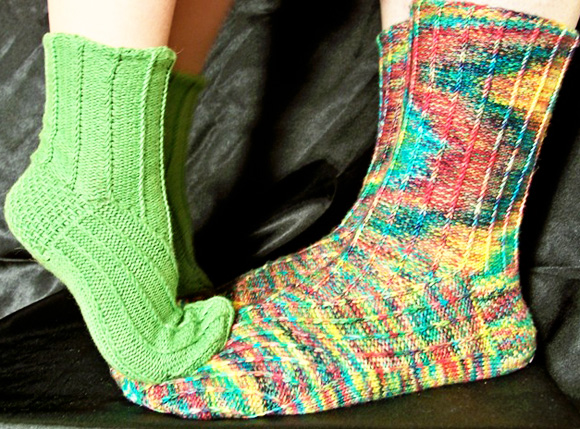 ^ Brown Sheep Cotton Fine [color: lime light] on left; Ella Rae Lace Merino [color: 102] on right and below ^v 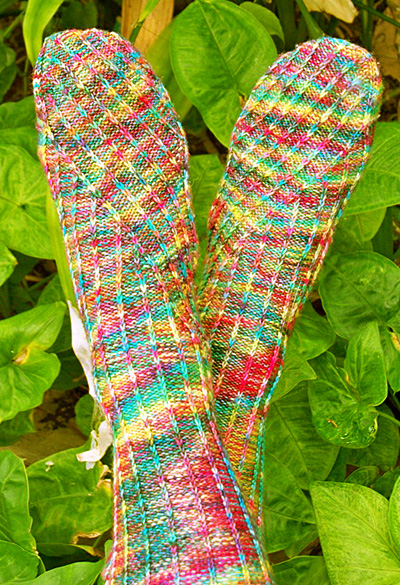 See Pattern Notes 6 through 8. Round 1: K22[23, 26, 27, 30, 31] stitches, k2tog, place first marker for start of pattern stitch; k1, work instep in established pattern for 18[22, 26, 30, 34, 38] stitches, k2tog, place decrease marker; [p3, k1] 4 times, place third marker for end of pattern stitch; k9[10, 13, 14, 17, 18]. 36[40, 44, 48, 52, 56] stitches worked in Twisted-slip rib between first and third markers. 32[34, 40, 42, 48, 50] stitches worked in stockinette. Rounds 2 & 3: K to first marker; work in Twisted-slip rib as established to third marker; k to end of round. Round 4: K to 2 stitches before first marker, k2tog; work instep in established pattern to 2 stitches before decrease marker, k2tog; continue working in established pattern to third marker; K to end of round. Rep Rounds 2-4 13[12, 13, 12, 13, 12] more times until 40[48, 56, 64, 72, 80] stitches remain. 22[27, 30, 35, 38, 43] stitches between first and third markers. Rep Round 2 twice more. Left Sock decrease/increase round: K to first
marker; work in Twisted-slip rib as established to 2 stitches
before the decrease marker, k2tog; continue in established
pattern to 2 stitches before the third marker, RLLI, work
2 stitches before third marker in established pattern;
k to end of round. Alternate two previous rounds, working the new stitches into the Twisted-slip rib pattern. Note: New stitches created by the increases should be treated as a continuation of the Twisted-slip rib. When there are 3 purls between the last knit stitch and the new stitch then the new stitch is knit. If the current round of the twisted rib requires that stitch to be slipped, return it to the left needle after it is knit and then slip it. For sizes XS, M and XL only, on the final repeat of the decrease/increase round (left foot) and increase/decrease round (right foot) working in pattern would call for knitting the new stitch. However, this would create an unsightly narrow band of ribbing along the outer edge. Therefore, this stitch is purled. At the completion of the increase rounds there will be 4[5, 4, 5, 4, 5] purls between knit stitches in the outermost column of ribbing. Unless you have very short feet (see Pattern Note 7), work until only 1 stitch remains between the first pattern marker and the decrease marker. The toe of the sock accounts for approximately .75[.75 1, 1, 1.25, 1.25] inches of the total length of the sock. After completing the decrease/increase rounds work the extending round (below) as required until the foot reaches the desired length. On final round prior to working the toe, remove all markers except the beginning of round marker. Record the number of extending rounds worked to refer to when making the right sock. Extending round: K to first pattern marker; work in twisted-slip rib to third marker; k to end of round. The decrease marker is no longer needed – you can remove it. 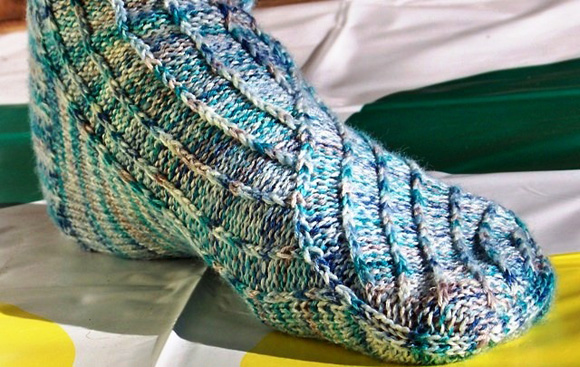 ^ SWTC Tofutsies [color: 927]^ Toe decrease set up round: K7[9, 11, 13, 15, 17], k2tog, k1, place first marker; p1, sl2p2tog, work in pattern for 14[18, 22, 26, 30, 34] stitches, p2tog, p1, place second marker; k1, SSK, k to end of round. Toe decrease round: K to 3 stitches before first marker, k2tog, k1; p1, sl2p2tog, work in pattern to 3 stitches before second marker, p2tog, p1; k1, SSK, k to end of round. Repeat Toe decrease round until 8 stitches remain. RIGHT SOCK Rep Rounds 2-4 13[12, 13, 12, 13, 12] more times until 40[48, 56, 64, 72, 80] st remain. 22[27, 30, 35, 38, 43] stitches between first and third markers. Rep Round 2 twice more. Right Sock increase/decrease round: K to first
marker; work two stitches in established pattern, LLLI,
work in pattern to decrease marker; SSK, work in pattern
to third marker; k to end of round. Alternate two previous rounds, working the new stitches into the Twisted-slip rib pattern as for Left Sock. Unless you have very short feet (see Pattern Note 7), work until only 1 stitch remains between the decrease marker and the third pattern marker. Work foot to final length and complete toe as for left sock. 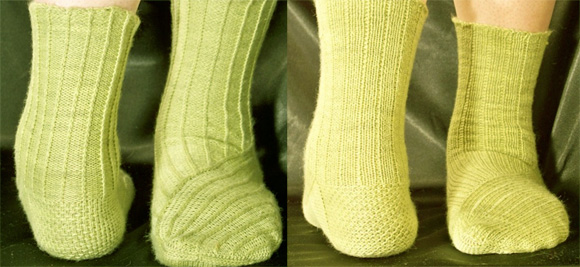 ^ Simply Socks Yarn Company solids [color: wasabi] - purl side out on left, knit side out on right^ |
|
FINISHING To make sock blockers you will need a large sheet of paper (like wrapping paper) and either corrugated cardboard (good for about 10 uses) or 1/4 inch plywood. Trace the lower profile of your foot on to the paper starting at the big toe, following along the sole, around the heel and up to the mid-calf. This is Line 1. Draw Line 2, representing the upper part of the foot parallel to and 2.5[3, 3.5, 4, 4.5, 5] inches away from Line 1. Line 3 begins at Line 1. It bisects the angle created by the heel and extends past Line 2 by .5[.5, .75, .75, 1, 1] inch. This is the widest point of the foot. Draw an alternate Line 2 from the end of Line 3 and extending approximately 2 inches in either direction to meet the original Line 2. Round off the toes, flatten the arch and even out “wiggles” in your lines. Cut out your sock blocker pattern. Trace the pattern onto the cardboard or plywood and cut out. Be sure all edges are smooth before using. |
| ABOUT THE DESIGNER |
|
|
|
Pattern & images © 2010 Jodie Gordon Lucas. Contact Jodie |