
|
|
|
|
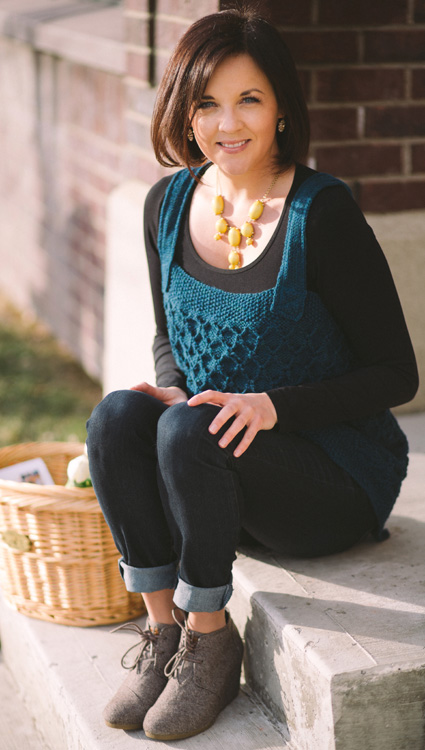
As with many design processes, the French Smock began as a collection of images and thoughts that eventually made their way into a tangible piece of clothing. The idea landscape included impressions of artists and painters, sun-dappled windows and long afternoons, French cafes and pastoral Europe, and aprons that long to turn into everyday wear. The top that emerged from these ideas is a piece that easily pairs with other clothing to provide a little extra warmth when needed, but is also an easy way to turn a t-shirt and jeans or a skirt into something a little special. The construction of the French Smock is quite simple: the main body is knit flat, and then straps are knit separately and attached to cross in the back. A smaller needle size adds density to the upper band of the top and straps, and a ribbon sewn on the inside of the straps also prevents stretching. Seed stitch at the edges of the top prevents rolling, while the pattern repeat over the main knit area creates an eye-catching design that is highlighted nicely by Cascade 220. I chose Cascade 220 for this project because it makes the French Smock a piece that is both affordable and quick to knit up, and it also adds structure and durability to the finished piece. |
||
|
|
||
|
SIZE |
|
|
FINISHED MEASUREMENTS |
|
MATERIALS Notions |
|
GAUGE |
| 16 sts/24 rows = 4 inches in pattern stitch |
|
PATTERN NOTES |
|
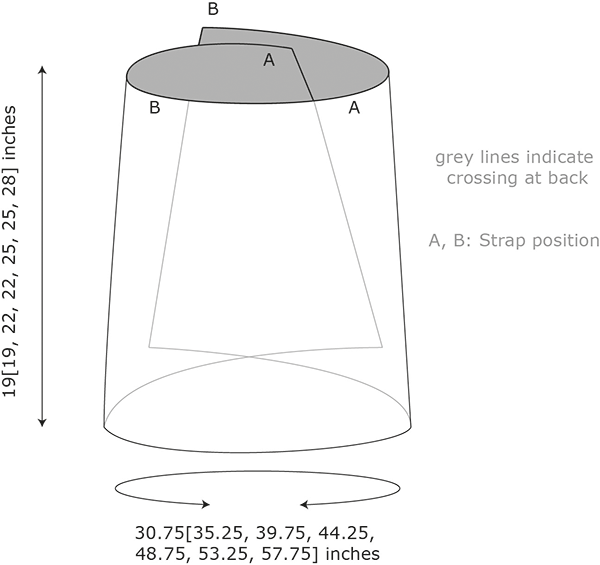
Body of smock is worked flat. Straps are knit separately and then attached. The straps are lined with ribbon to prevent stretching. Seed Stitch, Flat: Sl3pw: With yarn in front, slip 3 stitches purlwise. P1 over slipped sts: Insert right needle into next stitch on left needle (do not purl), then insert right needle under the strands of the slipped stitches. Purl all together. |
|
DIRECTIONS Switch to larger needles. Begin Smocked Pattern: Rep Rows 3 to 18 until work measures 13[13, 16, 16, 19, 19, 22] inches, ending after Row 18. Change to smaller needles. Work 16 rows in Seed St. Bind off knitwise. Straps (make 2): Work in stockinette until strap reaches 18[18, 20, 20, 23, 23, 26] inches or until length desired for over shoulders. Bind off and secure loose ends. |
 |
|
FINISHING Straps are attached at the front and edge of the smock. Sew straps so that one end rests at each shoulder in the front, and the other end crosses at the back to attach to the opposite corner edge of the smock -- indicated letters A and B on schematic. |
| ABOUT THE DESIGNER |
|
For Joleen, a.k.a. Kraftling, knitting and crocheting evolved from a hobby to an all-consuming passion (some would say obsession). Inspiration for her designs is drawn from past travels, current trends, and all kinds of things in between. She can often be found knitting in coffee shops in Victoria, BC, and online at kraftling.ca |
|
Pattern & images © 2015 Kraftling. Contact Kraftling |