|
  BACK BACK
Using
smaller needles, CO 102[106, 114, 126, 138,
154, 170] sts.
Work in 2x2 Rib until work measures 5 inches,
ending with a WS row.
Switch to larger needles and continue in
stockinette st as follows:
Next Row [RS]: K6[7, 1, 2, 9, 10, 8], k2tog,
[k6(8, 8, 6, 5, 5, 6), k2tog] to last 6[7,
1, 2, 8, 9, 8] sts, k to end. 90[96, 102,
110, 120, 134, 150] sts.
P 1 row.
Increase Row [RS]: K1, m1, k to last st,
m1, k1.
P 1 row.
Repeat these 2 rows 5 times more. 102[108,
114, 122, 132, 146, 162] sts.
Work Increase Row as above.
Next Row [WS]: P1, m1p, p to last st, m1p,
p1.
Repeat these 2 rows twice more. 114[120,
126, 134, 144, 158, 174] sts.
CO 28[31, 34, 38, 41, 41, 41] sts at end
of next 2 rows using Backward Loop method.
170[182, 194, 210, 226, 240, 256] sts.
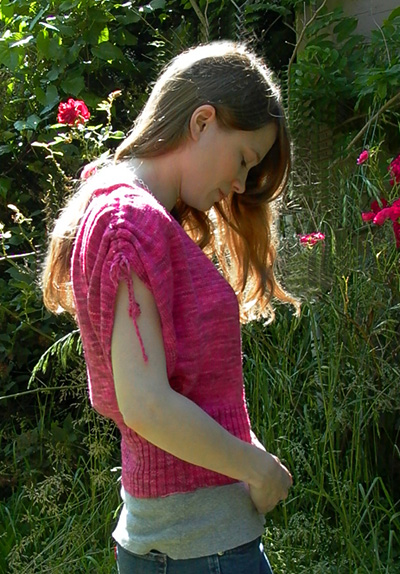
Next Row [RS]: P1, [k1, p1] 3 times, k to
last 7 sts, [p1, k1] 3 times, p1. This row
establishes ribbed edges of sleeves. Continue
working this ribbed edge until piece is complete
(edge will not be written into remaining
directions for this piece).
Continue in stockinette st until work measures
9[9.5, 10, 10.5, 11, 11.5, 12] inches from
CO edge at base of sleeves, ending with a
WS row.
Shape
Shoulders:
Row 1 [RS]: K to last 7[8, 8, 9, 10, 11,
12] sts, W&T.
Row 2 [WS]: P to last 7[8, 8, 9, 10, 11,
12] sts, W&T.
Row 3 [RS]: K to 7[8, 8, 9, 10, 11, 12] sts
before last wrapped st, W&T.
Row 4 [WS]: P to 7[8, 8, 9, 10, 11, 12] sts
before last wrapped st, W&T.
Repeat Rows 3-4 six times more. Note that
each short row is 7[8, 8, 9, 10, 11, 12]
sts shorter than the previous one.
Next Row [RS]: K to end, working wraps together
with wrapped sts.
Next Row [WS]: P all sts, working remaining
wraps together with wrapped sts.
Back Neckline and Left Shoulder Casing:
Row 1 [RS]: K60[64, 70, 78, 85, 92, 100]
sts and place these sts on st holder; BO
50[54, 54, 54, 56, 56, 56] sts, k to end.
60[64, 70, 78, 85, 92, 100] sts.
Rows 2-4: Work in stockinette st.
Row 5 [RS]: P all sts. This row forms turning
ridge for casing.
Rows 6-9: Work in stockinette st. BO all
sts.
Right
Shoulder Casing:
Place held sts on needle with WS facing and
rejoin yarn at neckline edge.
Work Rows 2-9 as for left shoulder casing.
LEFT FRONT
Using smaller needles, CO 53[57,
61, 69, 73, 81, 89] sts.
Row 1 [WS]: K1, [p1, k1] 3 times, [p2, k2]
to last 2 sts, p2.
Row 2 [RS]: K2, [p2, k2] to last 7 sts, [p1,
k1] 3 times, p1.
Repeat these 2 rows until work measures 5
inches, ending with a WS row.
Switch to larger needles and continue as
follows:
Next Row [RS]: K14[8, 7, 6, 8, 12, 10], k2tog,
[k8(8, 7, 4, 5, 4, 5), k2tog] to last 7 sts,
[p1, k1] 3 times, p1. 49[52, 55, 59, 64,
70, 78] sts.
P 1 row, working first 7 sts in pattern as
set.
Note: Read ahead! Neckline and side
shaping are worked at the same time, beginning
on the next row.
Shape Side:
Increase Row [RS]: K1, m1, k to last 7 sts
(shaping neckline as instructed below),
p1, k1, p5.
Next Row [WS]: K5, p1, k1, p to end.
Repeat these 2 rows 5 times more. These 2
rows establish pattern for front edge (worked
over 7 sts). Maintain these 7 edge sts in
pattern until piece is complete (edge will
not be written into remaining directions
for this piece).
Work Increase Row as above.
Next Row [WS]: P to last st, m1p, p1.
Repeat these 2 rows twice more. A total of
12 sts have been increased at armhole edge.
Work 2 rows in pattern, casting on 28[31,
34, 38, 41, 41, 41] sts at end of second
row (a WS row) using Backward Loop method.
Next Row [RS]: P1, [k1, p1] 3 times, k to
end. This row establishes ribbed edge of
sleeve. Continue working this ribbed edge
until piece is complete (edge will not be
written into remaining directions for this
piece).
AT THE SAME TIME, shape
neckline as follows:
Neckline Decrease Row [RS]: Work in pattern
to last 9 sts, k2tog, p1, k1, p5.
Work 3 rows in pattern.
Repeat these 4 rows 21[23, 23, 23, 24, 23,
23] times more. 67[71, 77, 85, 92, 99, 107]
sts.
Continue in pattern until work measures
9[9.5, 10, 10.5, 11, 11.5, 12] inches from
CO edge at base of sleeves, ending with a
RS row.
Shape Shoulder:
Row 1 [WS]: P to last 7[8, 8, 9, 10, 11,
12] sts, W&T.
Row 2 [RS]: K to end.
Row 3 [WS]: P to 7[8, 8, 9, 10, 11, 12] sts
before last wrapped st, W&T.
Row 4 [RS]: K to end.
Repeat Rows 3-4 six times more. Note that
each short row is 7[8, 8, 9, 10, 11, 12]
sts shorter than the previous one.
Next Row [WS]: P all sts, working wraps together
with wrapped sts.
Shoulder Casing:
Row 1 [RS]: K to last 7 sts, place these
7 sts on st holder. 60[64, 70, 78, 85,
92, 100] sts remain.
Rows 2-4: Work in stockinette
st.
Row 5 [RS]: P all sts. This row forms turning
ridge for casing.
Rows 6-9: Work in stockinette st. BO all
sts.
RIGHT FRONT
Using smaller needles, CO 53[57,
61, 69, 73, 81, 89] sts.
Row 1 [WS]: P2, [k2, p2] to last 7 sts, [k1,
p1] 3 times, k1.
Row 2 [RS]: P1, [k1, p1] 3 times, [k2, p2]
to last 2 sts, k2.
Rows 3-7: Work as for Rows
1-2 (ending on
WS row).
Row 8 [RS]: [P1, k1] twice, yo2, continue
in pattern as set to end of row.
Row 9 [WS]: Work in pattern to yo2, drop
first yo from needle, p remaining yo together
with next st, k1, p1, k1. One buttonhole
has been completed.
Repeat Rows 2-9 five times more; 6 buttonholes
have been completed.
Continue in pattern until work measures 5
inches, ending with a WS row.
Switch to larger needles and continue as
follows:
Next Row [RS]: P1, [k1, p1] 3 times, ssk,
[k8(8, 7, 4, 5, 4, 5), k2tog] to last 14[8,
7, 6, 8, 12, 10] sts, k to end. 49[52, 55,
59, 64, 70, 78] sts.
P 1 row, working last 7 sts in pattern as
set.
Note: Read ahead! Neckline and side
shaping are worked at the same time, beginning
on the next row.
Shape Side:
Increase Row [RS]: P5, k1, p1, k to last
st (shaping neckline as instructed below),
m1, k1.
Next Row [WS]: P to last 5 sts, k1, p1, k5.
Repeat these 2 rows 5 times more. These 2
rows establish pattern for front edge (worked
over 7 sts). Maintain these 7 edge sts in
pattern until piece is complete (edge will
not be written into remaining directions
for this piece).
Work Increase Row as above.
Next Row [WS]: P1, m1p, p to end.
Repeat these 2 rows twice more. A total of
12 sts have been increased at armhole edge.
Next Row [RS]: K to end, CO 28[31, 34, 38,
41, 41, 41] sts using Backward Loop method.
Next Row [WS]: K1, [p1, k1] 3 times, p to
end. This row establishes ribbed edge of
sleeve. Continue working this ribbed edge
until piece is complete (edge will not be
written into remaining directions for this
piece).
AT THE SAME TIME, shape neckline as follows:
Neckline Decrease Row [RS]: Work 7 sts in
pattern, ssk, k to end.
Work 3 rows in pattern.
Repeat these 4 rows 21[23, 23, 23, 24, 23,
23] times more. 67[71, 77, 85, 92, 99, 107]
sts.
Continue in pattern until work measures
9[9.5, 10, 10.5, 11, 11.5, 12] inches from
CO edge at base of sleeves, ending with a
WS row.
Shape Shoulder:
Row 1 [RS]: K to last 7[8, 8, 9, 10, 11,
12] sts, W&T.
Row 2 [WS]: P to end.
Row 3 [RS]: K to 7[8, 8, 9, 10, 11, 12] sts
before last wrapped st, W&T.
Row 4 [WS]: P to end.
Repeat Rows 3-4 six times more. Note that
each short row is 7[8, 8, 9, 10, 11, 12]
sts shorter than the previous one.
Next Row [RS]: K all sts, working wraps together
with wrapped sts.
Work 1 row in pattern.
Shoulder Casing:
Row 1 [RS]: Work 7 sts, place these 7 sts
on st holder; k to end. 60[64, 70, 78,
85, 92, 100] sts remain.
Rows 2-4: Work in stockinette
Row 5 [RS]: P all sts. This row forms turning
ridge for casing.
Rows 6-9: Work in stockinette st. BO all
sts. |