|
  Using circular needle, CO 114[138, 162,
174, 192, 216, 240] sts. Place marker and
join to begin working in the round, being
careful not to twist. Using circular needle, CO 114[138, 162,
174, 192, 216, 240] sts. Place marker and
join to begin working in the round, being
careful not to twist.
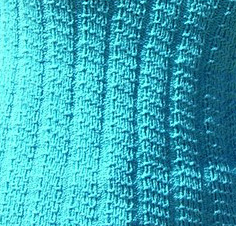
Work Round 1 of Diagonal Rib Pattern, placing
a marker after first 58[70, 82, 88, 100,
112, 124] sts: these first 58[70, 82, 88,
100, 112, 124] sts form front of piece, and
remaining 56[68, 80, 86, 92, 104, 116] sts
form back.
Continue in pattern until work measures
11 inches.
Shape Bust:
First Increase Round: Work 4
sts in pattern, pfb, p1, continue in pattern
to 6 sts before marker, pfb, p1, work 4 sts
in pattern, pfb, p1, work in pattern to last
2 sts, pfb, p1. 118[142, 166, 178, 196, 220,
244] sts.
Work 1 round in pattern.
Sizes XS, S Only:
Second Increase Round: Work 11 sts in pattern,
pfb, p1, continue in pattern to 13 sts
before marker, pfb, p1, continue in pattern
to end. 120[144, -, -, -, -, -] sts.
Sizes M, L, 1X, 2X, 3X Only:
Second Increase Round: Work 11 sts in pattern,
pfb, p1, continue in pattern to 13 sts
before marker, pfb, p1, work 18 sts in
pattern, pfb, p1, work in pattern to last
9 sts, pfb, p1, continue in pattern to
end. -[-, 170, 182, 200, 224, 248] sts.
Work 1 round in pattern.
Size M Only:
Third Increase Round: Work 18 sts in pattern,
pfb, p1, work 22 sts in pattern, pfb, p1,
work 22 sts in pattern, pfb, p1, continue
in pattern to end. 173 sts.
Sizes L, 1X, 2X, 3X Only:
Third Increase Round: Work 18 sts in pattern,
pfb, p1, continue in pattern to 20 sts
before marker, pfb, p1, work 32 sts in
pattern, pfb, p1, work in pattern to last
16 sts, pfb, p1, continue in pattern to
end. -[-, -, 186, 204, 228, 252] sts.
Work 1 round in pattern.
Fourth Increase Round: Work 25 sts in pattern,
pfb, p1, work -[-, -, 10, 16, 22, 28] sts
in pattern, pfb, p1, work 16 sts in pattern,
pfb, p1, work -[-, -, 10, 16, 22, 28] sts
in pattern, pfb, p1, continue in pattern
to marker, work 21 sts in pattern, pfb, p1,
work in pattern to last 23 sts, pfb, p1,
continue in pattern to end. -[-, -, 192,
210, 234, 258] sts.
 All Sizes: All Sizes:
Continue in pattern until work measures 12.5[12.75,
12.5, 12.75, 13.25, 13.75, 14.25] inches.
Sizes XS, S Only:
First Decrease Round: Work 11 sts in pattern,
p2tog, p1, work in pattern to 14 sts before
marker, p2tog, p1, continue in pattern
to end. 118[142, -, -, -, -, -] sts.
Work 1 round in pattern.
Second Decrease Round: Work 4 sts in pattern,
p2tog, p1, work in pattern to 7 sts before
marker, p2tog, p1, work 4 sts in pattern,
p2tog, p1, work in pattern to last 3 sts,
p2tog, p1. 114[138, -, -, -, -, -] sts.
Work 1 round in pattern.
Size M Only:
First Decrease Round: Work 18 sts in pattern,
p2tog, p1, work 22 sts in pattern, p2tog,
p1, work in pattern to 21 sts before
marker, p2tog, p1, continue in pattern
to end. 170 sts.
Work 1 round in pattern.
Size L, 1X, 2X, 3X Only:
First Decrease Round: Work 25 sts in pattern,
p2tog, p1, work -[-, -, 10, 16, 22, 28]
sts in pattern, p2tog, p1, work 16 sts
in pattern, p2tog, p1, work in pattern to
28 sts before marker, p2tog, p1, continue
in pattern to marker, work 21 sts in pattern,
p2tog, p1, work in pattern to last 24 sts,
p2tog, p1, continue in pattern to end.
-[-, -, 186, 204, 228, 252] sts.
Work 1 round in pattern.
Sizes M, L, 1X, 2X, 3X Only:
Second Decrease Round: Work -[-, 11, 18,
18, 18, 18] sts in pattern, p2tog, p1,
work in pattern to -[-, 14, 21, 21, 21,
21] sts before marker, p2tog, p1, work
-[-, 18, 32, 32, 32, 32] sts in pattern,
p2tog, p1, work in pattern to last -[-,
10, 17, 17, 17, 17] sts, p2tog, p1, continue
in pattern to end. -[-, 166, 182, 200,
224, 248] sts.
Work 1 round in pattern.
Third Decrease Round: Work -[-, 4, 11, 11,
11, 11] sts in pattern, p2tog, p1, work in
pattern to -[-, 7, 14, 14, 14, 14] sts before
marker, p2tog, p1, work -[-, 4, 18, 18, 18,
18] sts in pattern, p2tog, p1, work in pattern
to last -[-, 3, 10, 10, 10, 10] sts, p2tog,
p1, continue in pattern to end. -[-, 162,
178, 196, 220, 244] sts.
Work 1 round in pattern.
Sizes L, 1X, 2X, 3X Only:
Fourth Decrease Round: Work 4 sts in pattern,
p2tog, p1, work in pattern to 7 sts before
marker, p2tog, p1, work 4 sts in pattern,
p2tog, p1, work in pattern to last 3 sts,
p2tog, p1. -[-, -, 174, 192, 216, 240]
sts.
Work 1 round in pattern.
All Sizes:
Next Round: K2tog, [p1, k1] to 2 sts before
marker, p2tog, [k2tog, p1] twice, [k1, p1]
to last 6 sts, [k2tog, p1] twice. 108[132,
156, 168, 186, 210, 234] sts.
Work in Seed Stitch, beginning with Round
2 of pattern, for 2 inches, ending with Round
1 of pattern.
Next Round: Work 17[19, 21, 23, 27, 29,
31] sts in pattern, BO next 22[30, 38, 40,
44, 52, 60] sts, work 9[9, 11, 11, 13, 13,
13] sts in pattern (10[10, 12, 12, 14, 14,
14] sts on right needle) and slip these 10[10,
12, 12, 14, 14, 14] sts to st holder; BO
next 7[9, 9, 11, 13, 15, 17] sts and all
sts of back; BO first 7[9, 9, 11, 13, 15,
17] sts of next round. 10[10, 12, 12, 14,
14, 14] sts remain.
 The sts on the needle and the held sts will
become the strap, which will be worked in
two halves (left and right halves) and grafted
together at the back neck. To determine the
correct length for the strap, try on the
top. Using a flexible measuring tape, measure
from the outer edge of one set of sts, around
the back of your neck to the outer edge of
the other set of sts. Because the strap will
be very stretchy, subtract 7 inches from
this measurement; this will ensure that the
strap will fit snugly enough to hold the
top up. Divide the resulting number by two
to determine the length of each side of the
strap. The sts on the needle and the held sts will
become the strap, which will be worked in
two halves (left and right halves) and grafted
together at the back neck. To determine the
correct length for the strap, try on the
top. Using a flexible measuring tape, measure
from the outer edge of one set of sts, around
the back of your neck to the outer edge of
the other set of sts. Because the strap will
be very stretchy, subtract 7 inches from
this measurement; this will ensure that the
strap will fit snugly enough to hold the
top up. Divide the resulting number by two
to determine the length of each side of the
strap.
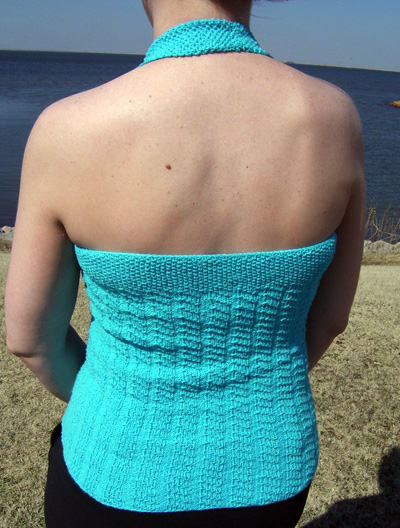
For example, for the top shown, the around-the-neck
measurement was 23 inches. The halter strap
is 16 inches long; each side of the strap
is 8 inches long.
Left Side of Strap:
Beginning and ending with Row 2 of pattern,
work in seed stitch until strap is desired
length. Do not bind off. Cut yarn, leaving
a tail approx. 8 inches long, which will
be used to graft the strap. Place sts on
hold on spare needle.
Right Side of Strap:
Place held sts on needle and rejoin yarn
with RS facing. Beginning and ending with
Row 1 of pattern, work in seed stitch until
strap is same length as left strap. Do
not bind off; cut yarn, leaving a tail
to be woven in.
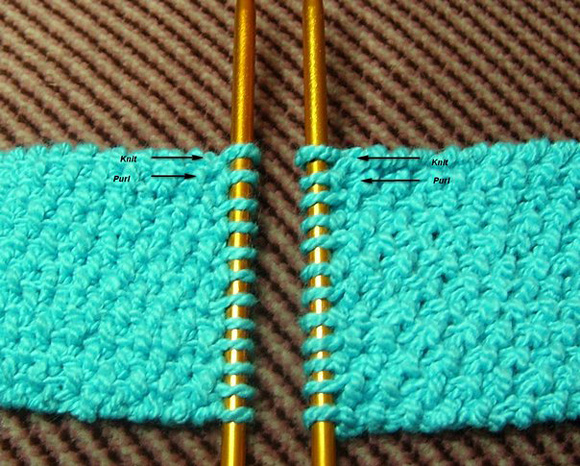
Lay the strap ends flat with right sides
up, as shown in photo. Position work so that
left half of strap is closest to you, with
yarn tail at right of work; this set of sts
will be designated the front needle (sts
of right strap will be referred to as the
back needle). Thread tail on tapestry needle
and graft as follows:
Set-up Step: Insert the tapestry needle
into the first stitch on the front needle
as if to knit and pull the yarn through.
Insert the needle into the first stitch on
the back needle as if to purl and pull the
yarn through.
Step 1: Insert the needle into the first
stitch on the front needle as is to purl
and pull the yarn through. Then drop this
stitch off the needle. Insert the needle
into the next stitch on the front needle
as if to purl and pull the yarn through.
Step 2: Insert the needle into the first
stitch on the back needle as if to knit and
pull the yarn through. Then drop this stitch
off the needle. Insert the needle into the
next stitch on the back needle as if to knit
and pull the yarn through.
Step 3: Insert the needle into the first
stitch on the front needle as if to knit
and pull the yarn through. Then drop this
stitch off the needle. Insert the needle
into the next stitch on the front needle
as if to knit and pull the yarn through.
Step 4: Insert the needle into the first
stitch on the back needle as if to purl and
pull the yarn through. Then drop this stitch
off the needle. Insert the yarn into the
next stitch on the back needle as if to purl
and pull the yarn through.
Repeat Steps 1-4 until all stitches have
been grafted. |