|
|
|||

|
|
|||
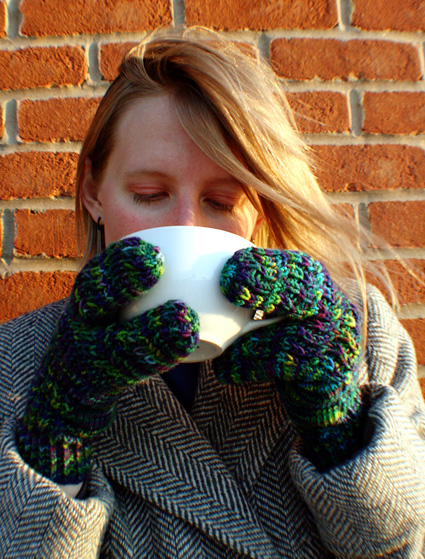
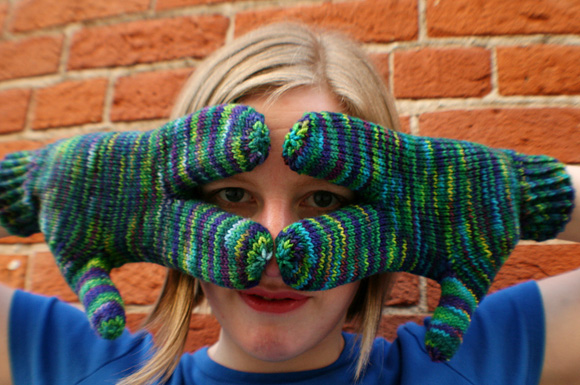
Credit for this idea goes to my husband, who is always coming up with great ideas, but for things that are usually not knittable. These started out destined to be just regular mittens (my first pair, even) with a cool stitch pattern on the back. He suggested that instead of mittens I make them into “Lobster Claw” gloves like we’ve seen at sporting goods stores. The name, Tridactyl, means “three-toed” and seems fitting for the reptilian look that these gloves have. These odd looking creations provide the warmth of a mitten, with the dexterity of a glove. Thus, getting out your keys, turning radio dials, pulling the break lever on your bike, and even answering your cell phone are all possible while your fingers are kept warm! Amazing! The stitch pattern is perfect for showing off the multitudes of color in this yarn, but would also look striking in a solid yarn as well. You could play around with some color-work or cables and put some really interesting designs on the back, or leave it plain and use a self-striping yarn. My husband has already put in his request for a pair and I have a feeling I’ll be making several more for holiday gifts this year. Good thing they knit up fast! |
|||
| SIZE | |||
One [women's]. See Pattern Notes for information about resizing |
|||
| FINISHED MEASUREMENTS | |||
Hand circumference: 7.25 inches |
|||
| MATERIALS | |||
Note: Not all of each skein is used; if more length is needed, there should be sufficient yarn. Recommended needle size:
|
|||
| GAUGE | |||
25 sts/36 rows = 4 inches in stockinette st |
|||
|
PATTERN NOTES [Knitty's list of standard abbreviations and techniques can be found here.] |
|||
Directions for both the
Cable Cast On and the Alternate
Cable Cast On (scroll to
bottom of page) can be found here. This project is ideal for cabling
without a cable needle.
Directions can be found here. T2RP: Sl next st to cable needle and hold to back of work; k1 from left needle, p1 from cable needle. needle. T2LP: Sl next st to cable needle and hold to front of work; p1 from left needle, k1 from cable needle. Wave Pattern (Worked over a multiple of 3 sts): Twisted 1x1 Rib (Worked in the round over an even number
of sts): Resizing |
|||
| DIRECTIONS | |||
|
|||
|
RIGHT GLOVE CUFF HAND Shape Thumb Gusset: Work 12 rounds in pattern, or until work reaches to point where thumb and hand meet. Next Round: K1, remove marker, place next 13 sts on
hold on waste yarn, CO 4 sts using cable cast on method,
join to continue working in the round; continue in pattern
to end. 50 sts. 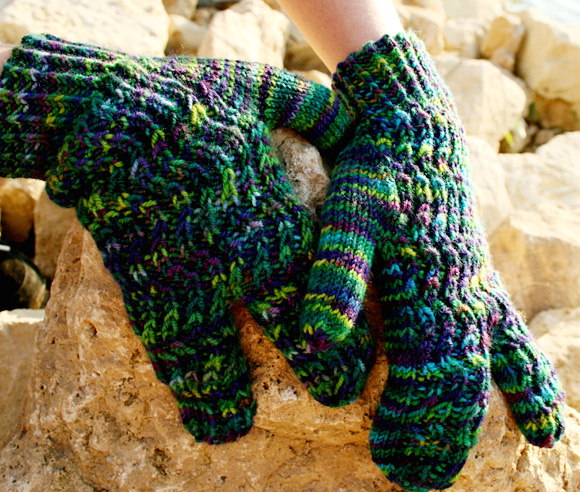
FIRST CLAW Round 1: K to end of Needle 2; using cable cast on,
CO 2 sts onto Needle 2; work sts on Needles 3 and 4 in
pattern as set. 28 sts. Work 24 rounds in pattern, or until work reaches to just above tip of index finger. Shape Top of Claw: SECOND CLAW Work 20 rounds in pattern, or until work reaches to 0.5 inches below tip of ring finger. Shape Top of Claw: 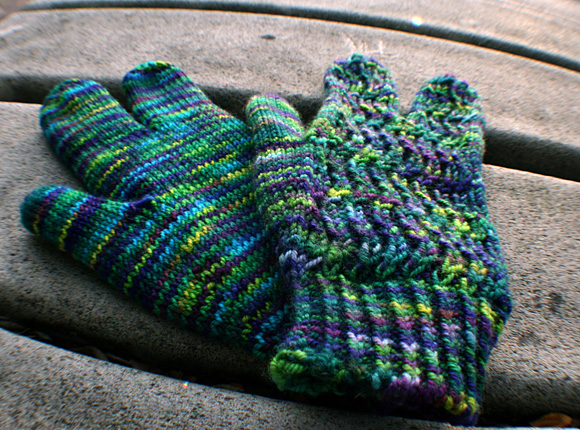
THUMB K 22 rounds, or until work reaches tip of thumb. Next Round: [K2tog] to last st, k1. 9 sts. LEFT GLOVE CUFF HAND Shape Thumb Gusset: Work 12 rounds in pattern, or until work reaches to base of thumb (where thumbs and hand meet). Next Round: K
to first marker, remove marker,
place next 13 sts on hold
on waste yarn, k1, CO
4 sts using cable cast
on method, join to continue
working in the round;
continue in pattern to
end. 50 sts. FIRST CLAW Round 1: K to end of Needle 2; using cable cast on,
CO 2 sts onto Needle 2; work sts on Needles 3 and 4 in
pattern as set. 26 sts. Work 20 rounds in pattern, or until work reaches to 0.5 inches below tip of ring finger. Shape Top of Claw: 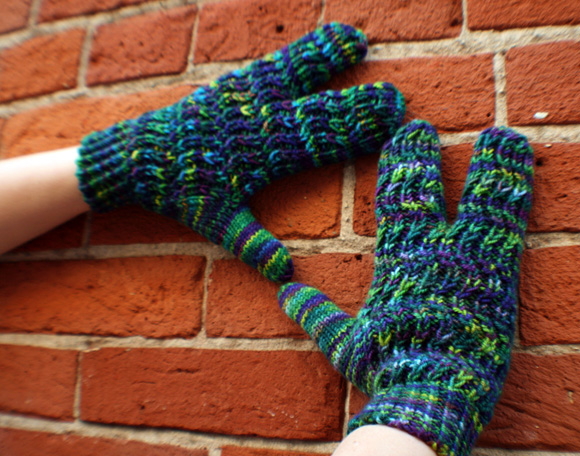
SECOND CLAW Work 24 rounds in pattern, or until work reaches to just above tip of index finger. Shape Top of Claw: THUMB |
|||
| FINISHING | |||
Weave in ends securely, sewing up any small holes between claws or at base of thumb. |
|||
| ABOUT THE DESIGNER | |||
 Her infrequent blog posts can be found here. |
|||
| Pattern & images © 2009 Tina Melvin. Contact Tina |