|
|
|
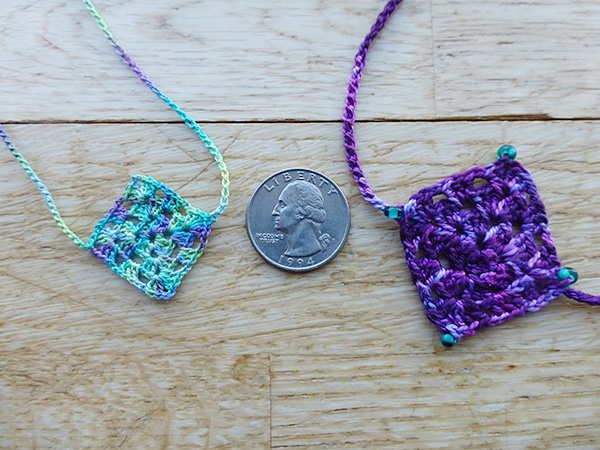
SIZE |
|
FINISHED MEASUREMENTS |
|
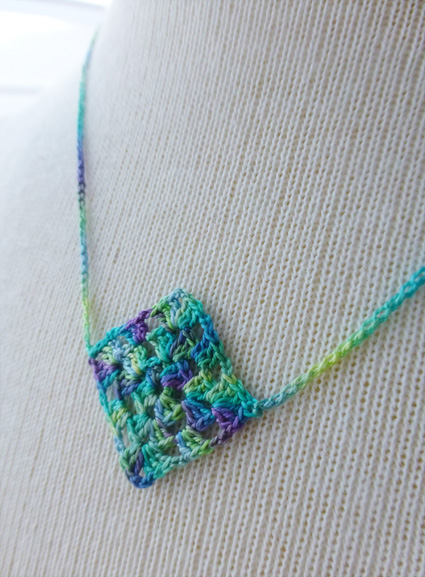
MATERIALS Wee one (shown above in blue/green) Notions |
|
GAUGE |
See note above re: size. A note about gauge: when working with thread and steel needles, you may find your stitches looser or tighter than when you crochet with yarn. Play with several steel hooks in sizes larger or smaller than listed here to get a jewelry fabric you like. A stiffer thread square is preferable because it will hold its shape. |
|
PATTERN NOTES |
|
Chain: ch Both squares are made the same: when using the #5 Perle Cotton, use the US7/1.65mm steel hook; when using the #12 Perle Cotton, use the US12/1mm steel hook. 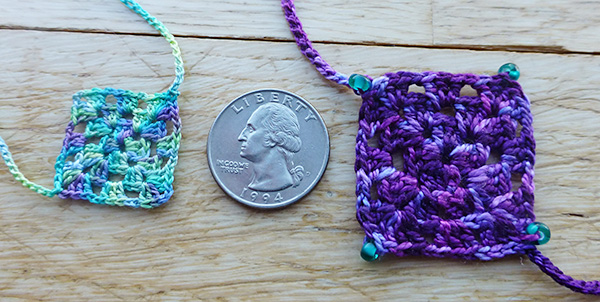
Beading: The #5 Perle Cotton Necklace is made with 3mm seed beads. Slide 4 beads onto your thread before starting your granny square. |
|
DIRECTIONS 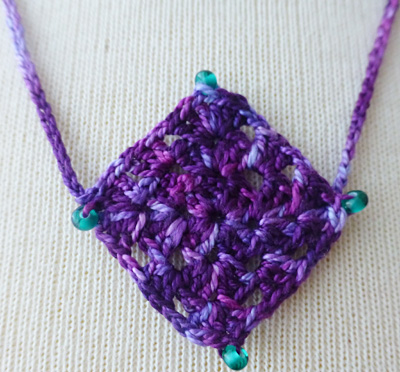
String the beads onto your choice of thread before you begin. Ch 5, join last ch to the first ch made with a sl st to form a ring. Round 1: Ch 3, work 2dc into the center of the ring, ch 2, *3 dc into center of ring, ch 2, repeat from * 2 more times, sl st into top of initial ch 3 to join. Sl st across the next 2 dc until you reach the ch-sp. Round 2: Sl st into the next ch-sp, ch 3, work 2 dc into same ch sp, ch 2, work 3 dc into same ch sp, ch 2, *in next ch sp, work [3 dc, ch 2, 3 dc] (corner made), ch 2, repeat from * two more times, sl st into top of initial ch 3 to join. Sl st across the next 2 dc until you reach the ch-sp. Round 3: Sl st into the next ch-sp, ch 3, work 2 dc into same ch sp, ch 1, slide a bead up to the hook, ch 1, work 3 dc into same ch sp, ch 2, *3 dc in next ch sp, ch 2, in next corner ch sp, work [3 dc, ch 1, slide a bead up to the hook, ch 1, 3 dc] (corner made), ch 2, repeat from * two more times, 3 dc in last ch sp, sl st into top of initial ch 3 to join. Do not fasten off. Chain |
|
FINISHING |
|
||||||||||||||||||||||||||||||||||||||||||||||||||||||||||||||||||||||||||||||||||||||||||||||||||