|
|
|
|
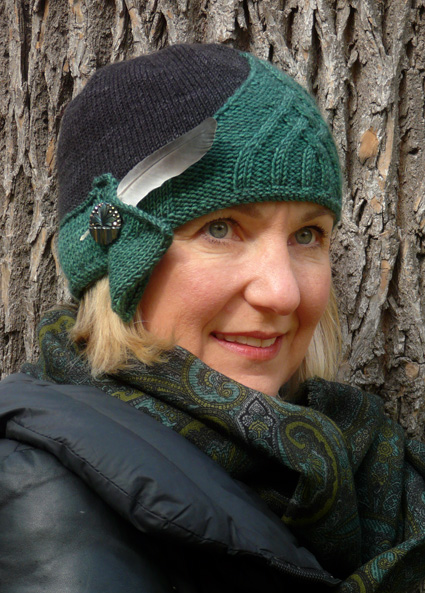
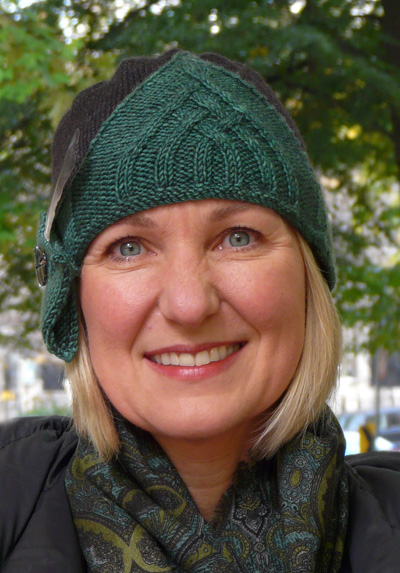
With their irresistible combination of vintage glamor and modern-day wearability, fashions of the 1920s provide a rich vein of inspiration for my knitwear designs. Although the details of her life are lost in time, Parisian designer Alice Bernard was a successful couturière and hat designer during the Roaring Twenties. Her high style creations were often featured in fashion magazines during the first half of the 1920s, when she was known for her elegant evening dresses and striking hats. This warm and stylish cap is created in sections: the streamlined cap, and a contrasting color band with a centered cable panel that ascends to a dramatic peak. The jaunty feather appeared on my balcony the morning I finished the cap, perhaps channeling Alice Bernard's wish for a final embellishment to the shaped side tab, and making it as fashionable on today's knitter as it would have been on the trendiest Jazz Age flapper. |
||
|
|
||
|
SIZE |
|
|
FINISHED MEASUREMENTS |
|
MATERIALS Notions |
|
GAUGE |
| 27 sts/40 rnds = 4 inches in stockinette stitch and MC with smaller needles 21.5 sts/30 rnds = 4 inches in stockinette stitch and CC with larger needles |
|
PATTERN NOTES |
|
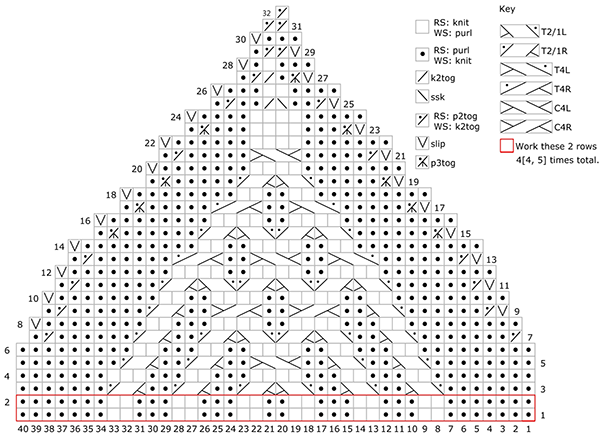
Alice is worked in three separate pieces: the cap, the cabled peak, and the stockinette band with short-row shaped side tab. One end of the Cable band is purposely worked longer than the other end to accommodate the overlap of this shaped side tab. Directions for the cable panel are provided in chart format, with a Stitch Key for the cable crosses. If you don't own a millinery form for blocking the finished cap, a small, rounded mixing bowl will do nicely as long as its circumference is similar to that of your head. C4L: Slip 2 sts to cable needle, hold in front, k2, then k2 from cable needle T2/1L: Slip 2 sts to cable needle, hold in front, p1, then k2 from cable needle T4L: Slip 2 sts to cable needle, hold in front, p2, then p2 from cable needle |
 |
DIRECTIONS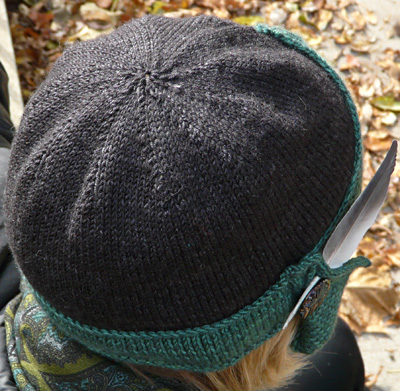 Cap With smaller circ needle and MC, use Cable method to CO 120[130, 140] sts. Place marker and join for working in the round, being careful not to twist. Knit all rounds until piece measures 4.5[5, 5.5] inches from CO edge. Next rnd, place markers: (K12[13, 14], pm) around. Shape crown: Band Work in St st, starting with a RS row, until piece measures approx 1.25[1.25, 1.5] ins above rev St st edging, ending with a WS row.
 Row 1 [RS]: K25[25, 30], w&t. Row 2 [WS]: P. Row 3 [RS]: K20[20, 25], w&t. Row 4 [WS]: P. Row 5 [RS]: K15[15, 20], w&t. Row 6 [WS]: P. Row 7 [RS]: K10[10, 15], w&t. Row 8 [WS]: P to end. Row 9 [RS]: K5[5, 10], w&t. Row 10 [WS]: P. Size L Only: All sizes: BO all sts. 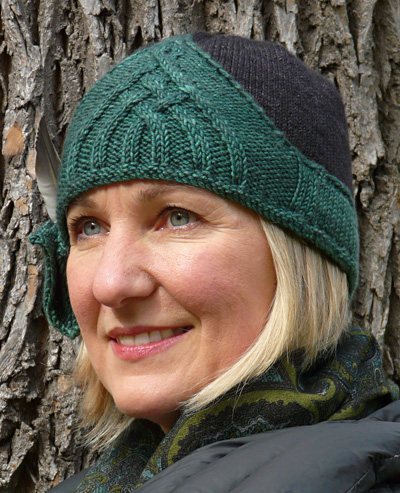 With larger needles and and CC, use Cable method to CO 55 sts. Setup Row 1 [RS]: P. Setup Row 2 [WS]: K. Row 1 [RS]: K5, pm, work Cable chart row 1 across next 40 sts, pm, k to end. Repeats Rows 1-2 3[3, 4] more times. Begin Cable shaping: Row 4 [WS]: P to m, work Cable chart row 4, p to end. |
|
FINISHING Place Cap over a mixing bowl or hat form and mist to block smooth. Sew narrow end of Band to short end of Cable Panel. Pin piece out to approx 22[24, 25.75] inches long, 2[2, 2.25] inches tall at narrow end, and 5[5, 5.25] inches tall at peak. Mist to block smooth. Pin Band to Cap with rev St st edge overlapping CO edge of Cap. Place shaped end over top of rem end of Cable panel by 2-3 ins. Try on Cap to ensure proper fit. Sew lower edge of pieces together. Sew BO edge of Band to front of Cap. Fold shaped end of Band to form a fan. Invisibly tack fold and free edge to lower edge of Cap. Sew button or brooch to edge of pleat, using photo as a guide. |
| ABOUT THE DESIGNER |
|
Her passion for 1920s fashion makes her suspect she was a flapper in a former life. Please visit her website for all the details. |
|
Pattern & images © 2014 Julie Turjoman. Contact Julie |