Knitty: little purls of wisdom
Title
beauty shot

Tangy


Reflector was the solution to a problem. I love to cycle, I get cold ears, and I believe in 'Safety First'! Also I had all this amazing reflective yarn and no idea what to do with it. After much yarn play, I decided a double-faced fabric would be the most comfortable way to wear it and that knitting with 2 very different yarn thicknesses created an interesting contrast in the fabric.

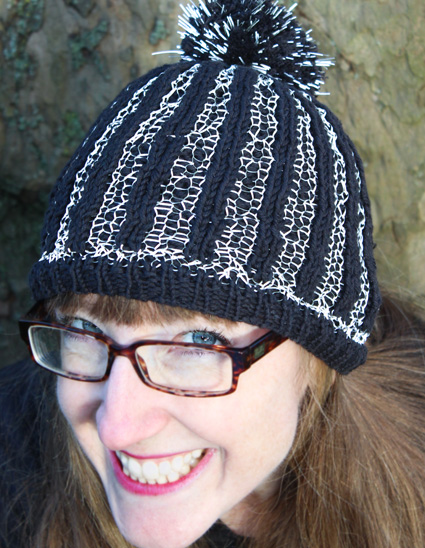
It all begins with a tubular cast on, followed by ribbing which evolves into double-knit vertical stripes, and finally is topped with a reflective pompom for your pleasure!


spacer model + photos: Renee Callahan, Ben Richards, Linda Lencovic
 

SIZE
One

FINISHED MEASUREMENTS
Circumference: 18 inches
Depth: 8 inches

spacer

MATERIALS
Yarn

spacer [MC] Brown Sheep Cotton Fleece [80% Cotton, 20% Merino wool; 215 yd/197m per 100g skein]; color: Cavern; 1 ball
spacer [CC] Retroglo Yarn [16% Polyester, 59% glass beads, 12.5% Phenolic Resin, 12.5% Urethane Adhesive; 43 yd/40m per 15g skein]; 1 skein.

Recommended needle size
[always use a needle size that gives you the gauge listed below -- every knitter's gauge is unique]
spacer 16-inch US #3 /3.25mm circular
spacer 16-inch US #4 /3.5mm circular
spacer US #4 /3.5mm DPNs, 2 circulars or 1 long circular for working closure

Notions
spacer scrap yarn for tubular cast on
spacer yarn needle
spacer pompom maker (optional)

spacer

GAUGE

22 sts/24 rounds = 4 inches in stockinette stitch in MC with larger needles
32 sts (16 "outer" and 16 "inner")/22 rounds = 4 inches in Vertical Stripe Pattern with larger needles
 

PATTERN NOTES
[Knitty's list of standard abbreviations and techniques can be found here.]

This hat requires a stretchy cast on, for which the tubular cast on is perfect. You can find instructions here.


M1: Use the backwards loop/e-wrap method to create a stitch.

Double knitting creates a double-faced fabric. The basic round goes as follows:
Move both yarns to the back, k1 with CC, move both yarns to the front, p1 with MC. The knit stitches form the outer fabric, the purl stitches form the inner fabric.

Double knit dec: To decrease for the crown, you need to work a double-layer decrease, knitting two ‘outer’ stitches together, and purling two 'inner' stitches together. To do this, rearrange the stitches to be decreased so that you have two consecutive outer stitches and two consecutive inner stitches. You can do this with the help of a cable needle, or as follows: slip the first 'outer' stitch onto RH needle, slip next 'inner' st off the needle and hold to the back. Slip the 3rd stitch onto RH needle, pick up the dropped stitch with LH needle, and slip 2 stitches from RH to LH needle. Stitches are now arranged with 2 'outer' stitches followed by 2 'inner' stitches. Working each decrease with yarn to match the stitches: bring both yarns to the back, k2tog, bring both yarns to the front, p2tog. 2 stitches decreased.

Pom-pom: Instructions for making a pom-pom can be found here

Reflectiveness: The photos on Ben show its reflective quality, and those on Renee show the hat in daylight.

DIRECTIONS
With MC and smaller needles, CO 72 sts with tubular method.

Switch to larger needles. Join to work in the round, being careful not to twist.


Lower edge:

Ribbing round: [K1, p1] around.

Work 6 rounds of ribbing as set.

Rnd 7, increase: [K1, m1] around. 144 sts.

Body of Hat
Join CC.
Rnds 1-3: [K1CC, p1MC] around.

Rnd 4, the main pattern: ([K1CC, p1MC] twice, [K1MC, p1MC] twice) around.

Work 30 rounds total as set, or until hat measures 6 inches.

Decrease for Crown
Note: Change to small-circumference method when hat gets too small to work on 16-inch circular. See Pattern Notes for details on the Decrease.

Rnd 1: [Work 20 sts in patt as set, work decrease] around. 132 sts.

Rnd 2: Work Rnd 4, the main pattern, as above.

Rnd 3: [Work 18 sts in patt as set, work decrease] around. 120 sts.

Rnd 4: Work even in pattern as set.

Rnd 5: [Work 16 sts in patt as set, work decrease] around. 108 sts.

Rnd 6: Work even in pattern as set.

Rnd 7: [Work decrease, work 2 sts in patt] around. 72 sts.

Rnd 8: Work even in pattern as set.

Rnd 9: Work decrease around. 36 sts.

Rnd 10: Work even in pattern as set.

Rnd 11: As Rnd 9. 18 sts.

Rnd 12: As Rnd 11. 9 sts.

Cut yarn, and pull tail through remaining stitches to close.

spacer

FINISHING
Block to measurements and weave in ends.
Make pompom. The one shown was made with a template 3 inches in diameter.
Attach to hat.

spacer
ABOUT THE DESIGNER

Renee knits and drinks gallons of tea in the wilds of East London.

You can find her here, on Ravelry, and on Twitter.

spacer