
|
|
|

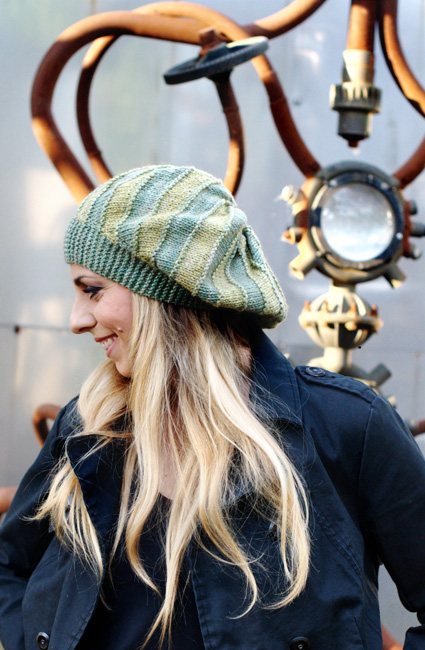
Bimitral is a versatile hat, constructed essentially of two elements. Consisting of stripes worked on the bias, where each panel is simply one color worked after the next which then in turn is repeated over and over until the desired sized is reached, Bimitral can be constructed as a slouchy beret (shown) or as a slouchy beanie, with only a slight adjustment in gauge. The techniques are that of any sideways hat: provisional cast-on, short rows, and (garter stitch) grafting. It's the perfect canvas for mixing two of your favorite yarns. It would lend itself beautifully to mixed weight yarns – why not knit the second color in a lace weight or 4-ply yarn, for a thick/thin effect? Or mix it up with one stripe in solid and the second in variegated? Whichever combination of yarn you go for, Bimitral will lend itself willingly to creating a unique piece each and every time.
|
||
|
|
||
|
SIZE |
|
|
FINISHED MEASUREMENTS |
|
MATERIALS Notions |
|
GAUGE |
|
PATTERN NOTES |
|
Row gauge determines how well the hat fits. The garter stitch is designed to work as ribbing and should be measured relaxed. Should your gauge differ from that required in the pattern, you can simply work more or less panels until the hat fits – a sideways knit allows you to try it on as you go! To complete this pattern, you'll need to perform a garter stitch graft – this creates the single row of ridges to echo the purl ridges between the panels (whereas a reverse stocking stitch creates two adjacent purl ridges). You can find a tutorial on Woolly’s website Provisional Cast On Short rows |
|
DIRECTIONS Row 1 [WS]: Purl all sts. Join CC. Keep both MC and CC attached throughout. When changing in the transition between brim and body, twist the two yarns around each other, to avoid making holes. Row 8 [RS]: With MC, p8[9, 10]; with CC P2, M1P, p23[26, 29], p2tog, w&t. Repeat these 16 rows a total of 9[10, 11] times, then work Rows 1-15 once more. |
|
FINISHING When grafting across short rows, you will treat the short rows in exactly the same way as you have throughout the pattern. How you pick up the wraps during the graft should mimic what you did when working the rows: If you picked up the wrap then worked into the back of the wrapped stitch previously you will need to do the same for the graft – to do this lift both the wrap and stitch off and twist towards you, and then place back on the needle and perform Garter Stitch Kitchener as normal. If you worked into the front of the wrapped stitch previously you do not need to twist them during the graft. You will be grafting from the bottom of the Hat up. Once the graft is complete, thread yarn through edge stitches and pull to tighten to close the crown. Wash. You can optionally block over a plate, but be careful not to stretch out the band too much. Weave in all ends. |
| ABOUT THE DESIGNER |
|
Woolly fully admits that she dreams about Hats and 3-D knitted forms. She can't help it. Thankfully, her partner and their son forgive her and they all live peacefully together, spending much of their time in their converted double decker bus. |
|
Pattern & images © 2015 Woolly Wormhead. Contact Woolly |