|
|
|
|
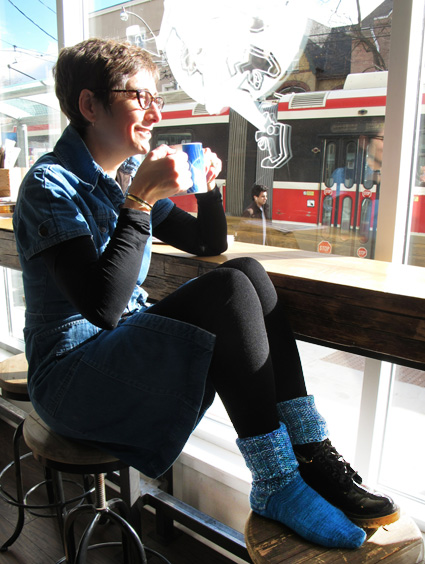
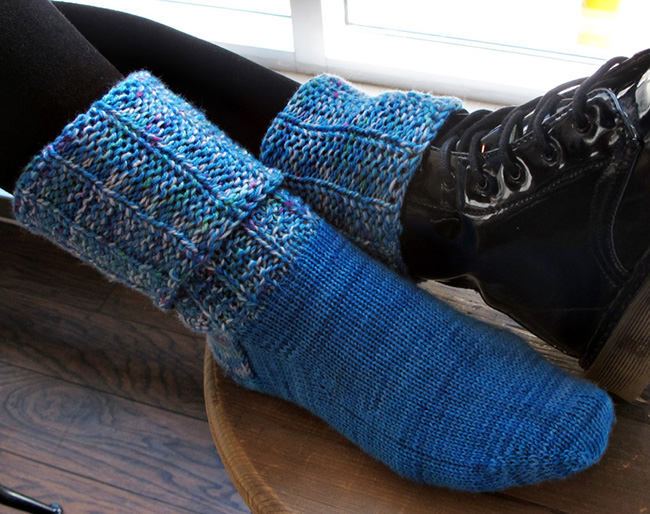
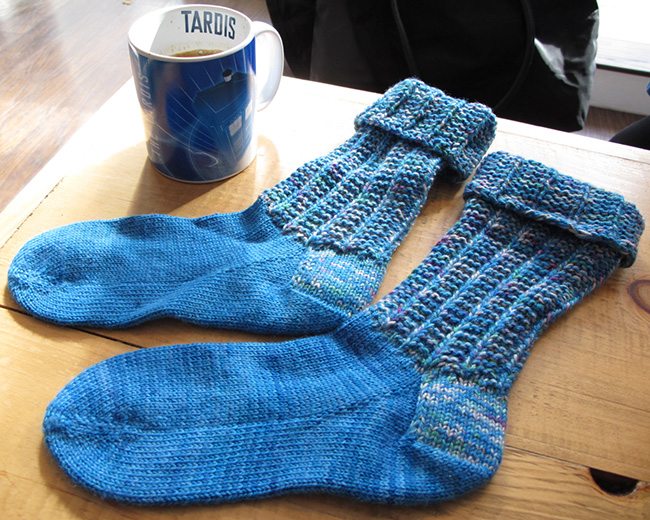
If you live in the sort of climate I do, you develop a pretty significant relationship with your winter boots: for two or three months, they’re the only footwear you use. Whether you’re going out to walk the dog, or heading to a party, or running errands or going to work: it’s your boots. Your boots go with you everywhere. Your boots help you get where you need to go, your boots help keep you safe. Your boots are your sidekick. These socks were designed to complement your boots, and keep you warm and comfy – and, as a side benefit, use up a bit of that overflowing sock yarn stash. It turns out that you use up sock yarn a lot faster if you work it double-stranded. And a double-stranded sock yarn leg makes an excellent boot cuff. Win-win! These toe-up socks start conventionally, with a single strand of yarn so that they fit into your most fashionable boots. But thanks to a simply brilliant – and brilliantly simple – suggestion from friend-of-the-show Lynne Sosnowski, I double-stranded the heel flap for extra reinforcement, and then continued the double-stranding up into the leg, working a stretchy and smooshy mistake rib-pattern. The advantage to double-stranded sock yarn is that you can work with larger needles, and you need fewer stitches – so not only do you use up more sock yarn, but the socks are faster to knit. What’s not to love? The leg is nice and long, and the pattern stitch is reversible, so the cuff can be folded over the top off your boots – for a bit of extra warmth, and to show off your handiwork. Inspired by a classic marled work sock, I’ve chosen to use a coordinating semi-solid and variegated yarn, for a nice tweedy look. This is also an excellent way to use up some of those busy variegated colorways you’ve got in your stash. If you’ve never made toe-up socks before, this is a good pattern to start with – and not only because it’s faster to knit than many! |
||
|
|
||
|
SIZE |
|
|
FINISHED MEASUREMENTS Choose a size with approximately 1 inch negative ease in the foot. The leg is very stretchy and accommodating. |
|
MATERIALS Notions |
|
GAUGE |
|
PATTERN NOTES |
|
Instructions for Jeny's Surprisingly Stretchy-Bind Off. Mistake-Stitch Ribbing Pattern Setting Up Your Stitches for Toe-Up Sock Knitting When you’re working your gusset increases, keep the increases together with the heel stitches. If you’re on magic loop or 2 circulars, the heel stitches and the gusset stitches will be together on one needle. If you’re working on DPNs, they might be on one or split across two, but either way keep the increases on the same needle(s) as the heel stitches. |
|
|
DIRECTIONS 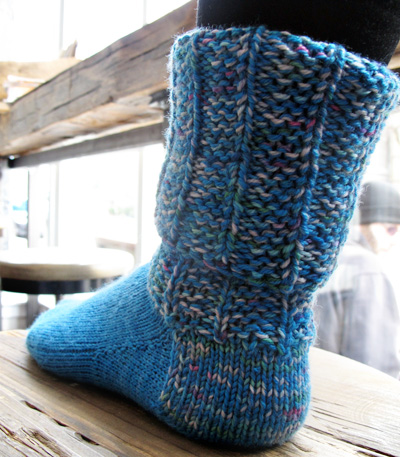 Knit 1 round, distributing stitches as you prefer. See Pattern Notes above. Place a safety pin or marker in the toe to indicate the start of the round, and a second to indicate the center of the round. Round 2, increase: K1, m1R, knit to 1 st before center of round, m1l, k2, m1r, knit to 1 st before end of round, m1l, k1. 4 sts increased. Round 3: Knit around. Repeat the above two rounds 8[9, 9, 10, 11] more times, until you have 56[60, 64, 68, 72] sts total on your needles. Gusset Round 1: M1R, pm, knit to end of the heel sts (the center of round), pm, m1L; knit to end of round. 2 gusset sts increased; 58[62, 66, 70, 74] sts total. You will have half the stitches between the two markers, and 1 st each for the gusset outside these markers. It’s easiest to work if you keep increases on the same needle(s) as the heel stitches. Round 2: Knit around. 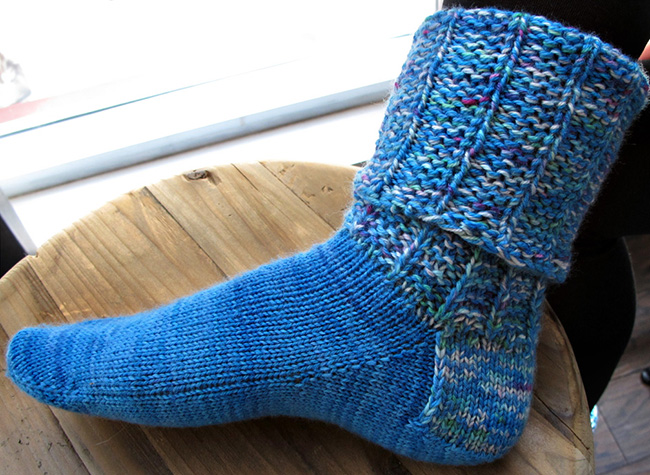
This is worked back and forth in rows the stitches between the heel markers. Short Row 1 [RS]: Knit to first marker, slip marker, knit to 1 st before second marker, w&t. Short Row 2 [WS]: Purl to 1 st before marker, w&t. Working only on the heel stitches, continue: Short Row 3 [RS]: Knit to st before last wrapped st, w&t. Short Row 4 [WS]: Purl to st before last wrapped st, w&t. Repeat Short Rows 3-4 until 10[10, 10, 12, 12] sts remain unwrapped in the middle, ending with a WS row. At this point, you can remove the heel markers. Heel Flap Join CC. The heel flap is worked with both yarns held together, on the smaller needles. Row 1 [RS]: K10[10, 10, 12, 12], knit the next 8[9, 10, 10, 11] sts together with their wraps; work an ssk on the last heel stitch (together with its wrap) and the first of the gusset stitches. Turn. Row 2 [WS]: Sl1, p18[19, 20, 22, 23], purl the next 8[9, 10, 10, 11] sts together with their wraps; work p2tog on the last gusset stitch (together with its wrap) and the first of the gusset stitches. Turn. Row 3 [RS]: Sl1, k26[28, 30, 32, 34], ssk, turn. Row 4 [WS]: Sl1, p26[28, 30, 32, 34], p2tog, turn. Repeat the last 2 rows 7[8, 9, 10, 11] more times, until all but one of gusset stitches on each side have been decreased. 58[62, 66, 70, 74] sts rem. RS will be facing.
The Leg & Cuff
You’re at the end of the instep. Change to larger needles. At this point you’ll start working the Mistake Stitch Ribbing pattern on the leg, but there is one final gusset st, at the start of the heel stitches, to be decreased away. Leg Round 2: K2tog, p1, k2, work Mistake Stitch Ribbing to end of round. 40[44, 48, 48, 52] sts. Continue, working Mistake Stitch Ribbing pattern as set until sock leg measures 10 inches, or the desired finished length. Leg should measure the same length as your boot leg, plus 5 inches for turned-over cuff. Bind off using Jeny’s Surprisingly Stretchy BO. |
|
FINISHING |
| ABOUT THE DESIGNER |
|
|
|
Pattern & images © 2015 Kate Atherley. Contact Kate |