Felting is huge. From books
to patterns to projects and blogs, it seems that
nearly every knitter has caught the felting bug.
Or have they?
Felting, in the eye of the fiber
arts purist, typically involves unspun wool/fleece
that is turned into usable fabric by repeated
stabbing with something known as a felting needle,
which could double as a torture device. Felting
needes are very sharp, come in a variety of thicknesses/gauges,
and have many barbs on them [sort of like a fish
hook with lots of points ]. Felters accomplish
their task by holding their intended target over
a felting block or form [typically foam] and taking
out their frustrations and bonding fibers together
by pushing the top layer into the lower one and
interlocking the fibers with this barbed needle.
That's not why we're here today.
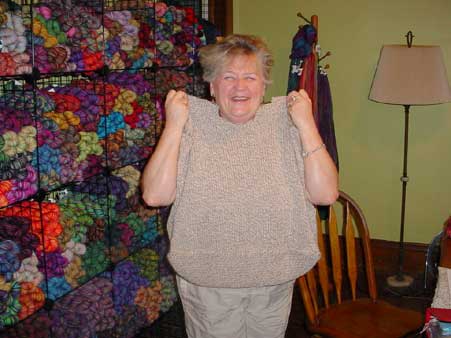 |
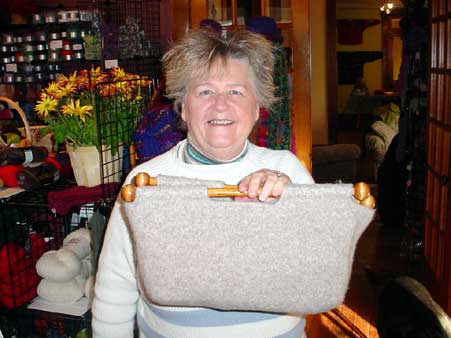 |
before |
after |
It turns out that what most
of us who are knitters are doing is technically
known "fulling", which uses spun yarns
to created a dense, durable fabric. The yarns
of choice are made from animal hair that is not
treated to be machine washable [superwash]. This
type of project is typically accomplished by knitting
at a very loose gauge, usually with a needle around
2mm larger in size than you would normally use
for the thickness of yarn [e.g. using a 6.5mm
needle with a worsted-weiht yarn instead of a
4.5mm]. This produces a completed knitting project
that is up to double in size than the ultimate
finished object. The shrinking is most often done
in a washing machine, taking advantage of temperature,
agitation and time. The warm water lifts and softens
the scales of the fiber, and the friction helps
them interlock and form a firm fabric [just like
your hair will form dredlocks with heat, moisture,
and friction]. You can also hand felt in your
sink with a good bit of effort and patience [and
tolerance for dishpan hands]. Some call the finished
fabric "boiled wool", but I don't recommend
simmering your knitting in a pot on the stove
- I've seen it done and the result is typically
misshapen, not completely felted, and the colors
bleed off in an unusual manner.
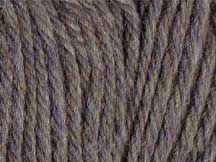 |
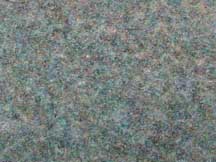 |
before |
after |
 Yarn
selection is key to the look of your finished
object. The most popular choices for felting include
yarns made from wool, mohair, alpaca, angora,
or llama - or a combination of these. Each animal
fiber lends a different characteristic to the
finished fabric, so keep your end result in mind.
Wool [from sheep] typically felts [fulls] into
the most smooth fabric, but sometimes a little
mohair or other type is a nice addition. For a
slightly feral, haloed look, turn to a yarn with
a bit of mohair in it, such as Brown Sheep Lamb's
Pride or Mountain Colors Mountain Goat. For a
supple, yet solid, fabric, try something with
some alpaca or angora in it. And for a felted
yeti look, the more llama in the yarn, the better
[Cascade Yarns Pastaza makes great textured felt].
Color and dyeing significantly
impact the end result of your felted item. White,
natural, or brightly colored yarns may go through
a bleaching process where some of the scales that
are important to the felting process are chemically
burned off. This may render the yarn unable to
felt or cause it to felt very strangely. Some
brands do have neutral shades that will felt,
but experienced felters are your best source for
"the skinny" on which brands and colors
may be good to use or avoid. Always test felt
a swatch when using multiple colors, even within
the same line of yarn. Different shades felt at
different rates, as do different brands of yarns.
 |
 |
before |
after |
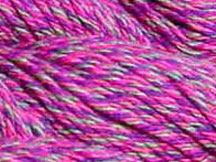
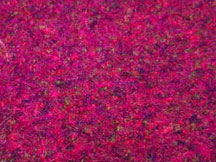
 Tweeds,
marls, and heathers produce amazing fabric, as
sometimes the felting process causes different
colors or textures to "come forward"
in the finished product. But sometimes a great
yarn, which might have amazing pops of color in
it when knitted, may blur and the color nubs may
either disappear or fall out during the washing
process.
The actual felting process -
taking your knitting for a trip to the Maytag
hot tub - is no slam dunk. In over two years of
making and felting accessory-type items [hats,
clogs, bags, scarves, vests, sweaters, and more],
I've collected a few nuggets of wisdom to share
with you here. Start with a tablespoon of soap
[any laundry soap works equally well], your lowest
water setting [smallest load], the roughest agitation
["soiled" as opposed to "regular"
or "delicate"], and a hot wash cycle.
The hot water out of your tank is typically hot
enough for our purposes, and adding a kettle of
boiling water only opens up the opportunity to
scorch yourself - in transit or otherwise. Don't
do it. Some advocate placing your knitted item
in a pillowcase [zippered protector type] or in
a mesh lingerie bag, but I abandoned those long
ago for a dip straight in the water. The bags
are recommended to keep loose fuzz from accumulating
in your washer's water pump, but there are ways
around that I'll share shortly.
About five minutes after agitation
begins, check the status of your items. They will
actually have gotten larger, as they
will have relaxed in the heat of the water. This
is perfectly normal, so don't be wigged out. Back
into the wash for another 5-10 minutes [I always
make regular checks on the progress] and you can
then stop the agitation, drain/wring out your
item, and see how it's coming along. Now is when
you can pull it back into shape if it's twisted,
or you can separate pieces that are sticking together
and shouldn't be. You may notice some color shedding,
as well - do not be alarmed. Most items will "crock"
a little bit, and reds, blues, and black are notorious.
Keep checking at 5-10 minute intervals until you
have reached felted nirvana, which may take multiple
wash cycles [do not run the entire machine cycle,
but just rerun the wash portion]. Then it's time
to tidy up before finishing.
 |
 |
If you used a pillowcase, there
will be lumps of sluffed-off fiber in the bag
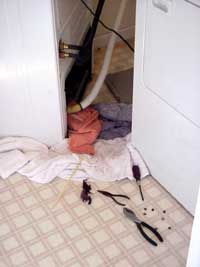
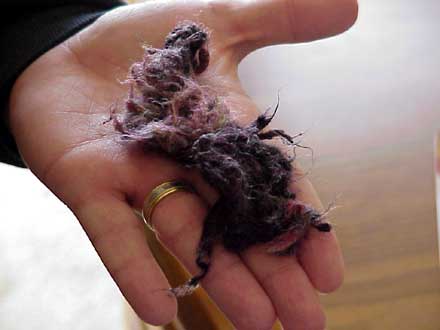
so clean up is a breeze. If you did free-range
felting like I do, you'll have woolen masses in
the tub that need to come out before the spin
cycle. Dip in with your hands or use a mesh strainer
to remove as much of the loose fiber as possible.
This is nasty stuff for your water pump and will
cause problems - we've burned out two pumps so
far with all of our felting. If some does manage
to slip through the system, it may well pass into
the pipes and be gone. If not, you'll end up with
a mass stuck in the water pump that requires removing
the back panel to your washing machine, removing
the exit hose [and fighting the water that spews
out], and extricating the wad stuck inside. I've
pulled many a wharf rat out of our trusty washer.
If you notice, during the felting
process, that a certain area isn't felting quite
as fast as the rest of the surfaces, you can spot-felt
by hand by rubbing and abusing that specific area.
This is especially common when combining different
brands of yarn in the same project [which I don't
always recommend]. Again, felting a test swatch
may well reveal any potential issues like this,
so I strongly suggest you do one when mixing and
matching yarns.
If your item is resisting felting
or stops shrinking before you'd like it to, remove
it from the washer, wring it out, and a quick
plunge into an ice water bath and back into the
tub will work wonders [especially with yarns like
Noro Kureyon, which can resist felting form time
to time]. If you think extra abrasion would help,
toss a couple pairs of old jeans [never
NEVER use towels] in with the felting
wannabe and see if that speeds the process.
Once your wash tub is free of
furry flotsam, spin out the water [take your item
OUT of the tub before this step] and get ready
for a cold water rinse. When the basin fills again,
dunk your felty goodness in the clear water and
slosh it around to remove any traces of soap.
DO NOT let it agitate in the rinse cycle, as additional
agitation will cause additional shrinkage. Then
you're ready for a final spin. Some folks don't
recommend letting your felt go through a spin
cycle, as it may leave a permanent crease in your
garment. I have never had this happen, and I spin
every item to remove as much moisture as possible.
If you don't care to risk it, roll your felt up
in a large bath towel and squeeze it to remove
the water. Then it's on to blocking.
Wet wool items, even felted
woolens, are extremely malleable. It's time to
make the most of your felted beauty and shape
it exactly as you want. Block hats over head-sized
bowls or other items that will form them as you
would like. Shape your bags with boxes for sharp
corners or shove them full of plastic grocery
bags to achieve the perfect style. Stuff your
slippers or clogs with plastic cups for a round,
attractive opening. And let them dry completely
[as much as two days, depending on the weather]
before removing the blocking forms. Finish with
a light brushing or a trim with scissors or a
beard trimmer [to remove excess hairiness] and
you've finished your own amazing accessory.
I asked several knitters why
they feel drawn to felted projects, and the most
common responses centered around how it was new
and different and that it allowed them to make
something both decorative and very useful that
typically garnered comments and compliments. Felted
projects are uniquely you - from color to size to
embellishments and more. And the process is enticing - both
the knitting and the felting of the knitted item.
One even mentioned that she was drawn to the warmth
and durability of the finished garment, and that
she could make something so wonderful for a fraction
of the prices seen in stores.
Why not try it for yourself.
Come on in, the water's fine!
Resources:
Cranley, Maddy [1996]. Fulling
Around With Felting: A Maddy Laine Handbook.
Penguin Lane Press: Pointe Claire, Quebec.
Galeskas, Beverly [2003]. Felted
Knits. Interweave Press: Loveland, CO.

