Many of us prefer Kool Aid to chemical dyes
because it is safer, requires no extra equipment
and it's sold at the corner grocery here in
the US. Besides, there's just something fun
about fruity smelling roving and yarn, and
it will dye any protein fiber. However, when
dyeing any larger amounts of yarn or fiber,
it can get pricey. Food color drops, and Wilton's
paste are also used for dyeing wool, but how
do you know what color you will get? With some
time, testing and a little experimentation,
you can dye your fibers almost any color you
could want. From blinding hot pink, to subtle
forest greens, all from those magic packets,
and little bottles.
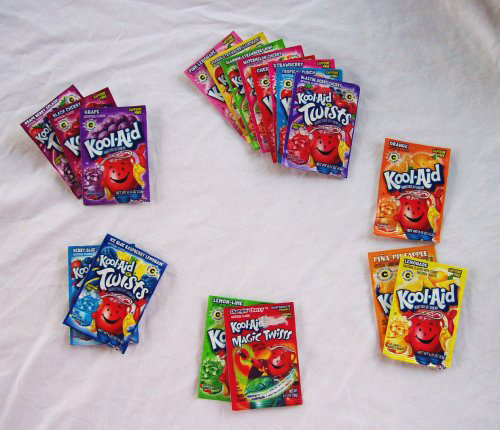
Kool Aid is colored with food color in powder
form, and also contains citric acid for flavor.
The colors in all the different flavors I could
get in my area are made up primarily of these
three: red #40, blue #1, and yellow #5.
I found eight flavors of Kool Aid, which were
all the same color, red. They were all colored
only with red #40. But how can Pink Lemonade
be the same color as Blasting Berry Cherry?
One is dark bright red, and one is a subtle
pink. The difference is actually in value,
that is to say the amount of red #40 in each
packet. So the dark reds, such as Blasting
Berry Cherry, Strawberry, Tropical Punch, and
Cherry, have more red #40, and the pinks have
much less red #40. What this means is that
if you want to dye five pounds of wool pink,
then it might take as many as 50 packets or
more of a pink color Kool Aid, where as it
might only take one to five of the dark reds.
A sobering thought, when you consider the extra
yarn you could afford by saving all that money.
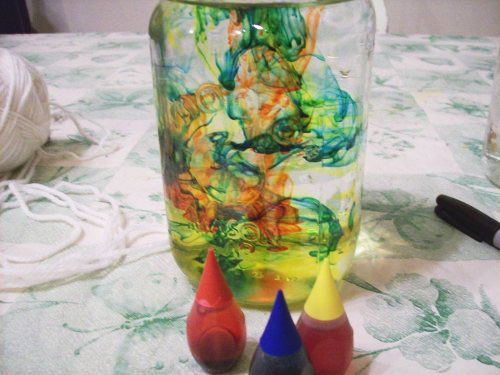
However, there are also food color drops,
and are more concentrated than their fruity
flavored rivals. There are two kinds available
in my area. They are the regular food color
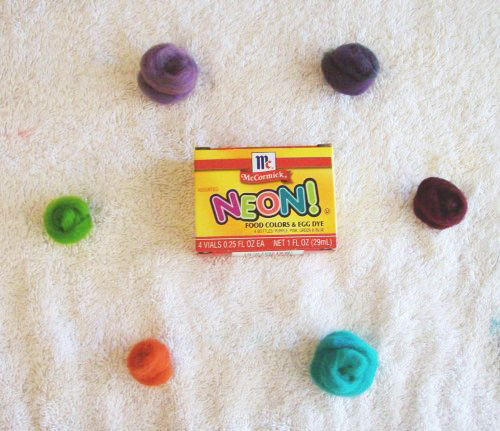
drops, and the newer NEON food color drops.
Here is a break down of of which colors are
in each color.
In the regular box,
green = blue #1 + yellow #5
red = red #40
blue = blue #1 + red #3
yellow = yellow #5
NEON food colors:
Pink = red #40, possibly also red #3
Yellow-green = yellow #5 + blue #1
Blue = blue #1
Purple is red #3 + blue #1
This is at least what I think is in each color,
since they don't say what is in each bottle.
So for about $3 to $5 you can dye more wool,
and have a much better variety of colors, especially
if you use Kool Aid and food colors together.
The most useful colors will be regular red,
NEON blue and regular yellow.
So, now we need to consider how colors relate
and mix together to make the colors we want.
Primary colors, as I'm sure most of us know
are red, yellow and blue. NEON blue, regular
red and regular yellow are all primary colors.
They are blue #1, red #40, and yellow #5. To
start with, we will work with the colors that
only contain one food color, and avoid regular
blue, purple and yellow green in the NEON box,
because they contain more than one color. So
now that we have three primary colors to work
with, we can make the secondary colors.
Yellow and blue makes green, Ziplock told
us so many years ago. Red with blue is violet,
and yellow plus red makes orange. Orange, violet
and green are the secondary colors.
So now that we've had a quick little primer
in color theory, we can work on making our
own colors. Here is a short run-down of the
common Kool Aid colors, and how to make them.
For 1/2 to 1 oz of fiber (to get the same result
as the one packet of drink mix for the same
amount of fiber).
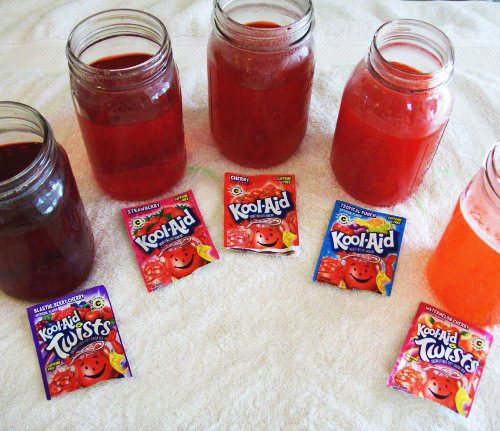
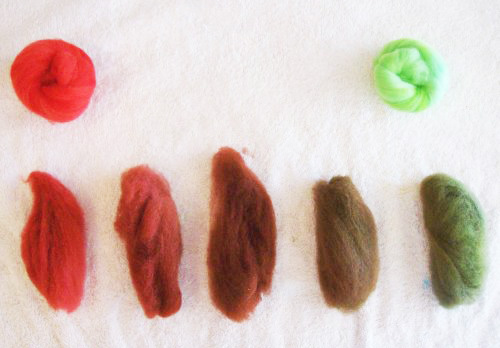
Reds and Pinks
5 drops regular red - light pinks (Pink Lemonade)
10 drops - darker pinks (Slammin' Strawberry
Lemonade)
15 drops- light reds (Watermelon Cherry)
30 drops- medium red (Strawberry, Cherry and
Tropical Punch)
50 drops - dark red (Blastin' Berry Cherry)
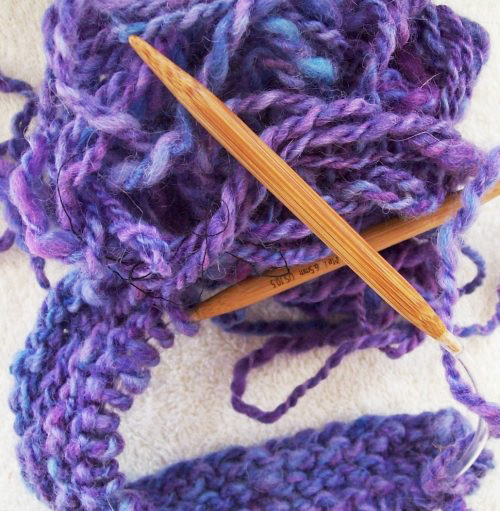
Violet
5 regular red + 2 blue - a bluer violet (Grape)
5 regular red + 1 blue - a red violet (Grape
Berry Splash)
Note: Secondary colors
tend to separate during the dye process,
particularly purple. You will have best results
if you dye the fiber pink or red, and then
overdye it with blue. Still the hand-painted
look can be very attractive. Purple is a
challenge. It can be done, but is a rather
complex process, and even the Kool Aid separates
a little.
Blues
6 drops of NEON blue is the same as Berry Blue
2 drops of NEON blue is the same as Ice Blue
Raspberry Lemonade.
Greens
NEON: 4 yellow + 1 blue - lime green (Lime
Green / Lemon Lime Kool Aid)
Regular: 3 drops green + 2 drops yellow – lime
green (Lime Green/Lemon Lime Kool Aid)
2 NEON blue + 1 regular yellow (Changing Cherry)
3 regular blue + 1 regular yellow (Changing
Cherry)
Yellow
1 drop of regular yellow (Lemonade)
Orange
4 regular yellow + 1 regular red (Orange)

The downside to using food color instead of
Kool Aid is that the Kool Aid smells better
than vinegar. Some colors of Kool Aid are the
best value, such as the reds, because they
are more concentrated. You can dye some fiber
in Kool Aid, and then after all of the dye
has been absorbed you can reuse that water
quite a few times without adding more acid.
You can also purchase citric acid in many health
food, and gourmet stores, or buy the invisible
Kool Aid and use that for the acid, as even
for large dye batches a few packets will be
plenty. Doing samples, and dyeing small batches
can be fun, and if you keep some basic records
of your recipes, you can get a wide range of
results that are easy to duplicate.
So now that you can make all these colors
from those little bottles, what about more
subtle colors? Not everyone wants neon colored
socks after all. The final piece of the color
theory puzzle are called compliments. These
are the colors that are across the color wheel
from each other. Yellow is across from violet,
green is across from red, and blue is across
from orange. Notice that there is always one
secondary color, and one primary color. When
you add a compliment to the dye in the right
amount, it will have the effect of damping
down the brightness of the strongest color.
This color wheel was made by mixing compliments
together, and you can see the resulting tones.
Beautiful, rich and lovely, colors that anyone
would want to wear or use.

So what we really have done, is mixed one
primary with one secondary, and that is an
easy enough thing to do. What you are really
doing is combining the three primaries in different
amounts. If there is more red and less blue
and yellow, then the color should have a reddish
cast, more yellow, then a yellow tone, and
so on. The main technique though is merely
combining all three colors in various amounts
to create new colors. So you can not only do
blue and orange, but blue and red orange or
blue and yellow orange. The sky is the limit,
and you can make any color you want with food
colors.
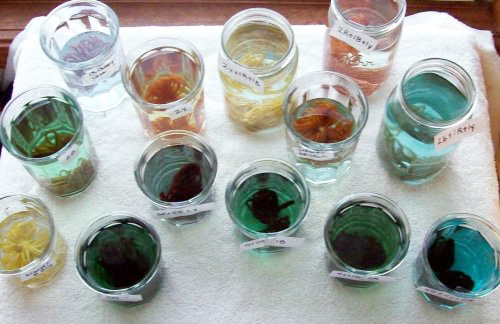
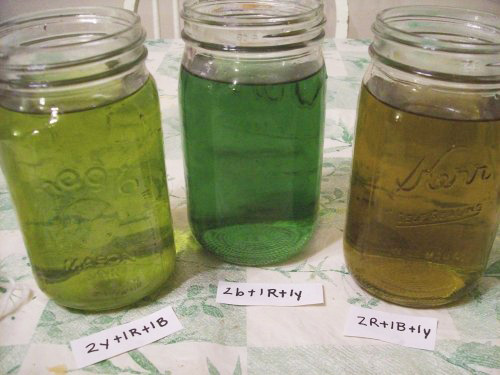
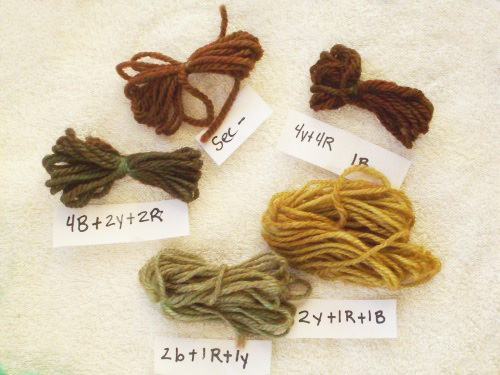
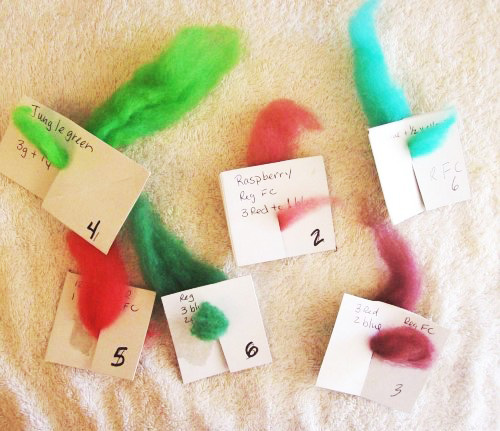
In this example, we have
9 jars, fill each one with cool water, and
one tablespoon of vinegar. Now we will add
the food color drops. Add the number of drops
indicated of each color in each jar. This example
clearly shows how the dye progresses from red,
to brown, and finally to green.
From left
to right:
Jar 1: 5 red, 1 green
Jar 2: 5 red, 2 green
Jar 3: 5 red, 3 green
Jar 4: 5 red, 4 green
Jar 5: 5 green, 5 red
Jar 6: 5 green, 4 red
Jar 7: 5 green, 3 red
Jar 8: 5 green, 2 red
Jar 9: 5 green, 1 red
Submerge a small amount of wool, and microwave
on high for two to seven minutes. Keep reheating
as needed, keeping the water very hot until
all the dye is absorbed.
Our samples show clearly that the red drops
are a bit stronger than the green drops. Jar
6 or 7 is where the middle of the range is,
that is to say the ratio where the red and
green make a good solid brown. If the red and
green were of exactly equal strength, then
5 red and 5 green would be the balanced brown.
You can make this whole progression with any
color you like to get just the right color
you want for a special project. First you decide
which color you would like. Perhaps you would
like a nice rusty rose color. Since you want
the dye to be light, then you will not want
to make a super strong dye bath. You will also
want to begin with some red food color, and
slowly add small amounts of green, or vice
versa.

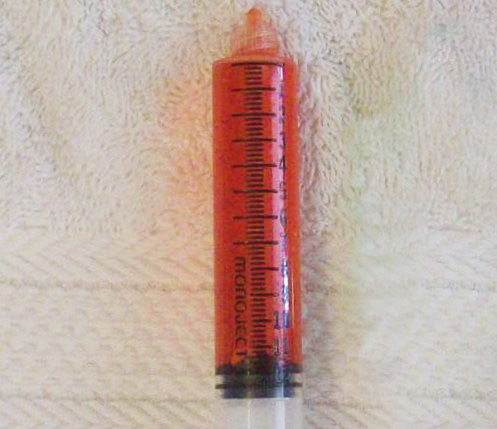
Often you need to add less than the equivalent
of one drop, so what I do is add one drop to
a cup of water and then with a syringe purchased
for this purpose (needle removed of course)
I add the primary color to the secondary color
at 12 ml at a time until I have something close
to what I want.
I dye a small sample of yarn or fiber and
see if I am getting the color I want. Too brown,
means add less of the primary, and too bright
means add more of the primary. Too dark means
that you have too much dye in the bath.
All other colors and their compliments work
the same way. It is necessary to do the same
test to find the middle or brownest tone mixture
with each color group. You can also subtly
alter the colors by using colors like yellow
green and red violet.
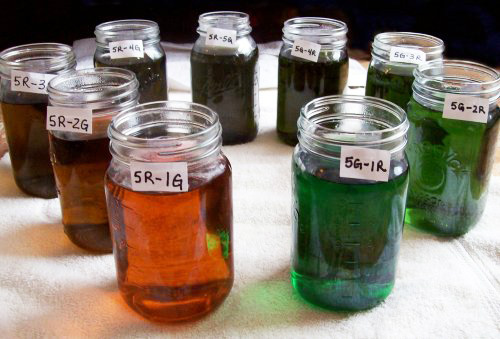
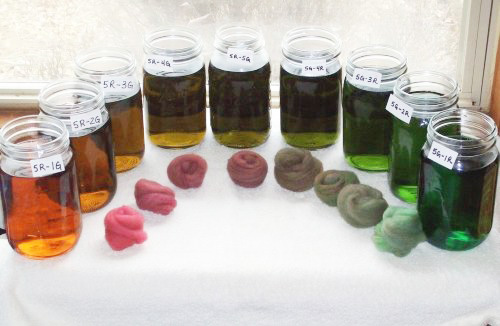
The combinations and resulting colors are
almost limitless. The best part of all, is
that these techniques will also work with almost
any type of dye materials, I have personally
used them with great success with Jaquard dyes.
There are also recipes on the backs of the
boxes, and these are a great place to start
as the colors are stunning and easy to mix
following the instructions. All the colors
I made were beautiful and easy to mix, although
some of them took quite a while to dye to
that dark consistency.
Now that we have a pretty good handle on how
colors mix to make new colors we can try the
ever challenging purple.
Purple is a difficult, because red and blue
are absorbed at different rates, and also at
different acid levels. So if you mix up a beautiful
purple dye bath and plonk your yarn or fiber
in, it will in all likelihood come out looking
hand-painted, blue and pink with some purple
places. This is very beautiful, so don't be
discouraged if you get this, it will knit or
spin up to be quite lovely. To get a more solid
purple, there are several things that will
help.
* Add a teaspoon to a tablespoon of salt
to your water. This softens the water and will
help the dye adhere more evenly.
* Start with less acid, depending on the
amount of fiber, perhaps only a teaspoon or
tablespoon of vinegar at a time. The reds will
absorb leaving the blue behind. Keep increasing
the acid one tablespoon at a time until all
the blue is also absorbed. For dark purples
this might take all day. Be patient, and give
it time to absorb the blue, it will eventually.
* If using a product that
has red #3 this is even more important as it
absorbs much faster than blue and at a much
lower acid level. Red #40 is less of a problem,
you might work with it first, and then once
you can get a good result consistently, then
try the red #3. They react similarly, but the
reaction is much more pronounced in red #3.
* Mix your dyes in cold
water, and soak your materials in cold water
as well. Once your fiber or yarn is well soaked,
lay it in the dye bath and heat slowly.
* Try dyeing the yarn or
fiber pink or red, rinse, then spin dry or
roll in a towel. Once the fiber has most of
the excess water out, and is cooled, re-dye
it in blue.
*Finally, if you can avoid
accidentally felting, you can remove the fiber,
and stir the dye every few minutes. This usually
works well for yarn, because I don't usually
mind if it felts a bit. Rovings and other loose
fibers are not easy to remove for stirring
without serious side effects, so use this method
with caution.
Experiment on pieces of left over yarn or
fiber, and document your results in a small
notebook. The only time you don't make careful
notes of the colors used, will be the time
you make the most amazing color you've ever
made, and you will not ever be able to create
it again. So, write it down.
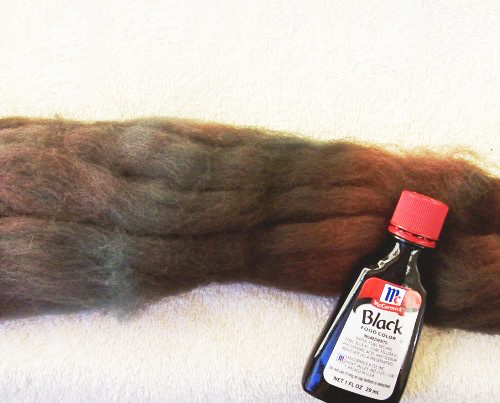
Finally, you can use ANY food coloring product
with these methods, and with some experiments
and careful note taking, you can make almost
any color you like. The only color I have not
made is a pure black, because this color tends
to separate like crazy, but again, the effect
is stunning.
Once you have done your dye testing, break
a piece off, and cut a slot in a piece of cardboard
(I keep all the tags from Christmas and reuse
them). Write your recipe on the card, and secure
the sample in the slot. The extras are wonderful
for needle felting or a handspun color change
yarn. You know, Christmas tags will be on sale
in a few weeks, so don't forget to buy the
old fashioned cardboard kind. I buy a box or
two each year for 75% off, and these work perfect.
Business cards or even card stock are also
great.
To make recipes for all the choices in food
color would be difficult to put all in one
article, however here is some basic information
on Wilton's paste, and how you can use it instead
of food color drops. I have listed the colors
contained in each, largest amount to the smallest.
Primary
Colors (meaning only one color is
used in the mixture)
Lemon Yellow (yellow #5)
Sky Blue (blue #1)
No Taste Red (red #40)
Greens
Teal (blue #1, yellow #5)
Juniper Green (yellow #5, yellow #6, blue #1,
red #3)
Reds and Pinks
Pink (red #3, yellow #5)
Rose (red #3, yellow #5) note same colors as
Pink, but a stronger concentration.
Red (Red #40, Red #3, yellow #5, yellow #6)
Burgundy (red #3, yellow #6, blue #1)
Blues
Delphinium Blue (blue #1, red #3, yellow #5,
yellow #6)
Royal Blue (blue #1, red #3)
Black (blue #1, red #3, yellow #5, yellow
#6)
Wilton's also has some color mixing information
on
their website. There are 28 colors in all,
and I have only included the information I
read off the jars I happened to have on hand.
I hope this helps you to make all those colors
of the rainbow that are floating around in
your head. |