|
|
 |
 |
 |
Winter is coming, and depending on where you live, you may need
a pair of really warm socks to keep your lower limbs cozy and
root you in a sense of well-being. These socks are warm, mysterious,
and can use up lots of leftover sock yarn, gathering up happy
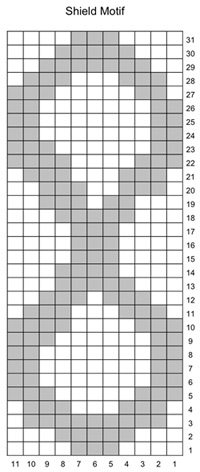
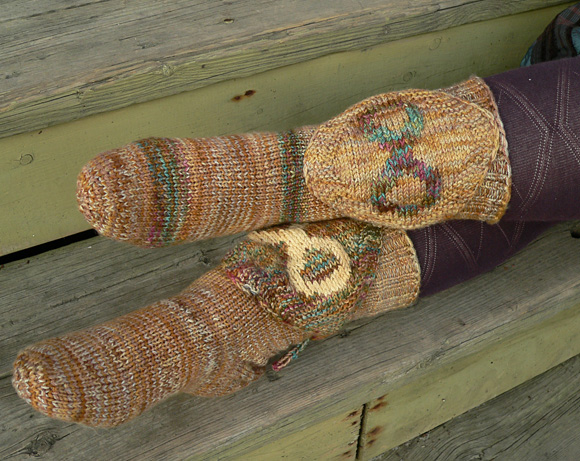
sock memories. A separate diamond-shaped shield with a duplicate-stitched
image is sewn to the leg and tied in the back. You can use the
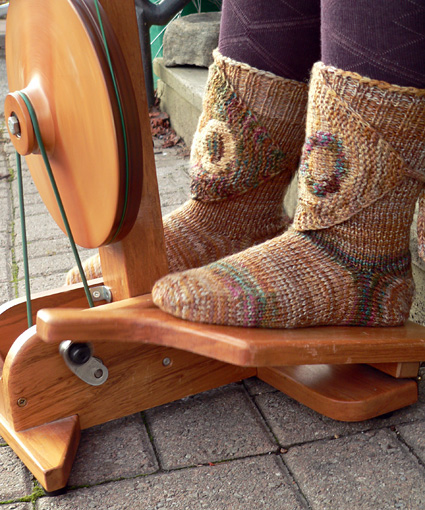
infinity symbol I chose, or anything that sparks your heart. The bronze-colored sample shown at left uses the extremely
simple method I present in my latest
book, Personal
Footprints for Insouciant Sock Knitters. |
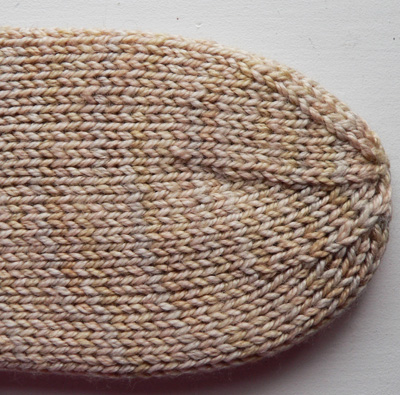
This new method allows socks to be worked 100% in the round (not a purl in sight, unless used as a design element!) which, along with the ease of knitting and perfect fit, makes this method unique. For those who prefer a traditional-style top-down heel-flap sock, I've provided a pattern below [the cream-colored sock] with a few unique twists that improve the fine points of a sock: one is an ssp decrease instead of a p2tog in the heel turn, which I introduced in Socks Soar on Two Circular Needles, but which so far as I can tell has not been widely adopted in the general sock world. It creates a smooth surface on the heel turn which is a lovely thing to behold, instead of the cross-hatched version everyone else uses (and it probably wears better too). The other improvement is the ssk line on the gusset. The pattern instructions below ask you to knit the former ssk through the back loop on "plain" rounds, which takes the wobble out of this line. If you'd like to also snug up your ssk line to match your sleek, smooth k2tog line perfectly, watch my YouTube video to learn a technique I call "Hungry Stitch". This common-sense technique can be used any time you need to snug up loose stitches, and works like a charm.
|
|
|
SIZE
|
|
FINISHED MEASUREMENTS |
|
MATERIALS Light version shown below Notions |
|
GAUGE |
|
PATTERN NOTES |
|
You must start with the Synergy Shield itself, because its vertical height lets you know how tall to make the leg of your socks. You’ll knit about 5 inches of three-stitch-I-cord, and then begin increasing a few stitches in from each edge, working in garter stitch. After about an inch, you’ll begin the stockinette oval that fills shield’s center, keeping the edges in garter stitch. This oval becomes your duplicate stitch canvas. Alternatively, you could work an image in intarsia. To find images, browse stitch dictionaries, convert cross stitch designs, or draw images on graph paper. Because of the way the shield stretches around the leg, when worn your stitches are pulled nearly square, like graph paper, so what you draw will closely resemble your stitching. Work shield increases as instructed until you can hold the needle holding the stitches along the center front of your leg and pull the corner with the I-cord tie to the center of the back. This half diamond should stretch from center front to center back. Write down the number you increased to so you’ll remember to make the second shield the same size. Then begin decreasing as instructed. |
|
|
DIRECTIONS 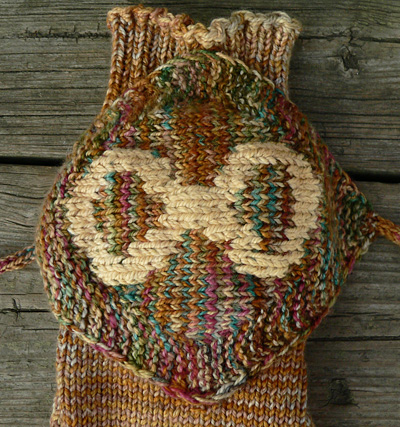
Start: (Worked in Bronze, double-stranded like the socks) Cast on 3 sts and knit 5 inches of I-Cord, ensuring that when you’re done you’re in position to work the RS. As you’re working, slip all sts with yarn in front, as if to purl. Then move yarn to back to begin knitting. Row 1 [RS]: Sl1, kfb twice, k1. (5 sts) 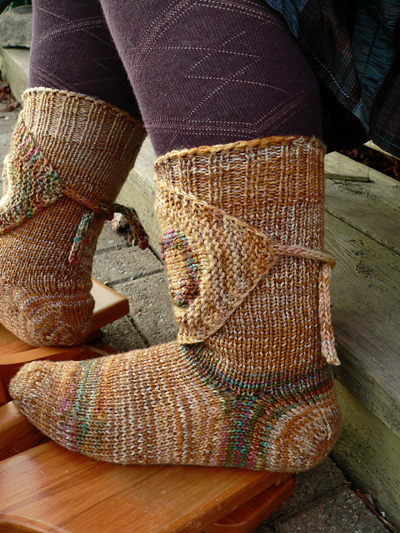
Next part:
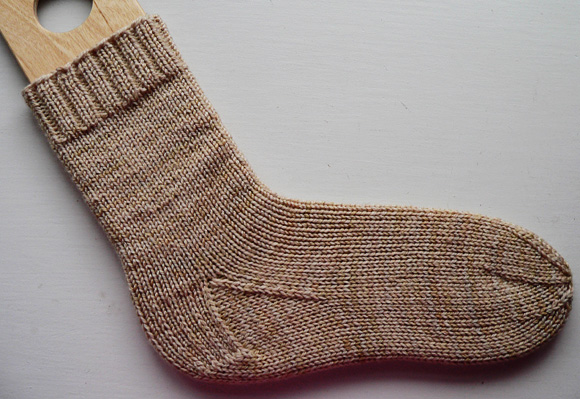
Cat's Simple-but-elegant top-down socks Cuff: Leg: Heel flap: Heel turn: Row 1 [RS]: Knit 13[14, 15], k2tog, k1, turn. 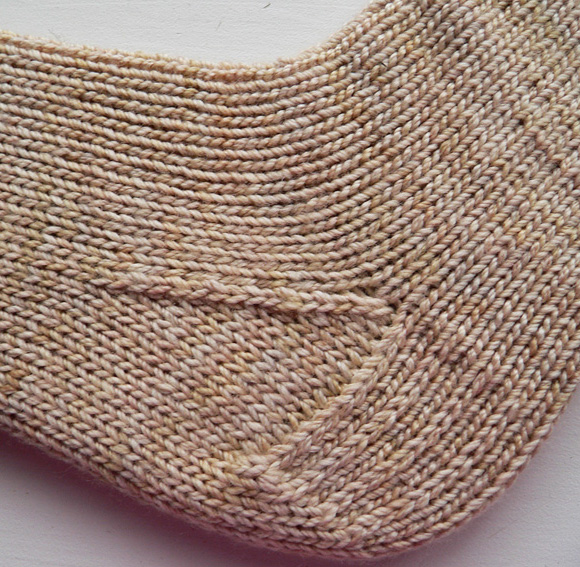
Pick up and knit 1 st in each loop along adjacent heel flap edge, then 1 st tbl in intersection—12[14, 16] sts total along edge—place first marker, k 20[24, 28], place second marker, pick up and knit 1 st tbl in intersection and then 1 in each loop along adjacent heel flap edge—12[14, 16] sts total along edge—knit to start of round marker. Total sts—58[66, 76]. Round 1: Knit to 2 sts before first marker, k2tog, k to second marker, ssk, k to end of rnd—2 sts decreased. Round 2: Note: knitting the ssk (which was worked in round 1) through the back loop will take the wobble out of your ssk line. If you’d like to also know how to tighten up your ssk’s using the Hungry Stitch, watch my Youtube video. Knit to second marker, k1tbl, k to end of Round. Repeat Rounds 1 and 2 until stitch total is reduced to 42[48, 54].
 Work even until when you try sock on -- it needs only another 1.25 [1.6, 2] inches to reach desired foot length. Toe |
|
FINISHING |
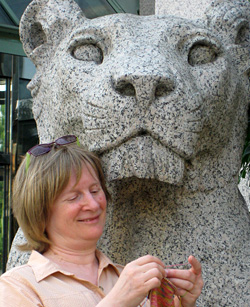
| ABOUT THE DESIGNER |
|
|
|
Pattern & images © 2009 Cat Bordhi. Cat's headshot courtesy Clara Parkes. Contact Cat |