|
|
A Motive for Motif
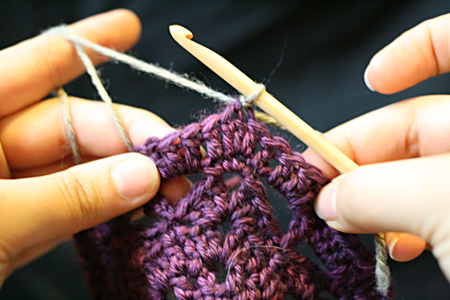
Are you hooked on grannies yet? We love them because they're small, and quick, and portable. You can make dozens and stuff them somewhere for a rainy day when you can join them into an endless variety of projects. But while it's very hip at the moment to be square, grannies are only the beginning when it comes to motifs. A motif is any small knitted or crocheted shape that's created to be used in some larger project. Lucky for us, crocheted and knitted motifs play quite well together. As we discussed in the last issue, a granny "square" is actually a motif crocheted in the round. Its squareness is created by having four even sets of increases. Using the same concept, you can create geometric shapes with any number of sides, just as long as you "stack" the increases evenly--that is, place all the increases on top of one another creating clear corners. Our project this time, the beautiful Apiculturist Scarf, designed by Miriam, combines both knitted and crocheted hexagons: six-sided motifs. Both the knitted and crocheted "hexes" are worked from the center out so they can be joined evenly. There are several ways that motifs can be joined together. We're going to cover a couple of basic ones: a slip stitch join, a zig-zag chain join (that's the technique Miriam used to join the motifs in the scarf), and joining as you go. Slip Stitch Join
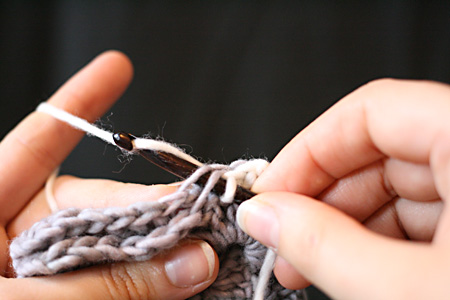
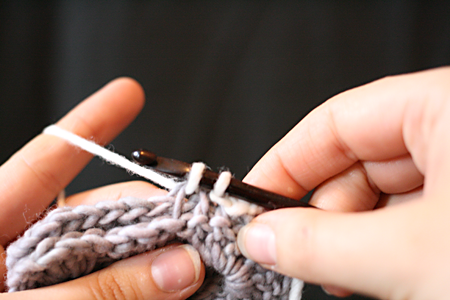
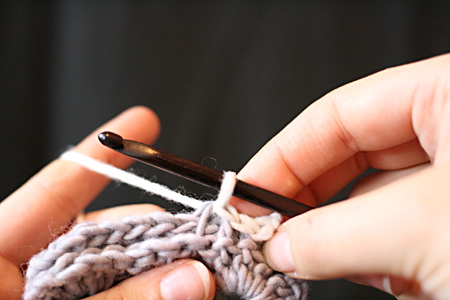
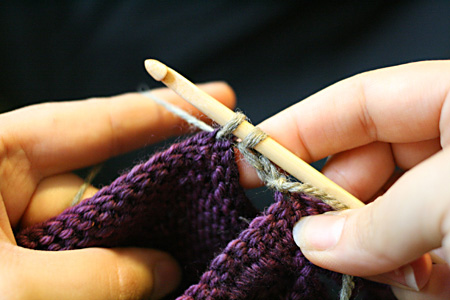
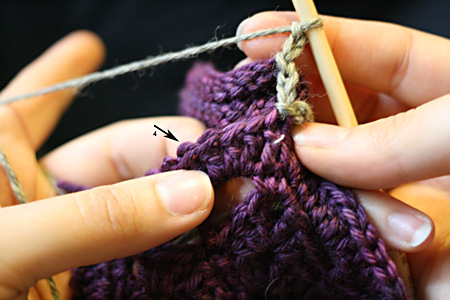
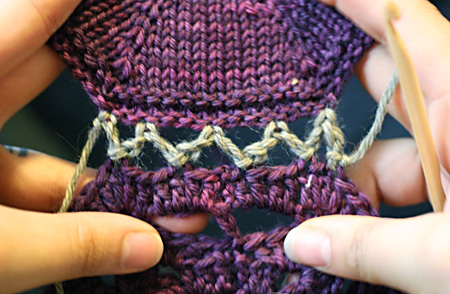
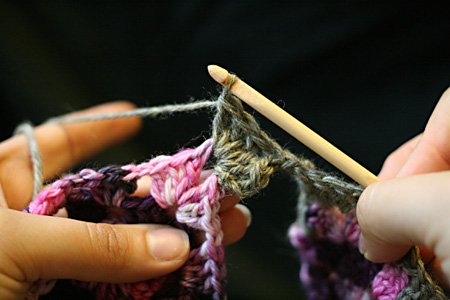
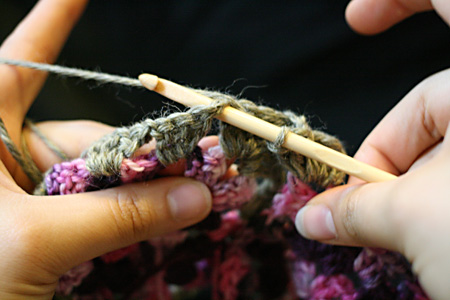
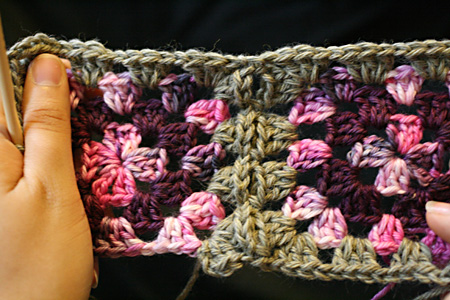
Often, when joining squares, you'll make strips of squares first and then slip stitch the strips (or columns) together to make a larger project. You can also seam with a single crochet instead of a slip stitch. It gives you a much more prominent ridge where the two pieces join which adds an interesting design element, and a little more stretch to the join. Zig Zag Chain Join Hold your motifs wrong side together. The motif closest to your body will be the Front Motif, the other will be the Back Motif. Here's how we joined the hexes for the Apiculturist Scarf:
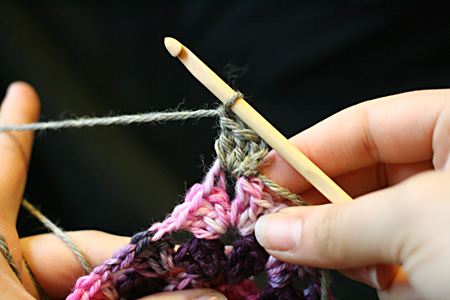
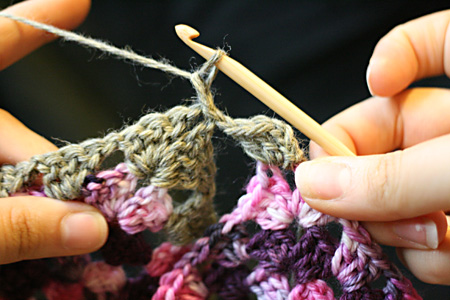
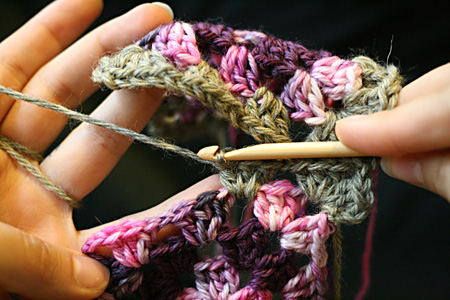
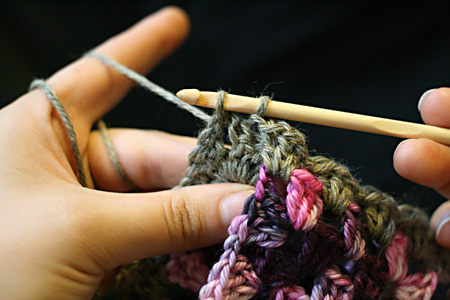
You can vary both the length of the chain between the pieces and the number of stitches between each jump of the zig zag to give you more or less open look. Join As You Go To join as you go, you'll need one completed four-round granny square. Make a second square and finish the 3nd round.
Variegated Behavior
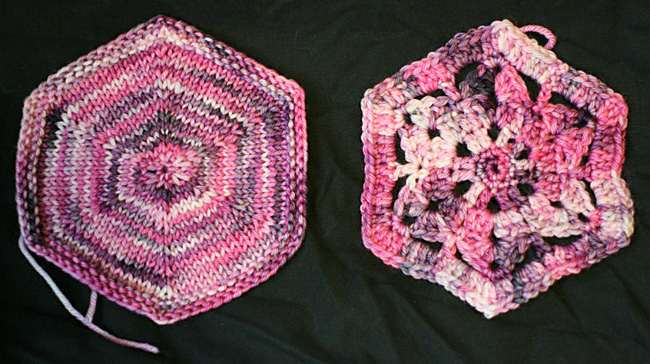
With knitting, the color runs follow the line of the rounds (in this case they swirl around the center). But with the crocheted motif we get segments of color that look much more speckled. This happens because of the way crochet stitches use yarn. The different heights of crochet stitches also help to break up variegation patterns. Is your yarn in a twist? When you work knit stitches, you are reinforcing the S-twist because the action of creating stitches keeps that clockwise motion going. When you crochet a stitch, you are effectively un-twisting an S-twist yarn yarn putting a counter twist in the fiber when you make the stitches. Most of the time, the effect will be so subtle that you won't notice, but some loosely spun yarns can get un-twisty especially if you have to rip and rework a few times. What can you do? Designer Doris Chan has cleverly discovered that pulling from the top or the bottom of a yarn ball can twist the yarn clockwise or counter clockwise. Look at the ball and see how it was wound. If you're crocheting an S-Twist yarn, pull from the clockwise end of the ball to help counteract the untwisting of the stitches. |
|||||||||||||||||||||||||||||||||||
| |
|||||||||||||||||||||||||||||||||||
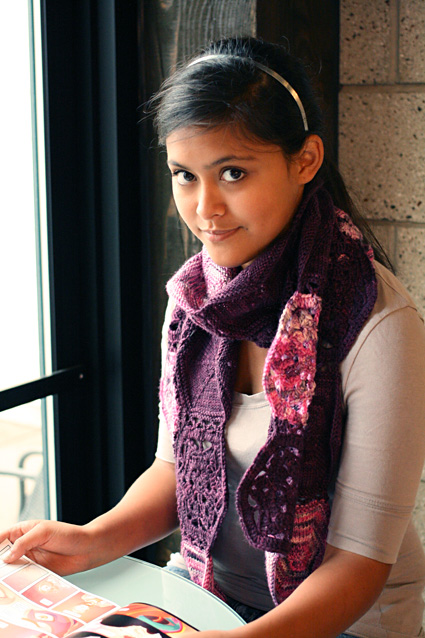
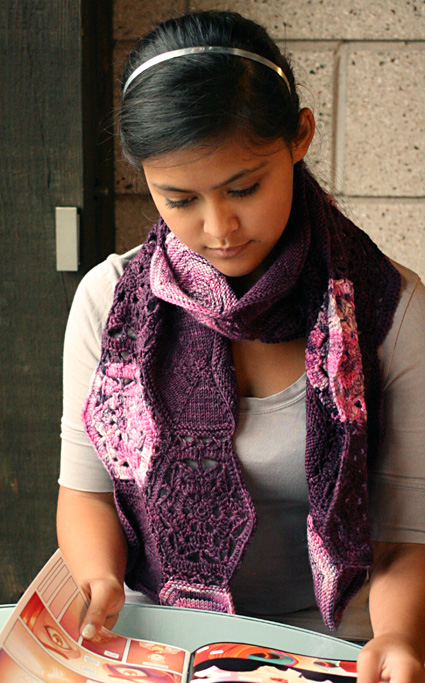 by Miriam Felton a·pi·cul·ture: noun Miriam dreams of owning some land, raising vegetables, chickens, and bees. She pours over books of chicken breeds and heirloom seed catalogs dreaming of the day she can build her little self-sufficient farm. And what farm would be complete without bees to pollinate the crops and make delectable honey. The hexagonal motifs in this piece are reminiscent of honeycombs. These hexagons can be arranged in a multitude of ways! Don't feel limited by the diagram or the scarf shape if you get a creative urge to do something different! The wonderful thing about motifs is that once you've made a bunch you can lay them out and play around with what you want to make. For this project we made a scarf, but you could easily add another column or two of motifs and make a wrap, or use this layout and make a triangular shawl. You could make a lot of motifs and end up with a blanket too! |
|||||||||||||||||||||||||||||||||||
|
|
|||||||||||||||||||||||||||||||||||
|
SIZE |
|
FINISHED MEASUREMENTS |
|
MATERIALS Notions |
|
GAUGE |
| 24 sts/32 rounds = 4 inches in stockinette stitch 12 dc = 2 inches |
|
PATTERN NOTES |
|
Chain: ch You can find hexagonal graph paper for plotting your design layout before making all the motifs here. Adjust your hook or needle size so that both knit and crochet motifs block to the same size (your knit motifs will probably have a larger difference after blocking than the crochet motifs, but both will benefit from a good soaked blocking). Disappearing Loop method for a circular start: Instructions can be found here. Here's an alternate layout if you wish to have a triangular shawl instead. You would need 40 motifs to work the triangular shawl layout as shown. How you divide up these 40 into knit and crochet is up to you. If you want a more open shawl, work more crochet motifs. If you want a more solid shawl, work more knit motifs. The finished shawl in the layout below would be about 78" across the wingspan. 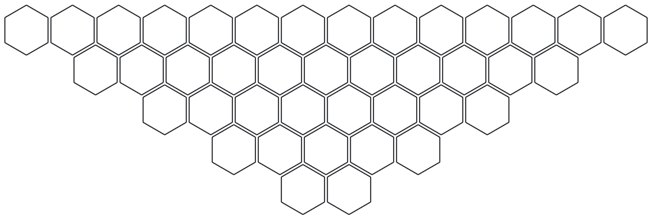
|
|
DIRECTIONS 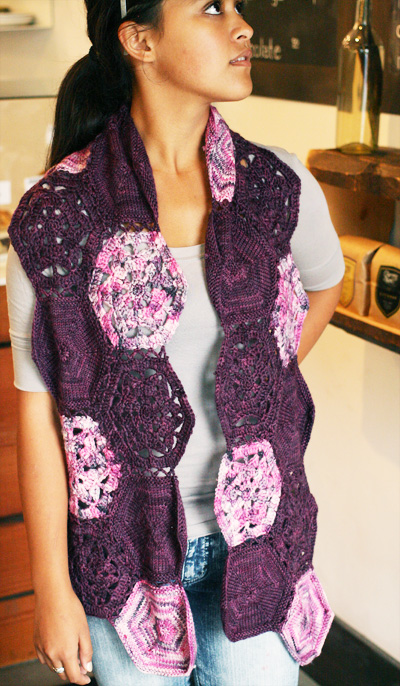
For Scarf, make 7 in MC and 4 in CC. Round 1: Ch2, 6sc in first chain, sl st in first sc of rnd. Fasten off. Weave in ends. Knit Motif: Cast on 6 sts using the disappearing loop method; distribute sts across needles as you prefer and join for working in the round. Note: the single knit stitch between the two increases is the "corner stitch", as identified in the joining instructions. Round 1: Kfb 6 times. 12 sts. BO purlwise. 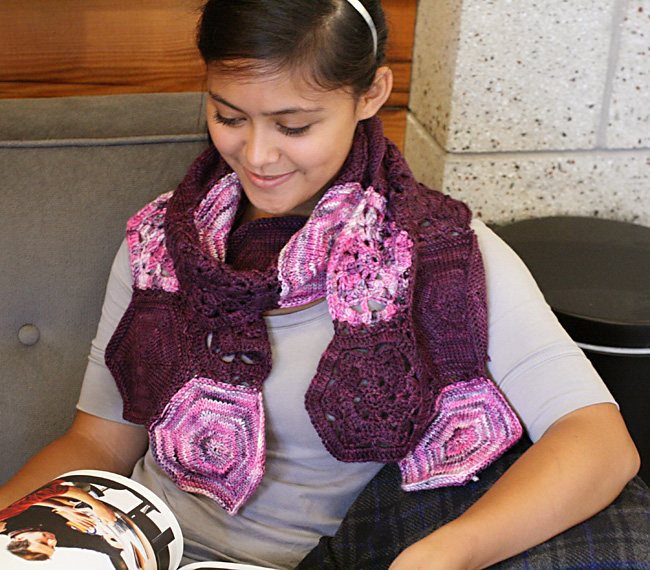
|
|
|
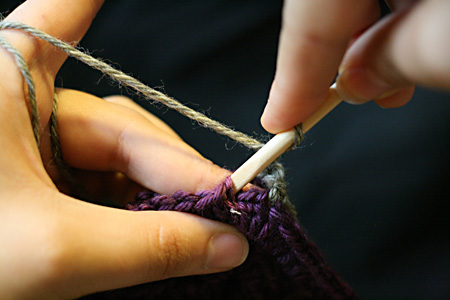
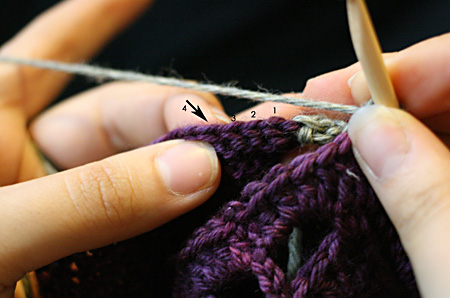
FINISHING Joining: Make a slip knot on your hook, and sl st in the corner stitch of the Front Motif. Ch2, sl st in the corner stitch of the Back Motif. Ch2, skip 1 st on the Front Motif and sl st in the 2nd st, (ch2, skip 3 sts on the Back Motif and sl st in the 4th. ch2, skip 3 sts on the Front Motif and sl st in the 4th) 3 times, ch2, sl st in the corner stitch of the Back Motif. Fasten off. Join all motifs in each column, then join the columns together in the same way. You can block again if desired, or you can just spray the joins with water and stretch them out a bit so they relax. Weave in ends from the joining. |
| ABOUT THE DESIGNER |
 Amy and Miriam both have patterns on ravelry.com. |
| Pattern & images © 2014 Amy O'Neill Houck + Miriam Felton. Contact Miriam |