Calash, a free knitting pattern from Knitty.com. Free knitting pattern for a DETAILS HERE.
INTRODUCTION
Calash
 by Heidi G. Schultz

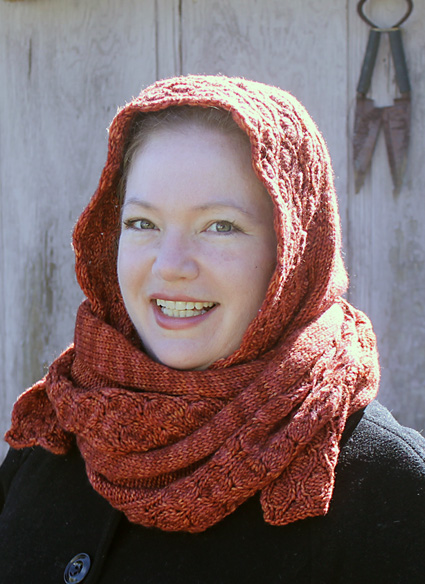
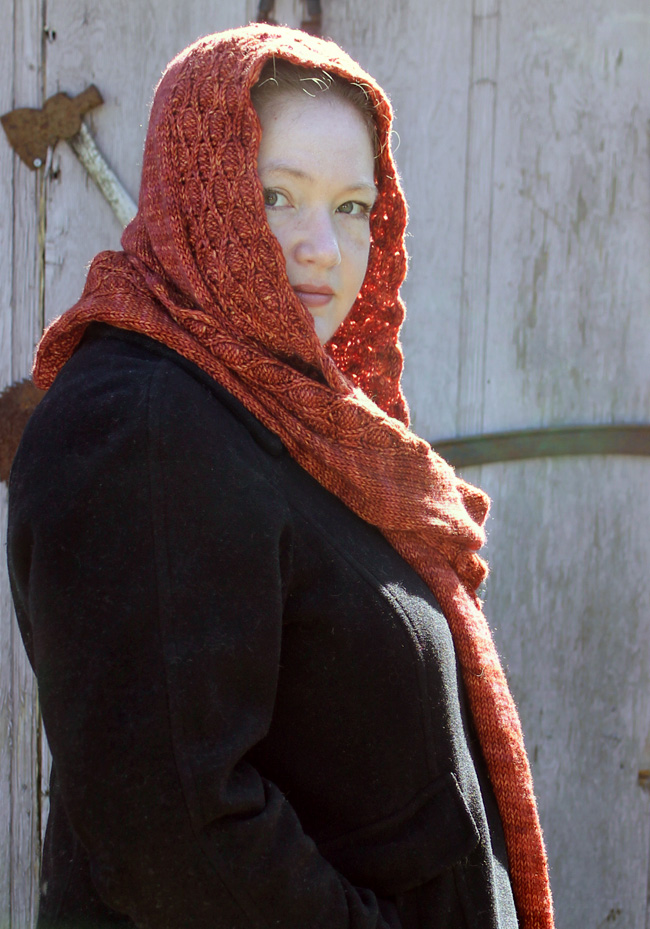
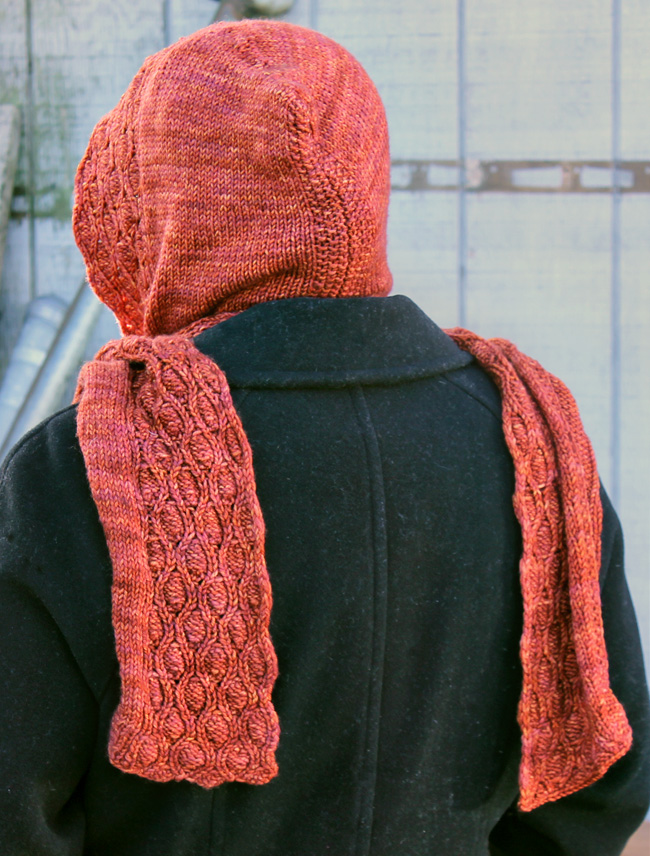
Living in the Pacific Northwest, hats and scarves are a staple part of my wardrobe during the colder months. Some mornings, keeping track of both a hat and a scarf while trying to walk the dogs and get ready for work is just a little too much, and thus Calash was born. Inspired by the shape of 18th century rain bonnets (or calash), this hooded scarf is roomy enough for a cute hairstyle and warm enough to keep the damp and chill from creeping down your coat.
The scarf is knit end-to-end, with simple shaping, creating a scarf that tapers at both ends. An easily memorized and fun stitch pattern frames the face and provides structure. The crown is shaped with a few short rows, which can be omitted if you like a pointy hood. The tails of the scarf are long enough to wrap twice around the neck for extra cold days or can be left hanging in a variety of ways.
 model: Angela Goben
photos: Heidi Schultz
SIZE
One
FINISHED MEASUREMENTS
Width: 11 inches/ 28 cm
Length: 100 inches/254 cm
MATERIALS
Yarn
![]() Rust version (shown above): Unplanned Peacock Superwash Merino DK [100% Superwash Wool; 230 yd/210 m per 3.5 oz/100 g skein]; color: Kestrel; 3 skeins
Rust version (shown above): Unplanned Peacock Superwash Merino DK [100% Superwash Wool; 230 yd/210 m per 3.5 oz/100 g skein]; color: Kestrel; 3 skeins
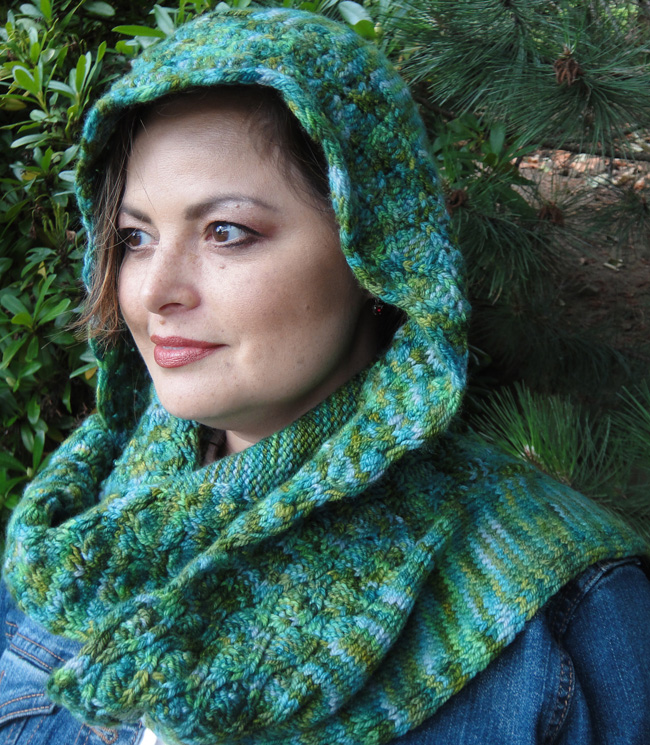
![]() Green version (shown below): Blue Moon Fiber Arts Silky Victoria 85% Polwarth, 15% Silk; 695 yds/635 m per 8.5 oz/ 241g skein]; color: Mossy Plaid; 1 skein
Green version (shown below): Blue Moon Fiber Arts Silky Victoria 85% Polwarth, 15% Silk; 695 yds/635 m per 8.5 oz/ 241g skein]; color: Mossy Plaid; 1 skein
Recommended needle size
[always use a needle size that gives you the gauge listed below - every knitter's gauge is unique]
![]() US #5/3.75 mm needles for working flat
US #5/3.75 mm needles for working flat
Notions
![]() Stitch markers
Stitch markers
![]() Removable stitch marker or safety pin
Removable stitch marker or safety pin
![]() Tapestry needle
Tapestry needle
GAUGE
18 sts/24 rows = 4 inches/10 cm in stockinette stitch
PATTERN NOTES
[Knitty's list of standard abbreviations and techniques can be found here.]
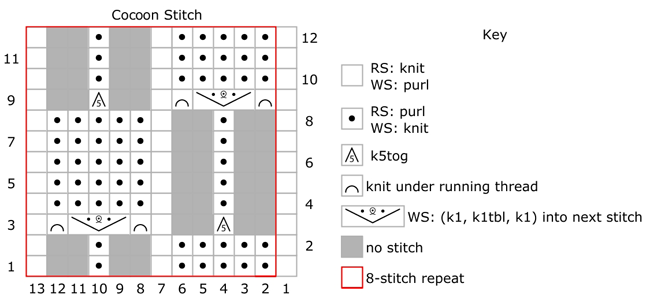
Cocoon Stitch: (multiple of 8 sts plus 1)
Row 1 [WS]: P1, *k1, p1, k5, p1; rep from *.
Row 2 [RS]: K1, *p5, k1, p1, k1; rep from *.
Row 3: P1, *k1 under running thread between the st just worked and the next st, (k1, ktbl, k1) in the next st, k1 under the next running thread, p1, k5tog, p1; rep from *.
Rows 4, 6 and 8: K1, *p1, k1, p5, k1; rep from *.
Rows 5 and 7: P1, *k5, p1, k1, p1; rep from *.
Row 9: P1, *k5tog, p1, k1 under running thread between the st just worked and the next st, (k1, ktbl, k1) in the next st, k1 under the next running thread, p1; rep from *.
Row 10: Repeat Row 2.
Row 11: Repeat Row 1.
Row 12: Repeat Row 2.
CHARTS
DIRECTIONS
Section 1 - Increase:
Using Long Tail or your preferred method, CO 32 sts.
Setup Row 1 [WS]: Sl1 wyib, (k1, p1) twice, place marker, k1, work Cocoon Stitch to last stitch, k1.
Setup Row 2: [RS]: Slp1 wyif, work Cocoon Stitch over next 25 stitches, p1, slip marker, k to last 4 stitches, k1, p1, k1, p1.
Setup Row 3: Sl1 wyib, k1, p1, k1, m1r, p to marker, work in pattern as set to end of row. 1 st increased.
Row 1 and all following odd-numbered rows [RS]: Slp1 wyif, work Cocoon Stitch over next 25 stitches, p1, slip marker, k to last 4 stitches, k1, p1, k1, p1.
Row 2 & 4 [WS]: Sl1 wyib, k1, p1, k1, p to marker, work in pattern as set to end of row.
Row 6: Sl1 wyib, k1, p1, k1, m1r, p to marker, work in pattern as set to end of row. 1 st increased.
Repeat Rows 1-6 until you have 60 sts total, 33 after the marker. Using safety pin or removable marker, mark this row.
Section 2
Work even as follows:
RS rows: Slp1 wyif, work Cocoon Stitch over next 25 stitches, p1, slip marker, k to last 4 stitches, k1, p1, k1, p1.
WS rows: Sl1 wyib, k1, p1, k1, mk1, p to marker, work in pattern as set to end of row.
Continue until piece measures 14 inches/35.5 cm from marked row, ending with WS row.
Piece should measure approximately 44 inches/112 cm in total.
Section 3 – Shape Crown:
Row 1 (RS): Work in pattern as set to last 5 sts, w&t.
Row 2 and all following WS rows: Work in pattern as set.
Row 3: Work in pattern as set to 4 sts before last wrap, w&t.
Repeat Rows 2-3 5 more times. 6 wraps. Work Row 2 once more.
Row 15 (RS): Work in pattern as set to first wrap, w&t. There are now two wraps around the same stitch.
Row 16 and all following WS rows: Work in pattern as set.
Row 17: Work in pattern as set to next single wrap, working the wraps of the double wrapped stitch together with the stitch when you reach it, w&t.
Repeat Rows 16-17 4 more times, then work Row 16 once more.
Row 18 (RS): Work in pattern as set to end of row, working the wraps of the double wrapped stitch together with the stitch when you reach it.
Section 4:
Work even as per Section 2 until scarf measures 14 inches/35.5 cm from short row section, ending with Row 2 or 8 of the Cocoon Stitch. Piece should measure 28 inches/71 cm from the marked row.
Section 5 - Decrease:
Row 1 (WS): Sl1 wyib, k1, p1, k1, p2tog, work in pattern as set to end. 1 st decreased.
Rows 2-6: Work even in pattern as set.
Repeat Rows 1-6 until 33 sts remain. Repeat Row 1 once more. (5 stitches remain before the marker).
Continue working as established for 5 more rows, ending with Row 2 or 7 of the Cocoon Stitch pattern.
Bind off in pattern.
FINISHING
Fold scarf in half at the first short row. Using a tapestry needle, seam down the center back, starting at fold point, for 8.5 inches/21.5 cm.
Wash and stretchy gently to block. Weave in all ends.
ABOUT THE DESIGNER
 Heidi is obsessed with all things string. Also an avid seamstress, weaver and spinner, she lives with her partner, dog, and chickens in Portland, Oregon. In addition to designing patterns for handknit accessories, she also creates a line of knitting cases and bags to keep her many projects organized.
Find her here on Ravelry.
Pattern & images © 2019 Heidi G. Schultz.