Fizzy Water Beret and Tam, a free knitting pattern from Knitty.com. Free knitting pattern for a DETAILS HERE.
INTRODUCTION
Fizzy Water
 by Tanya Seaman

This stitch patterning – which I’ve nicknamed “fizzy water” – grew out of playing with slipped-stitches with two or more colors. I was excited to create a two-sided stitch pattern that was worked one color at a time. Although somewhat related to both, fizzy water is neither brioche nor double-knitting! The name comes from the mixed columns knit in one color and purled in a second color, which look like bubbles rising in a glass of carbonated water. I’ve used fizzy water to create cowls, and then after developing a technique to create increases, designed a fitted hooded cowl.
As my hair was growing out from scratch (chemo-baldness), I wanted a hat with more volume, and found that berets seemed to be the right form. So I challenged myself to figure out how to make tidy decreases in the pattern, and hence the top of this beret came into being. I wanted to achieve decreases that matched the increases as much as possible, and chose this branching style that reaches the center top.
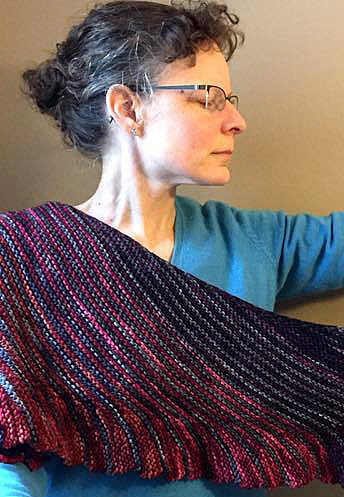
This hat is a fun way to use leftovers in exciting color combinations. It can be worked in solid colors or with a variegated color inside, which will show subtly on the outside. That said, this is a reversible hat. If blocked without a plate, both the beret and tam can easily be worn either way; if blocked with a plate, re-blocking is necessary.
This pattern is for knitting either a beret or a tam – the tam simply has a longer brim to cover more of the head, and can certainly be made longer to cover one’s ears, which would be welcome on a cold day.
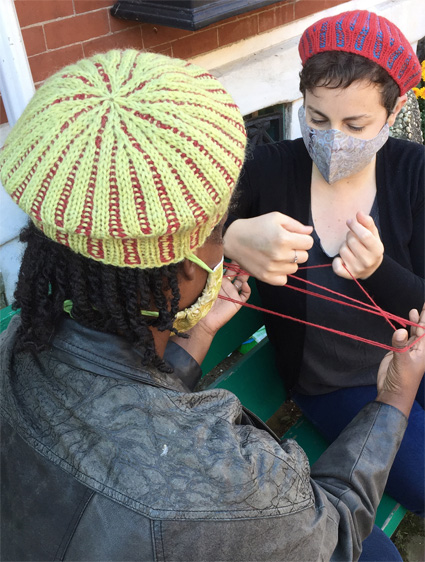
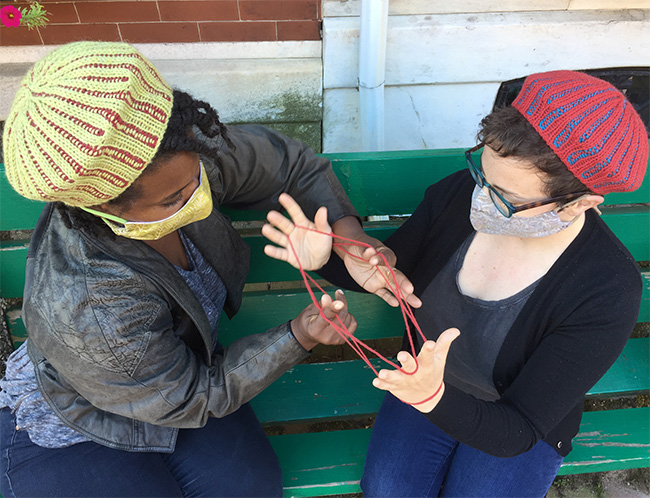
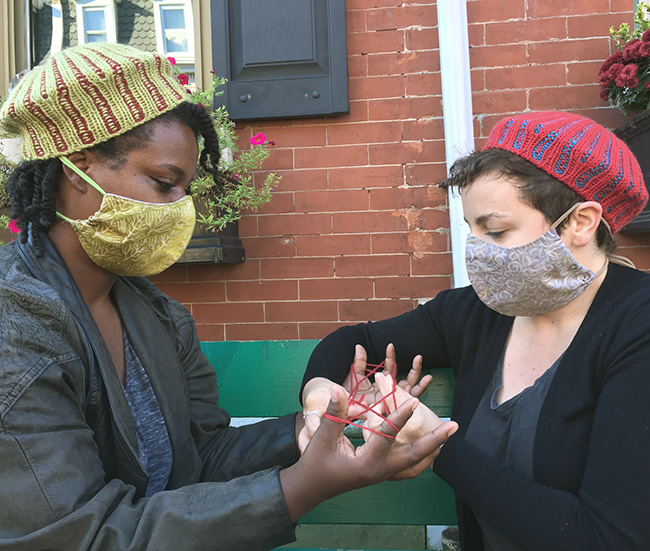
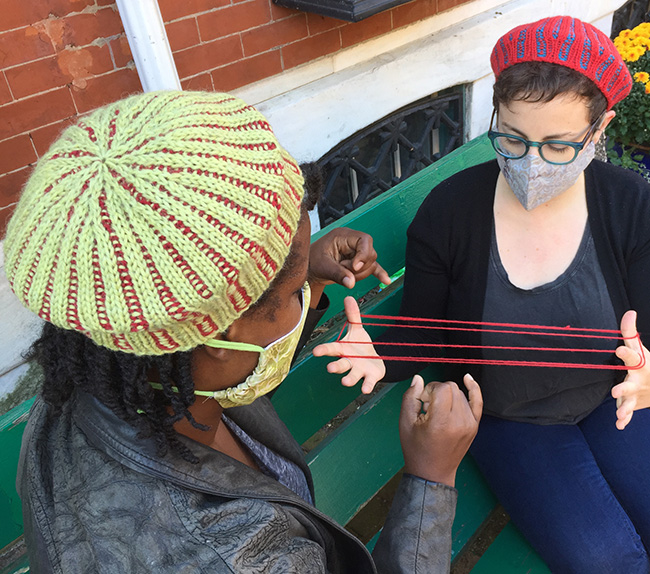
 models: DC Boyd and Emily Wyner
photos: Tanya Seaman
SIZE
Adult S[M, L]
FINISHED MEASUREMENTS
Circumference of brim: 16[20, 24] inches/ 40[50, 60] cm
Depth – Beret: 6[7.5, 9] inch/ 15[19, 23] cm
Depth - Tam: 8[10, 12] inch/ 20.5[25.5, 30.5] cm
Choose the size closest to, but no larger than, your head circumference.
MATERIALS
Yarn
Tam: Pale Green and Red (shown above left)
KnitPicks Wool of the Andes Worsted [100% wool; 100 yd/101 m per 50g skein];
![]() [MC] Green Tea Heather; 1[1, 1] skein;
[MC] Green Tea Heather; 1[1, 1] skein;
NOTE: the largest size will use pretty much all of the skein; if your gauge is different, or if you wish to adjust depth, then a second skein will absolutely be required
![]() [CC] Cranberry; 1[1, 1] skein;
[CC] Cranberry; 1[1, 1] skein;
Beret: Red and Turquoise (shown above right)
KnitPicks Wool of the Andes Worsted [100% wool; 100 yd/101 m per 50g skein];
![]() [MC] Red; 1 skein;
[MC] Red; 1 skein;
![]() [CC] Whirlpool; 1 skein;
[CC] Whirlpool; 1 skein;
Yarn characteristics: Smooth, plied worsted-weight yarn in high-, medium-, or low-contrasting colors. MC should be a solid color or slightly tonally dyed, while the CC can be a color-changing yarn.
Yarn requirements:
Beret MC needs approx. 50[65, 90] yds/ 45[60, 82] m
Beret CC needs approx. 40[55, 75] yds/ 36[50, 70] m
Tam MC needs approx. 55[70, 85] yds/ 50[65, 78] m
Tam CC needs approx. 45[60, 85] yd/ 40[55, 78] m
Recommended needle size
[always use a needle size that gives you the gauge listed below - every knitter's gauge is unique]
![]() 1 US #8/5mm circular needle, 16 inch/40cm
1 US #8/5mm circular needle, 16 inch/40cm
![]() 1 US #8/5mm needles for small circumference in the round, for crown
1 US #8/5mm needles for small circumference in the round, for crown
Notions
![]() 1 stitch marker[, ]
1 stitch marker[, ]
![]() 8[10, 12] inch/ 20.5[25.5, 30.5] cm diameter plate for blocking
8[10, 12] inch/ 20.5[25.5, 30.5] cm diameter plate for blocking
![]() yarn needle
yarn needle
GAUGE
16 sts/36 rounds = 4 inches/10 cm in pattern stitch
15.5 sts/24 rounds = 4 inches/10 cm in stockinette stitch
To swatch, CO a multiple of four stitches plus one.
Note about pattern stitch: The number of stitches showing on the RS of your knitted fabric will be 3/4 the number of stitches on your needles. This means that every 3 stitches you see on the RS is accomplished with 4 stitches on the needles.
PATTERN NOTES
[Knitty's list of standard abbreviations and techniques can be found here.]
Rib Cable Cast-On: With a short tail – about 3 inches/7.5cm – CO 2 sts using the long-tail method. *With yarn in back, put the tip of the right needle between the two stitches, from front to back; wrap yarn around needle tip knitwise, and pull through. Place resulting stitch on left needle. Bring yarn to front. Put the tip of the right needle between the first two stitches, from back to front; wrap yarn around purlwise, and pull through. Place resulting stitch on left needle. Repeat from *. Video tutorial.
M1Bp - Make one below, purl: use tip of left needle to grab strand of CC that runs between the last stitch on left needle and first stitch on right needle, picking it up from back to front; purl into it. 1 st increased.
Sl1p-yb: slip 1 st purlwise with yarn in back
Sl1p-yf: slip 1 st purlwise, with yarn in front
SSK (modified): slip 1 st knitwise, slip 1 st through the back of loop, return them both to left needle without twisting and knit them tog through back loop. 1 st decreased.
Note: In the following instructions, the slip is worked to reverse the order of the two stitches. It helps to turn the work to more easily catch the CC stitch through the back.
Right-Edge-Dec: Sl1p-yb, slip 2 sts together purlwise through the back of the stitches, move MC st and both CC sts back to the LH ndl, k2tog (both will be CC sts), ssk (both will be MC sts). 2 sts decreased.
Left Edge-Dec: Sl1p-yf, slip 2sts together purlwise through the back of the stitches, pass MC st back to the left needle. With yarn in front, untwist the CC st and pass to the right-hand needle, with yarn to the back (pull tight) k2tog (both will be MC sts). 1 st decreased.
DIRECTIONS
Brim
Using 16 inch/40 cm circular needle and MC, use the rib cable cast-on to CO 65[81, 97] sts.
Turn CO stitches so first st is a purl st. Move last CO stitch to opposite ndl, so it is now the first stitch. Long tail will be hanging from your left needle.
Round 1 [CC]: Place marker, p2tog, sl1p-yb, [p1, sl1p-yb] around. 64[80, 96] sts.
Round 2 [MC]: [Sl1p-yf, k1] around.
Round 3 [CC]: [P1, sl1p-yb] around.
Round 4 [MC]: [K2, sl1p-yf, k1] around.
Note: Rounds 3-4 form the fizzy water pattern.
For Beret: Repeat Rounds 3 and 4 until piece measures 2[2.5, 3] inches/ 5[6.5, 7.5] cm.
For Tam: Repeat Rounds 3 and 4 until piece measures 4[5, 6] inches / 10[12.5, 15] cm.
Work Round 3 one more time.
Body
Increase Round 1 [MC]: [K2, sl1p-yf, k2, RLI, k1, sl1p-yf, k1, LLI] around. 80[100, 120] sts.
Increase Round 2 [CC]: [(P1, sl1p-yb) 3 times, m1Bp, sl1p-yb, p1, sl1p-yb, m1Bp, sl1p-yb] around. 96[120, 144] sts.
Round 1 [MC]: (K2, sl1p-yf, k1) around.
Round 2 [CC]: (P1, sl1p-yb) around.
Work Rounds 1 and 2 for 4[5, 6] inches/ 10[12.5, 15] cm.
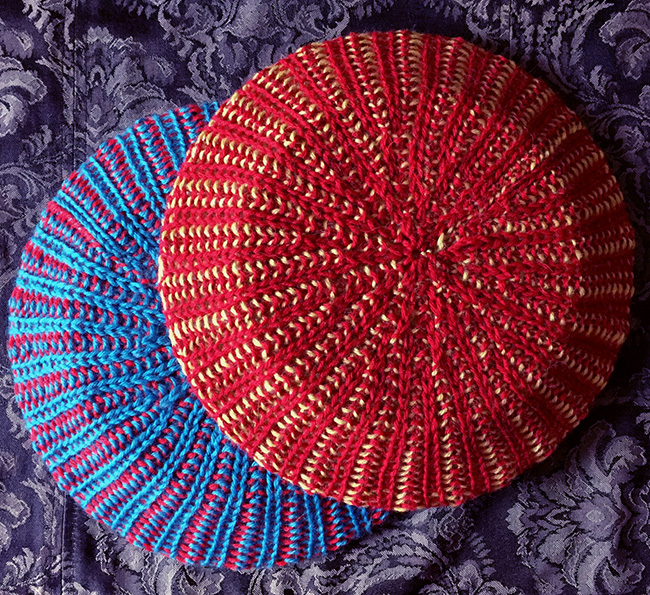
Hats turned inside out (they're reversible!)
Crown
Decrease 1
Round 1 [MC]: [(K2, sl1p-yf, k1) 4 times, work Right-Edge-Dec, then Left-Edge-Dec] 4[5, 6] times. 84[105, 126] sts.
Round 2 [CC]: [(P1, sl1p-yb) 9 times, p2tog, sl1p-yb] 4[5, 6] times. 80[100, 120] sts.
Decrease 2
Round 1 [MC]: [K2, sl1p-yf, k1, work Right-Edge-Dec, then Left-Edge-Dec, (k2, sl1p-yf, k1) twice] 4[5, 6] times. 68[85, 102] sts.
Round 2 [CC]: [(P1, sl1p-yb) 3 times, p2tog, sl1p-yb, (p1, sl1p-yb) 4 times] 4[5, 6] times. 64[80, 96] sts.
Round 3 [MC]: (K2, sl1p-yf, k1) around.
Round 4 [CC]: (P1, sl1p-yb) around.
Decrease 3
Round 1 [MC]: [Work Left-Edge-Dec, (k2, sl1p-yf, k1) twice, work Right-Edge-Dec] 4[5, 6] times. 52[65, 78] sts.
Round 2 [CC]: [P2tog, sl1p-yb, (p1, sl1p-yb) 5 times] 4[5, 6] times. 48[60, 72] sts.
To set up for the next set of decreases, return the last 2 sts to left needle. Switch to needles for small circumference in the round.
Decrease 4
Round 1 [MC]: [Work Right-Edge-Dec, Left-Edge-Dec, (k2, sl1p-yf, k1)] 4[5, 6] times 36[45, 54] sts.
Round 2 [CC]: [Sl1p-yf, p1, sl1p-yb, p2tog, (sl1p-yf, p1) twice] 4[5, 6] times 32[40, 48] sts.
Round 3 [MC]: (K2, sl1p-yf, k1) around.
Round 4 [CC]: (P1, sl1p-yb) around.
Decrease 5
Round 1 [MC]: [Work Left-Edge-Dec, work Right-Edge-Dec] 4[5, 6] times 20[25, 30] .
Round 2 [CC]: [Sl1p-yf, p1, sl1p-yb, p2tog] 4[5, 6] times 16[20, 24] sts.
Cut MC and CC, leaving a tail of 8 inches/20cm for each. With CC on tapestry needle, pull tail through all CC sts, passing MC sts to RH ndl and keeping the CC sts behind the MC sts. Pull CC through first stitch one more time and push tapestry needle through to WS and pull tight. Remove yarn from needle.
With MC on tapestry needle, pull through all MC sts, and through first stitch one more time. Push through to WS of hat and pull tight.
FINISHING
Soak in slightly soapy water for 30 minutes. Rinse and squeeze out as much water as possible, spinning in a washing machine if possible. Insert a dinner plate that corresponds to the desired finished circumference into the beret and center the beret or tam around the plate. With the hat band facing down, balance on a wide-mouth jar or large bowl to ensure air flow to the entire beret or tam. Flip over partway through drying to ensure the top of the beret dries. To wear inside out, hat will need to be re-blocked.
Plate size is critical for achieving proper fit. If unblocked hat is the correct circumference, stretch it around a plate that will not change this dimension. On the other hand, if the circumference is too small, block around a larger plate to increase the circumference. It can grow by a few inches if not careful. To ensure proper fit, weave through the inner edge of the hat band a strand of contrasting yarn and pull to the desired dimensions. See this page for helpful instructions.
Weave in all ends once dry.
ABOUT THE DESIGNER
 Tanya loves to create slipped-stitch patterns including mosaics, and spends most of her free time on new knitting designs, various sewing projects, and as a neighborhood leader for safe-street projects like adding new bike lanes and public plazas. She works in the freight-rail industry as a project analyst, crunching numbers and writing illustrated reports.
You can see more of her designs on Ravelry.
Pattern & images © 2020 Tanya Seaman