Knitty: little purls of wisdom
Got Yarn
Title
beauty shot

Tangy

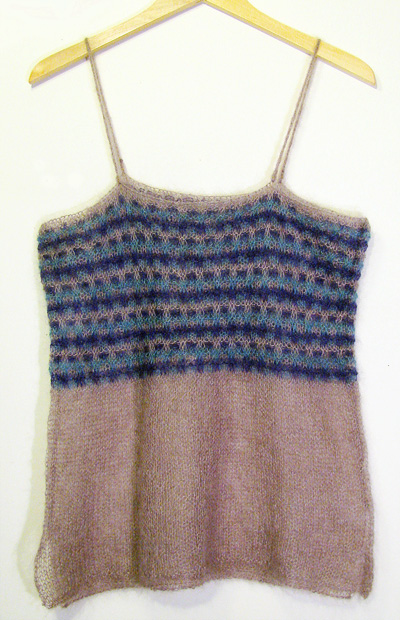
I’d been wondering for a while about designing a light see-through top with colorwork using fine mohair yarn like Kidsilk Haze (one of my dream yarns!). I didn’t see many patterns like that, since, I guess, fairisle and intarsia make it inevitably heavy and ugly on the wrong side, and with that yarn, you can see all those through from the right side.

Eventually I thought that a color-change pattern using slip stitches seemed the best way to go. I decided to use a simple linked-stripe pattern which has multiple colors and also some texture.  

Front and Back are worked separately from top and seamed later, except for the slits at the bottom.

This way, you can hide all the tails to weave in and the beginnings of color-changing rows in those seams.

spacer model: Yumiko spacer photos: Asami

SIZE
XS[S, M, L, 1X, 2X, 3X]

1 across spacer

spacer

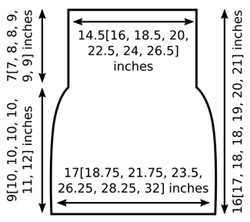
FINISHED MEASUREMENTS
Chest: 29[32, 37, 40, 45, 48, 53] inches

Lower Body: 34[37.5, 43.5, 47, 52.5, 56.5, 62] inches

Length to Underarm: 16[17, 18, 18, 19, 20, 21] inches

spacer

MATERIALS
Rowan Kidsilk Haze [70% super kid mohair, 30% silk; 229yd/210m per 25 g skein]
spacer [MC] #589 Majestic; 1[1, 2, 2, 2, 2, 3] skeins
spacer [CC1] #641 Blackcurrant; 1 skein
spacer [CC2] #582 Trance; 1 skein


Recommended needle size
[always use a needle size that gives you the gauge listed below -- every knitter's gauge is unique]
spacer 1 set US #9/5.5 mm straight needles
spacer 1 set US #6/4 mm double-point needles (for I-Cord straps; only two are used)

Tools
spacer Yarn needle

spacer

GAUGE
20 sts/36 rows = 4 inches in Stripe Pattern using larger needles
17 sts/20 rows = 4 inches in stockinette st using larger needles

spacer

PATTERN NOTES
[Knitty's list of standard abbreviations and techniques can be found here.]

When slipping sts in stripe pattern, slip st purlwise with yarn held to WS of work.

Stripe Pattern (Worked over a multiple of 4 sts + 2):
Row 1 [RS]: Using MC, k all sts.
Row 2 [WS]: Using MC, p1, k to last st, p1.
Row 3 [RS]: Using CC1, [k2, sl 2] to last 2 sts, k2.
Row 4 [WS]: Using CC1, [p2, sl 2] to last 2 sts, p2.
Rows 5-6: Using CC2, work as for Rows 1-2.
Rows 7-8: Using MC, work as for Rows 3-4.
Rows 9-10: Using CC1, work as for Rows 1-2.
Rows 11-12: Using CC2, work as for Rows 3-4.
Repeat these 12 rows for Stripe Pattern.

spacer

DIRECTIONS

1 across spacer
FRONT
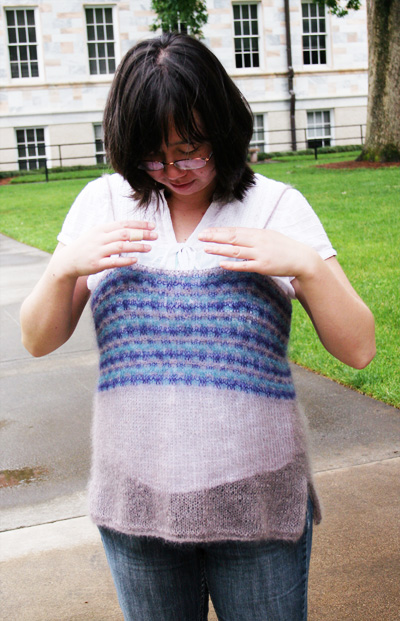
Using straight needles and MC, CO 74[82, 94, 102, 114, 122, 134] sts.

Work in Stripe Pattern until work measures 7[7, 8, 8, 9, 9, 9] inches, ending with a WS row. Break CC1 and CC2.

Using MC, continue in stockinette st until work measures 16[17, 18, 18, 19, 20, 21] inches or desired length, ending with a RS row.

K 2 rows.
Next row (WS): P 1 row.
Loosely BO all sts.

BACK
Work as for Front.

spacer

FINISHING
schematicBlock pieces to measurements shown in schematic.
Sew pieces together at side edges, beginning at upper edge and ending 4[4, 4, 5, 5, 6, 6] inches from lower edge.

Straps:
Using double-point needles and MC, CO 3 sts. Work I-Cord until cord measures 13[14, 15, 15, 16, 16, 17] inches or desired length.
BO all sts.

Make a second strap in the same way. Pin straps to top using photos as guides, then try on and adjust as needed to determine best locations for straps. Sew straps to upper edges.

Weave in ends.

spacer
ABOUT THE DESIGNER

designernamespacer Yumiko is a biomedical engineer during day, knitter at night, mom to 2 kids.

spacer