

|
  |
My latest book, Personal
Footprints for Insouciant Sock Knitters, teaches
a knitter to create a custom pattern that makes knitting
toe-up socks as simple and satisfying as humanly possible.
Although the method welcomes stitch patterns that flow
from toe to leg, the quiet simplicity of the process has
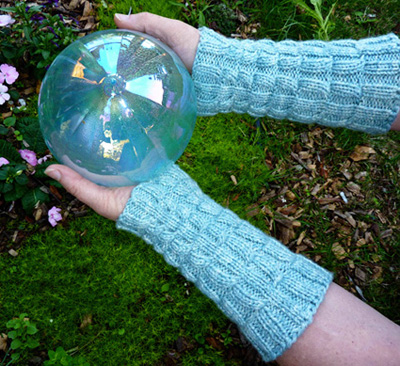
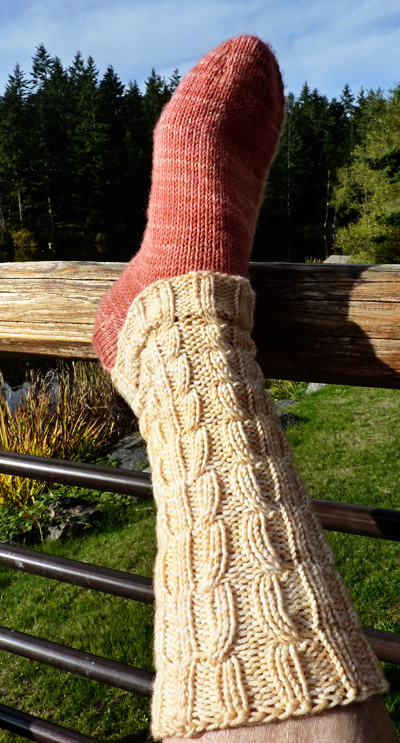
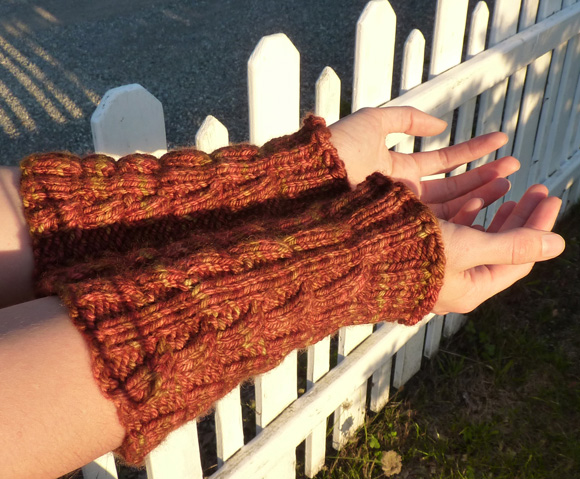
made me fall in love with plain feet and patterned legs. If you’ve never worn wristwarmers, you are in for a seasonal sensual treat. As winter blows its chilly breath our way, a pair of wristwarmers and a vest can keep you nearly as warm as a whole sweater. It sounds impossible, but it’s really true. Wristwarmers are quick to knit, take little yarn (make them as short or long as you wish), are welcome gifts (for men as well), and in my experience, knitting them is addictive. You’ll easily learn the Just One More Round stitch pattern by heart. It consists of knit 2-purl 2 ribbing, which is interrupted after 5, 6, 7, 8, 9, and then 10 rounds by a special cable round. The cable has an unusual appearance because it keeps jumping into purl territory, and does not create a twisted rope as is traditional. This, and the longer and longer stretches of ribbing between cable rounds (just one more round between cable rounds, thus the name) produces the columns of mirror image arcs you see in the photos. During cable rounds all stitches are knitted, which serendipitously creates a line of purl ridges at increasingly longer intervals on the reverse side. And the reverse is so handsome that I think you’ll have trouble deciding which side you like best. I keep wearing my wristwarmers one way, then the other. Sock legs can be turned down to show off the reverse side. |
|
SIZE |
|
MATERIALS For Socks Shown:
Recommended needle size [always use a needle size that gives you the gauge listed below -- every knitter's gauge is unique] OR
|
|
PATTERN NOTES |
|
For wristwarmers shown, I cast on: Directions for Jeny’s Surprisingly Stretchy Bind-Off can
be found here. A pattern for toe-up socks which can be worked using different weights of yarn can be found here. |
|
DIRECTIONS 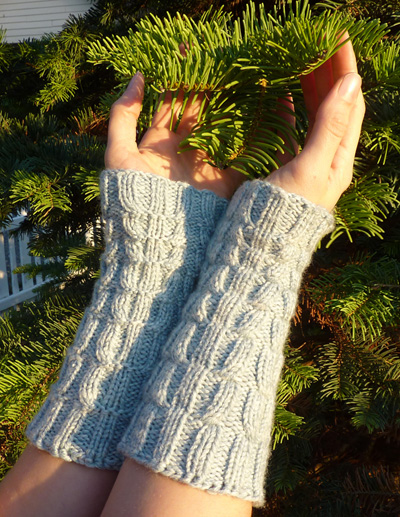 Note: To begin, you'll start by estimating which multiple of twelve stitches (24, 36, 48, 60, 72, 84, etc.) and which size needle will produce a good fit and a suitable fabric with your yarn. To figure the stitch number, measure the circumference of your arm, then use this formula: [Circumference in inches] x [[estimated stitch gauge per inch] = [approximate number of stitches to cast on] You won’t really know if you have the right number of stitches and tension for your fabric until you have knit about 3 inches, because the ribbing needs some length to establish its accordion behavior. Since the fabric is so elastic, you have a good chance of getting it right the first time out. If the wristwarmers turn out too big, they’ll make great leg warmers, keeping that cold air from rushing up your legs. CO a multiple of 12 sts. Divide sts between needles and join to begin working in the round, being careful not to twist. If desired, place safety pin or split ring marker in work to indicate beginning of round. Just One More Round
Pattern Work 6 ribbed rounds, then work a cable round.
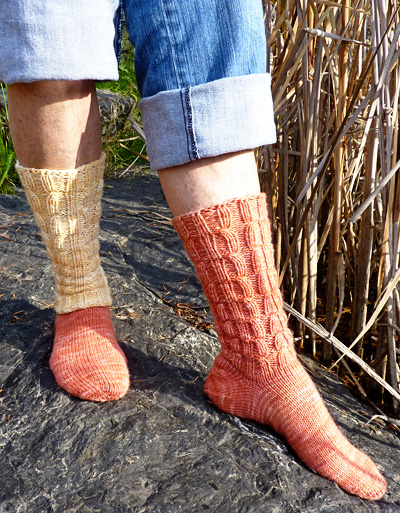 Knit this sock at any gauge and with any yarn you like, just be sure you are producing sock fabric, which is dense yet elastic. Work a sock foot in stockinette st using one of the patterns in Personal Footprints for Insouciant Sock Knitters, or any toe-up sock pattern you know and like (see Pattern Notes above for a link to another pattern that can be used). K 3 rounds more, ending at center back of leg. Pause to determine how many increases you may need for the leg. If your current stitch total is a multiple of 12, you may choose to simply go up 2 needle sizes for the leg. If your st total is not already a multiple of 12, you’ll need to knit one more round, increasing sts evenly as needed up to the next multiple of 12 sts. If you add 1-6 stitches, Begin Just One More Round pattern as for Wristwarmers. When leg is desired length, finish as for Wristwarmers. LAPPED-LEG SOCKS Begin Leg: Using larger needles and desired color for leg, CO number of sts indicated above. Divide sts between needles and join to begin working in the round, being careful not to twist. 2x3 Ribbed Round: [K1, p3,
k1] to end.
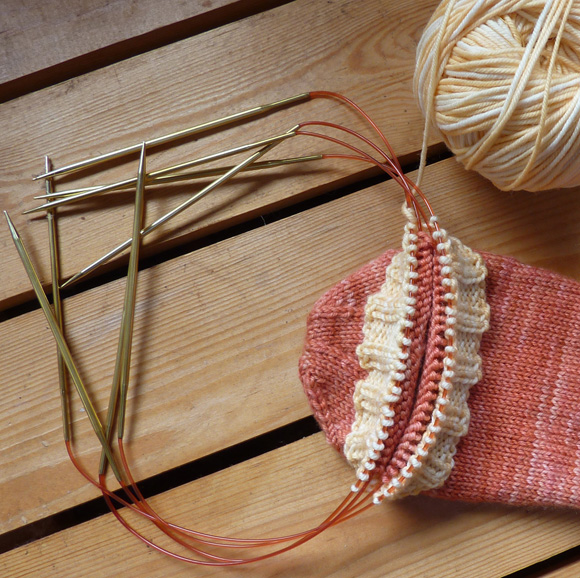
Arrange sock inside leg as shown in photo above. Using leg yarn and larger needles, [k 1 st from leg together with 1 st from sock] until all sock and leg sts have been joined. You should have 36[48, 60, 72, 84, 96] sts on the larger needle(s). Put away the smaller needle(s). Work ribbed round as for Wristwarmers, then work cable round. |
|
FINISHING |
| ABOUT THE DESIGNER |
|
Pattern & images © 2009 Cat Bordhi. Contact Cat |