

|
|
|
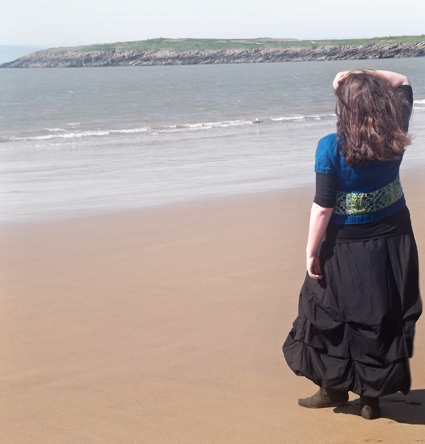
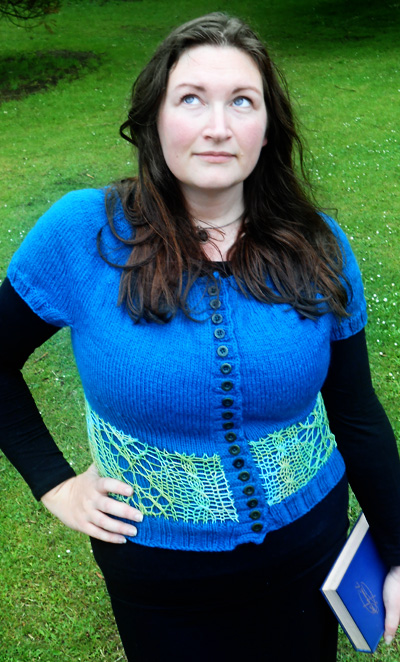
This simple but striking little cardigan echoes the fashion of the mid-Victorian lady, with its short, slightly puffed sleeve, nipped-in waist and column of little buttons. Named for George Eliot’s great Victorian novel, this sweater marries Rosamond’s longing for novelty and fashion with Dorothea’s practical and egalitarian edge. Structural and feminine, it features an avant garde approach to lace. The waist detail uses my ‘unvention’ of integrated lace: here fingering-weight yarn is knitted into lace and cables and anchored seamlessly into the fabric of a worsted-weight layer beneath. This quick knit is entirely seam free and the short sleeves and scoop neck are designed to show off a long-sleeved shirt beneath - perfect for layering on cool fall days. It’s an easily adaptable knit. Keep working the rib on
the sleeves to end up with a cosier cardigan for winter. Knit
the lace and cable waist detail in sport or DK to achieve a different
look. Take the opportunity to play with color. |
||
|
|

|
Tweet
 |
|
SIZE |
|
|
FINISHED MEASUREMENTS |
|
MATERIALS Blue version: Notions |
| GAUGE |
| 20 sts/25 rows = 4" in
stockinette stitch with MC on smaller needles 10 sts/12 rows = 4" in pattern stitch with CC on larger needles |
|
PATTERN NOTES |
 Plain Rib (worked flat over multiple of 5 sts + 3) Plain Rib (worked in the round over multiple of 5 sts) Notes on gauge and fit: How to swatch for your CC: Cast on 18 sts with larger needles.
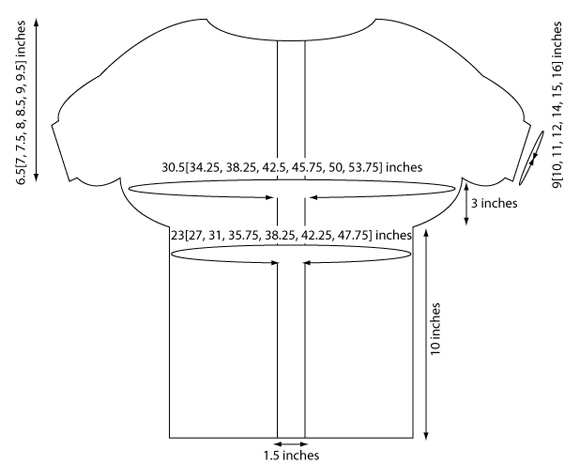
Work as follows: You want the underbust/waist decreases to hit below your bust. If you have a very large or low bust you may need to work more than the 3 inches suggested before working the decreases. I suggest slipping the body stitches onto waste yarn before working the dec row, trying it on and checking that your bust is fully covered. The waist detailing does not start until you have worked 5 inches below the armhole – so you can easily move the shaping down by 1 or 2 inches without otherwise changing the pattern. |
The charts for this pattern are very large and fit on a letter-sized page. Click here and print the resulting page. |
|
DIRECTIONS 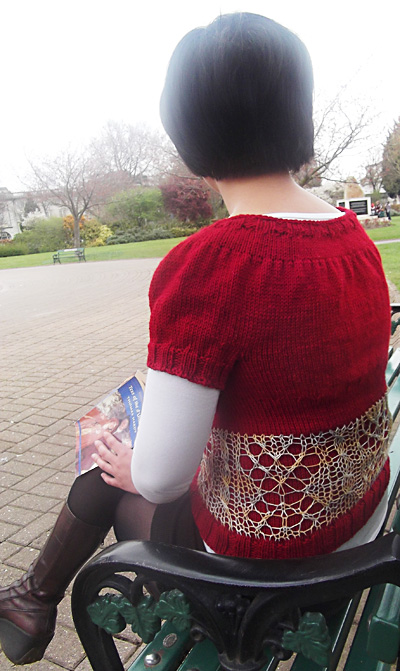
With smaller circular needle, cast on 93[113, 133, 133, 133, 133, 133] sts. Work in plain rib for 1 inch, finishing with RS facing for next row. Change to St st and work your first increase row as follows: Inc Row 1 [RS]: [K2, m1] to last st, k1. 139[169, 199, 199, 199, 199, 199] sts. Sizes XS, S, M, L only: Inc Row 2 [RS]: K1, (m1, k2[2, 3, 2]) 29[11, 20, 31] times, (m1, k3[3, 4, 3]) 7[41, 19, 25] times, (m1, k2[2, 3, 2]) 29[11, 20, 30] times, m1, k1[1, 2, 1]. 205[233, 259, 286] sts. Sizes 1X, 2X, 3X only: Inc row 2 [RS]: K1, [m1, k2] 38 times, [m1, k3] 15 times, [m1, k2] 38 times, m1, k1. 291[291, 291] sts. Cont in St st until work measures 5 inches from CO edge, ending after a WS row. Inc Row 3 [RS]: K5[2, 1], (m1, k11[4, 3]) 10[1, 6] times, (m1, k12[5, 4]) 5[55, 63] times, (m1, k11[4, 3]) 10[2, 6] times, m1, k6[2, 2]. 317[350, 367] sts. All sizes: Now divide for sleeves and body as follows: Dividing Row [RS]: K33[37, 43, 48, 53, 59, 62] sts; place next 40[45, 50, 54, 61, 67, 70] sts on waste yarn; CO 14[14, 16, 17, 17, 17, 21] sts for underarm using the backwards loop cast on; k 59[69, 73, 82, 89, 98, 103] sts; put next 40[45, 50, 54, 61, 67, 70] sts on waste yarn; CO 14[14, 16, 17, 17, 17, 21] sts for underarm using the backwards loop cast on; k to end. You will now have your body sts on your needles and your sleeves on waste yarn. 153[171, 191, 212, 229, 250, 269] body sts on needles. Body 115[135, 155, 179, 191, 211, 239] body sts rem. Work in St st for a further 2 inches, ending with RS facing for next row. Marked Row (RS): Work in St st. Thread waste yarn on a tapestry needle and draw yarn through this row; alternatively, mark this row with a locking stitch marker. Now cont to work in St st until Body measures 11 inches from underarm (and approx. 6 inches from marked row), ending after a WS row. Leave MC body sts on needle or slip to waste yarn (do not break yarn). 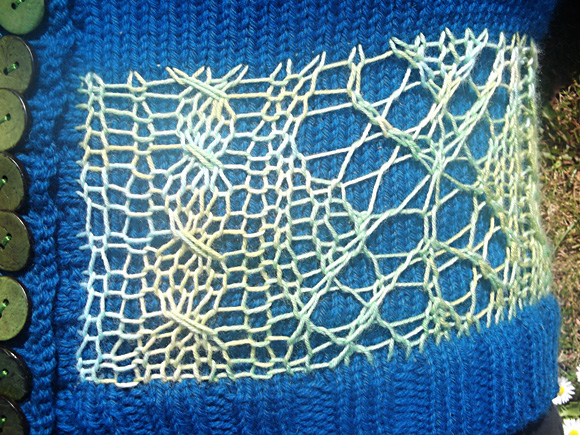
You will be picking up sts along your marked row using CC and larger needles. You may find it easier if you use a crochet hook to pick up your sts and then place them on your needle. Pick up 1 st in each of the first 2 sts of the marked row, then [skip 1 st, pick up in 1 st] 55[65, 75, 87, 93, 103, 117] times, skip the next st and then pick up the last 2 sts of the row. 59[69, 79, 91, 97, 107, 121] sts picked up in CC. 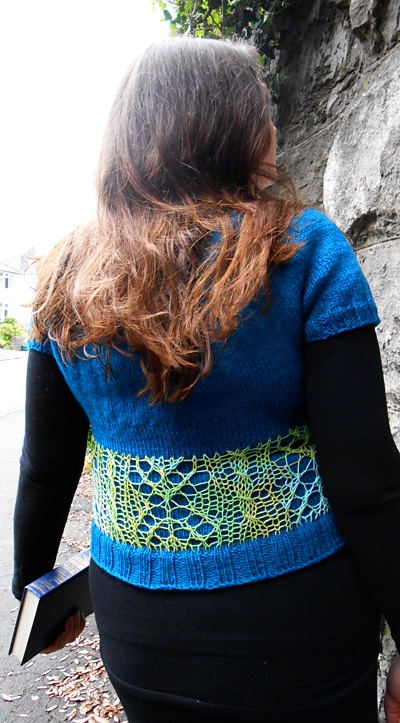 Sizes XS and L only: Sizes S and XL only: Sizes M, 2X and 3X only: When you have completed Chart A, rejoin your lace sts to the main layer as follows: With RS facing, hold your larger and smaller needles parallel with the larger needle in front. With smaller needles and MC, work sts tog as follows: [K 1 st from back and 1 st from front ndl tog] twice, then [k1 from back ndl only, k 1 st from back and 1 st from front ndl tog] 55[65, 75, 87, 93, 103, 117] times, k1 from back ndl only, [k 1 st from back and 1 st from front ndl tog] twice. 115[135, 155, 179, 191, 211, 239] body sts rem. Work 1 WS row, inc 3[3, 3, 4, 2, 2, 4] sts evenly across row. 118[138, 158, 183, 193, 213, 243] body sts. Work in Plain Rib for 2 inches. BO loosely in rib or using your favorite stretchy bind off. SLEEVE 54[59, 66, 71, 78, 84, 91] sts. Join in the round and work in St st for 6 rounds. Dec round: K3[5, 0, 1, 1, 0, 0], *k3[3, 4, 4, 7, 7, 6], k2tog, rep from * 8[8, 10, 10, 7, 8, 10] times more, k6[9, 0, 4, 5, 3, 3]. 45[50, 55, 60, 70, 75, 80] sts. Now work Plain Rib over all sts until sleeve measures 2.5 inches from underarm or desired length. BO loosely in rib. Repeat for other sleeve. 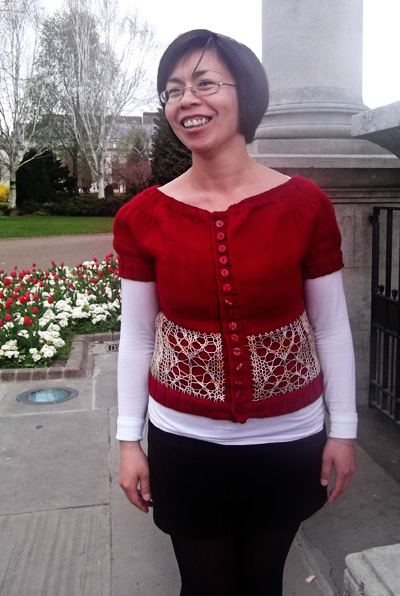 Pin the edges of the lace overlayer firmly into place over the main layer. Starting with the buttonband on the left front of the cardigan, pick up 93[93, 98, 98, 103, 103, 108] sts evenly from neck to hem (if you've worked to the gauge and length given for your size, you'll be picking up roughly 3 sts for every 4 rows). When you get to the lace overlayer you'll be picking up through both layers. Concentrate on picking up as instructed from the base layer and work through whichever is the most convenient space in the edge column of stitches of the lace overlayer. Starting with a WS row, work in Plain Rib for 9 rows. BO loosely. Now pick up the same number of sts for the buttonhole band on the right front of the cardigan, using the same technique. Starting with a WS row, work in Plain Rib for 3 rows. Row 4 [RS]: K3, p2, [k1, BO 1 (leaving 1 new knit st on needle after BO), p2] 17[17, 18, 18, 19, 19, 20] times, k3. Row 5 [WS]: P3, k2, [p1, CO 1 st using backward loop cast on, p1, k2] 17[17, 18, 18, 19, 19, 20] times, p3. Cont to work in Plain Rib for 4 more rows, then BO loosely. |
|
FINISHING |
|
| ABOUT THE DESIGNER |
|
|
|
Pattern & images © 2012 Miranda Davies. Contact Miranda |