

|
|
|
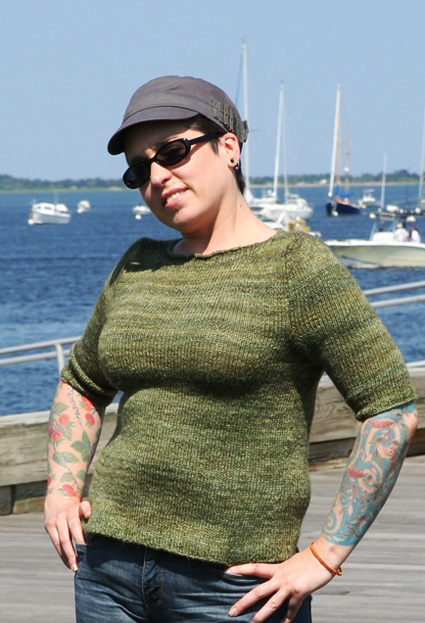
We've carried the wool/flax fiber in the shop for a while and I often get asked what to do with it. It is a really unique fiber that sounds scary to many because there is flax in the title. The amazing thing about this fiber is that the 60% wool content makes it so easy to spin. It's a little dry feeling but once you get use to it, it's amazing. A little wash with a beating and the yarn becomes drapey and soft. It's a wonder to spin. Even those that were hesitant to spin it have been drawn in by the lovely finished yarn and come back for more. It makes great shawls and scarves as one might suspect. It can also be a really nice lightweight summer/spring sweater. It doesn't have a lot of spring back thanks to the flax, but the drape makes up for it. If you knit in a tight gauge for the yarn that you make, you will find there isn't a ton of sagging in the finished garment like some linen yarns can have. Of course, if you want movement in the final garment you can knit at an airy gauge and achieve a much more drapey item. This sweater was made with no ease. A fitted sweater, perfect for spring and summer or if you live in tropical weather, it will be great for the winter as well. |
||
|
|
 |
Tweet
 |
|
SIZE |
|
|
FINISHED MEASUREMENTS |
|
MATERIALS
Finished Yarn: Recommended needle size Tools |
|||||
| GAUGE |
| 20 sts/28 rows = 4" in stockinette stitch, blocked |
|
PATTERN NOTES |
|
The body of the sweater is worked in the round from the bottom up until the arm shaping. The neck and shoulder shaping is worked with short rows. The sleeves are worked from the bottom up until the cap shaping. This is so that the sweater has minimal sewing with all the shaping of a set in sleeve. |
|
DIRECTIONS 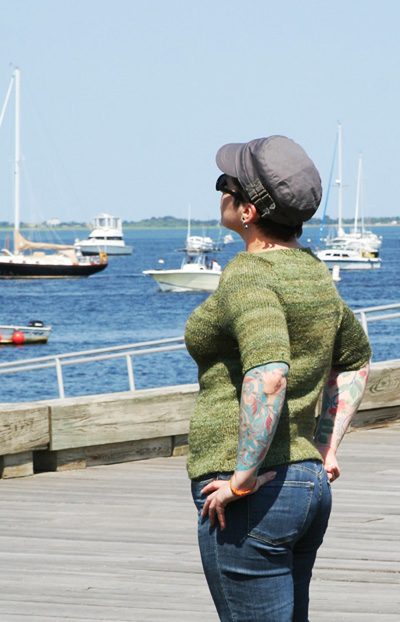
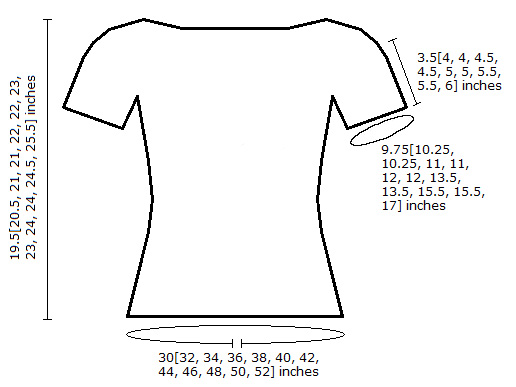
Using the smaller size needle, CO 76[80, 86, 90, 96, 100, 106, 110, 116, 120, 126, 130] sts, PM, CO 76[80, 86, 90, 96, 100, 106, 110, 116, 120, 126, 130] sts, PM. Join to work in the round being careful not to twist your sts. 152[160, 172, 180, 192, 200, 212, 220, 232, 240, 252, 260] sts]. Work in 3x1 ribbing for 6 rounds (some of the ribbing sections will cross the markers, if this bothers you, you can choose to place the markers after you do the ribbing). Change to larger needles. Start working in st st. When your piece measures 2.5[3, 3, 3, 3, 3.5, 3.5, 3.5, 3.5, 4, 4, 4] inches from the CO edge start working the waist decreases as follows: Decrease rnd: *K1, k2tog, work to 3 sts before the next marker, ssk, k1, SM, rep from * once more. 148[156, 168, 176, 188, 196, 208, 216, 228, 236, 248, 256] sts. 4 sts decreased. Work 4 rnds even. Repeat last five rnds 2 more times. 140[148, 160, 168, 180, 188, 200, 208, 220, 228, 240, 248] sts. 8 sts decreased. Work 11 rnds even. Start working the bust increases as follows: Increase rnd: *K1, M1, work to 1 st before the marker, M1, K1, SM; rep from * once more. 148[156, 168, 176, 188, 196, 208, 216, 228, 236, 248, 256] sts. 4 sts increased. Work 4 rnds even. Repeat last five rnds 2 more times. 152[160, 172, 180, 192, 200, 212, 220, 232, 240, 252, 260] sts. 8 sts increased. Continue working even until piece measures 12[12.5, 13, 13, 13.5, 13.5, 14, 14, 14.5, 14.5, 14.5, 15] inches from the CO edge. Slip marker at beginning of rnd. *K until 5[5, 5, 5, 5, 5, 6, 6, 6, 6, 6, 7] sts before the next marker, BO the next 10[10, 10, 10, 10, 10, 12, 12, 12, 12, 12, 14] sts; rep from * once more. This will have separated your back and front by binding off the armhole bottoms and put you at the front side and ready to work back and forth flat now. 66[70, 76, 80, 86, 90, 94, 98, 104, 108, 114, 116] sts each for front and back halves. 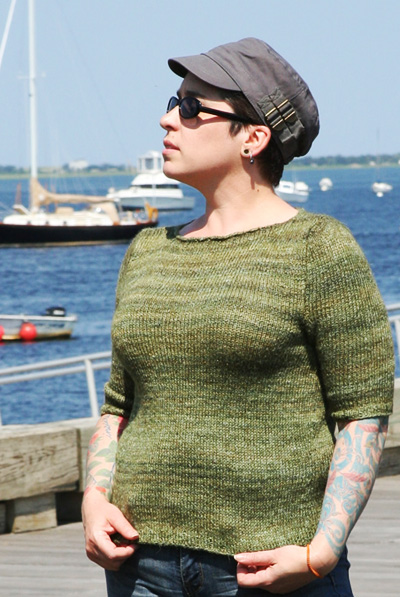 Row 1 [RS]: BO 4[4, 4, 5, 5, 5, 5, 5, 5, 6, 6, 6] sts, k to end of row. 62[66, 72, 75, 81, 85, 89, 93, 99, 102, 108, 110] sts. Row 2 [WS]: BO 4[4, 4, 5, 5, 5, 5, 5, 5, 6, 6, 6] sts. p to end of row. 58[62, 68, 70, 76, 80, 84, 88, 94, 96, 102, 104] sts. Row 3 [RS]:BO 3 sts, k to end of row. 55[59, 65, 67, 73, 77, 81, 85, 91, 93, 99, 101] sts. Row 4 [WS]: BO 3 sts, p to end of row. 52[56, 62, 64, 70, 74, 78, 82, 88, 90, 96, 98] sts. Row 5 [RS]: *K1, k2tog, k to the last 3 sts, ssk, k1. 50[54, 60, 62, 68, 72, 76, 80, 86, 88, 94, 96] sts. 2 sts decreased. Row 6 [WS]: P to end of row. Work last two rows 1[2, 2, 2, 2, 4, 4, 4, 4, 5, 6, 8] more times. 48[50, 56, 58, 64, 64, 68, 72, 78, 78, 82, 80] sts. 2[4, 4, 4, 4, 8, 8, 8,8, 10, 12, 16] sts decreased. Continue to work even in st st until armhole measures 6.5[7, 7, 7, 7.5, 7.5, 8, 8, 8.5, 8.5, 9, 9.5] inches. Neck/shoulder shaping: Change to smaller needles. 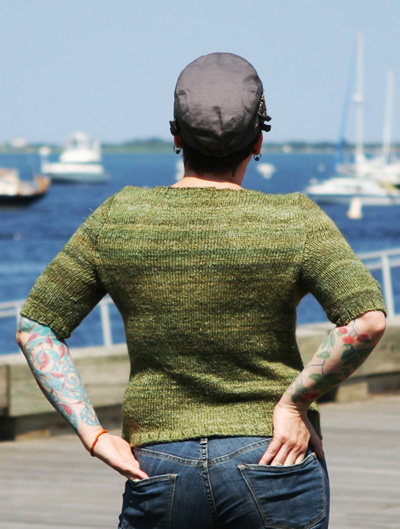 Work back in the same manner as Front. Sleeves (make 2) Using the smaller needle, CO 52[56, 56, 60, 60, 68, 68, 72, 72, 80, 80, 92]. Join to work in the round marking the beginning of round and being careful not to twist your sts. Work in 3x1 ribbing for 6 rounds. Switch to larger needle, start working in st st. Work even until your sleeve measures 3.5[4, 4, 4.5, 4.5, 5, 5, 5.5, 5.5, 6] inches from the CO edge. Start working flat. |
 |
|
FINISHING |
| ABOUT THE DESIGNER |
|
|
|
Pattern & images © 2013 Amy King. Contact Amy |