|
|
|
|
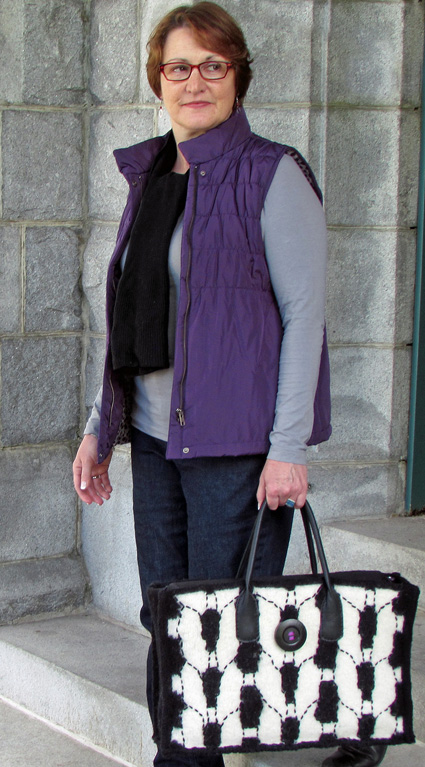
I've been a knitter for a long time, and an obsessed one for about 10 years. But it wasn't until I bought a condo in the city this year that I realized just how gaga I had become for anything resembling a knit stitch. And I'm not talking wannabe chevrons: I mean the real deal -- the simple loop after intertwined loop of yarn that stockinette creates. But a tote sure is! And this one is large enough for all those daily necessities like a wallet and tablet and a current WIP and all the tools that entails. And so what if the rest of the world sees only a graphic black -and-white pattern of some sort; fellow knitters will smile when they recognize the larger-than-life-size loop-de-loop stitches you're toting around.
|
||
|
|
||
|
SIZE |
|
|
FINISHED MEASUREMENTS After Felting Sewn together, interior size |
|
MATERIALS Notions |
|
GAUGE |
| 20 sts/24 rows = 4 inches in stockinette stitch, before felting |
|
PATTERN NOTES |
|
The Front, Back, and Sides of this tote are worked flat in one piece; this makes subsequent steps -- blocking, decorative stitching, and basting on mesh panels after felting easier to do. Working the tote's body flat also allows for more accurate sizing for the Base piece, which is worked after the Front/Back/Sides piece is felted. This design does not require a top-loading washer for felting. Instructions are given for felting in a clothes dryer, which allows for more checks throughout the process and better control of finished measurements. For each of the black color sections on the tote's Front and Back, I used individual yarn bobbins to minimize overall stranding (see picture below) and total yarn consumption. This method also prevents the darker color from tinting the lighter one during felting. A single strand of white was carried across the entire width of pattern chart reps on the Front; the Back was worked with its own single strand of white as well. These white strands are dropped to work the solid black sides of the tote, and picked up when the chart resumes on the next row.
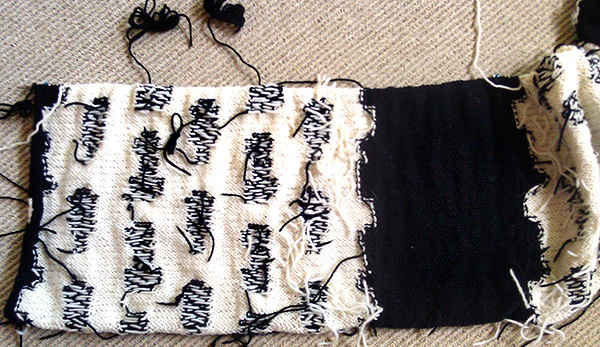
Directions and tips for intarsia can be found here. Before felting, weave ends into 3 or 4 purl bumps in a straight line on WS. Don't reverse direction or tie knots. During felting checks, snip any yarn ends or strands that are creating tension; the final minutes of felting will blend the clipped ends into the fabric. When installing purse feet, you may have to snip plastic mesh to allow the posts all the way through to inside of bag. |
|
DIRECTIONS 
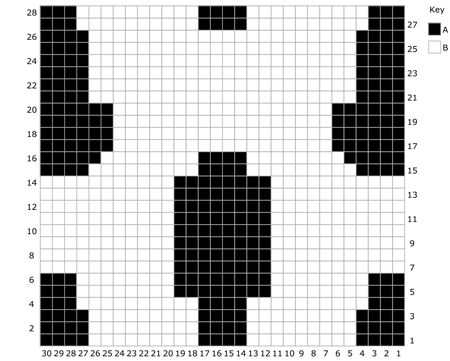
Knit 1 row. Purl 1 row. Knit 1 row. Note: The two sections with 90 sts between markers are the front and back and from here will be worked according to the color chart; the remaining sections (4 sts, 36 sts and 32 sts) are worked only in Color MC. Next row [RS]: With MC, knit to m, join strand of B to begin color chart, working 3 reps of Row 1 of chart to next m, drop CC; with MC knit to next m, join another strand of CC and work 3 reps of Row 1 of chart to next m, drop CC; with MC knit to end. Very important: See Pattern notes for information on handling the yarns -- bobbins are used for MC not but CC. Work in patterns as est until 84 rows (3 vertical reps) of color chart are completed. With MC, purl 1 row. |
|
FINISHING Unwrap knitted piece from towel and place both in dryer; dry on high heat for 20 minutes. Remove from dryer to check felting progress and snip any tight strands on WS (see Pattern Notes). Re-wet piece in hot water without detergent; wrap and blot as previous. Place in dryer with towel and dry on high heat, checking after 6 or 7 minutes. If the height has shrunk to 11 inches, remove from dryer and skip to next paragraph. If piece is still more than 12 inches tall, dry for 5 to 6 minutes more. Piece will likely be damp, which is intended so that you can stretch it to size in blocking. Pin to blocking board, stretching height to 13 inches. Stretch width of each colorwork section to 16 inches, and each solid-color side section to 5.5 inches. Let dry completely.
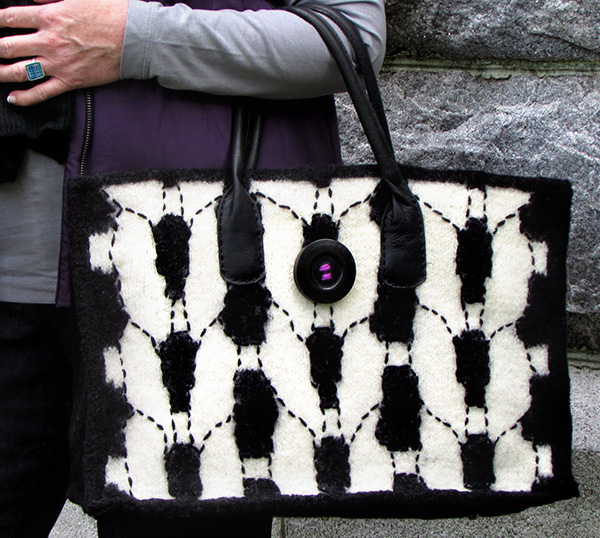
Decorative stitching Sew side seams Flip piece so that other colorwork section is facing up (and side seam just stitched is to the right). Create a side seam welt, repeating directions between * * in previous paragraph. Repeat for creating welt and seam at the left edge of this colorwork section. (The fourth side seam is stitched after Base is sewn on.) Attach mesh Make base piece Starting with a knit row, work in stockinette until piece measures 6.5 inches, ending with a WS row. Felt as for other knitted piece, checking every 10 minutes, then every 5 minutes during the drying phase. Depending on your yarn choice, this piece will likely complete its felting without shrinking to exact measurement needed. Simply pin to blocking board and let dry. Cut Base piece to actual width measurement plus .5 inch of Front; the short side of the Base should equal the depth of the tote's solid black sides plus .5 inch. Cut piece of mesh to dimension of Base, trimming three quarters of an inch from all edges and rounding off corners. With coordinating sewing thread, whipstitch perimeter of mesh to WS of Base. Install purse feet according to package instructions (see Pattern Notes): On right end of Base, place each of two purse feet 2 inches in from each side edge and 1 inch in from each long edge of the Front; repeat for two more purse feet along Back Base edges. Install fifth foot in exact center of Base. (To prevent feet hardware from damaging lining from the inside, you may want to cover hardware of each foot with duct tape.) Sew Base to tote. Sew fourth side seam. Hold tote with open side seam at the right, RS of tote facing. Align Side and Front pieces WS together. With tapestry needle threaded with strand of MC, sew seam 3/4 inch from edge. Attach handles and buttons On Front, place each inner edge of perforated handle tab 1 inch from edge of button; the top of the perforated handle tabs should sit .5 inch below the top of the tote. With heavy-duty thread sew each tab to Front, through all thicknesses, using backstitch. Repeat with other handle on Back piece. Make lining Cut two pieces of lining fabric for each Side. Width equals the width of the tote's felted Side plus 1 1/4 inches, height equals the height of the tote's felted Side plus 2 5/8 inches. With RS together, pin one Side piece to left side edge of Front piece and second Side piece to Front right side edge, pin Back piece to each Side piece in the same manner. With sewing machine, stitch these four pinned seams, each with a five-eighths-inch allowance. Pin one long edge of Base lining to bottom edge of Front lining; repeat for Back lining. Beginning five-eighths inch down on long edge and ending 5/8 inch before end, stitch these two pinned seams. Pin remaining two seams of Base lining to bottom edges of Side piece lining; stitch with sewing machine, flattening existing seam allowances to close holes at corners. With WS of lining facing out, fold back top edges of lining so that height of lining measures 1 inch less than height of tote; iron in place. With WS together, place lining inside felted tote; pin in place, matching seams of lining to inside seams of felted tote. With regular sewing thread, stitch folded-back cuff to inside of felted tote (about .5 inch down from pressed edge, taking care not to catch lining itself in the stitching). |
| ABOUT THE DESIGNER |
|
|
|
Pattern & images © 2015 Carolyn Noyes. Contact Carolyn |
 The size of the finished bag will vary according to yarn choice and gauge. For this reason, it's best to finish the knitting and blocking before buying the lining fabric.