Longwing, a free knitting pattern from Knitty.com. Free knitting pattern for a double garter stitch crescent shawl.
INTRODUCTION
Longwing
![]()
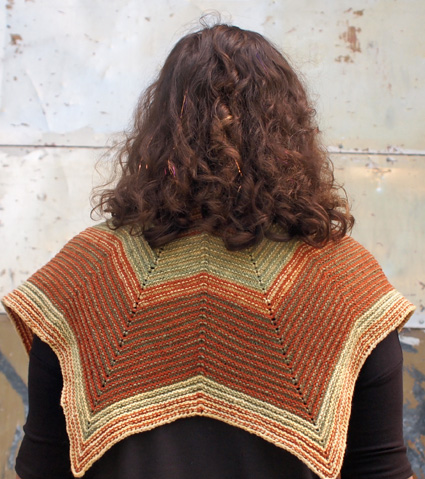
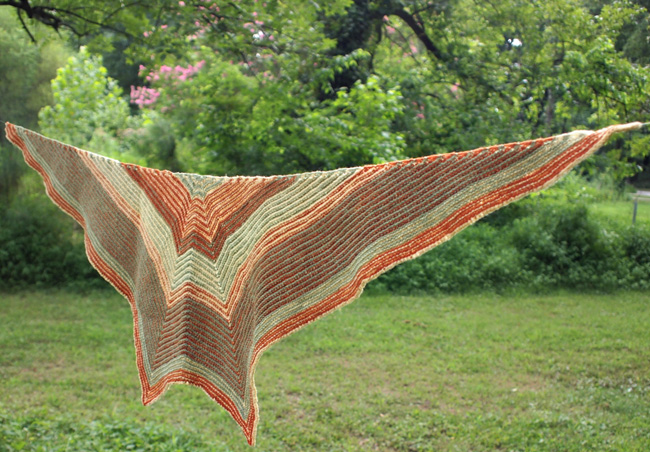
Longwing is a double garter stitch crescent shawl with two chevrons inserted in the middle. The result sometimes reminds me of part of a star shape, but more often makes me think of a butterfly’s wings. There's something fun about wearing butterfly wings without it being obvious.
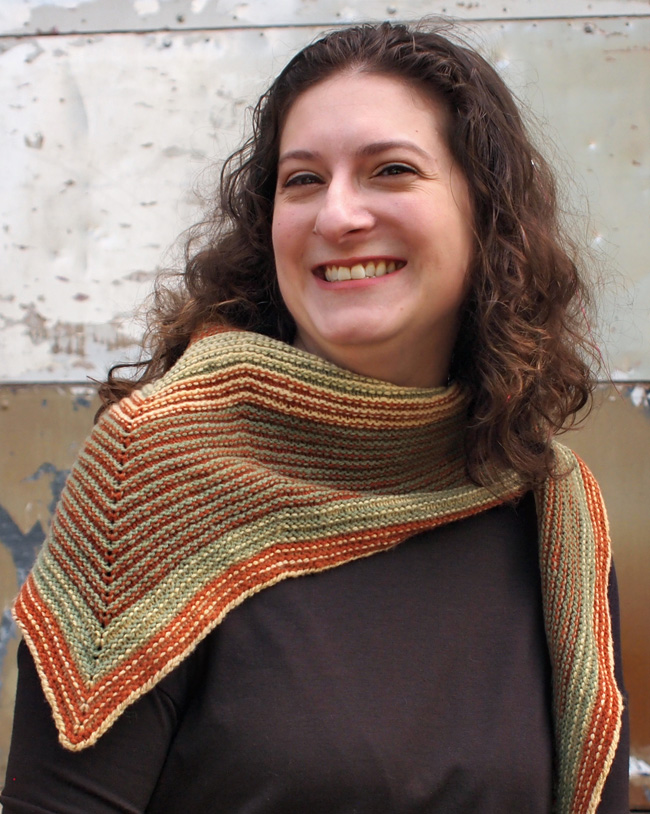
Longwing has two sides. Because of the way this particular stitch pattern curls into ridges (technically known as welting), each color in a given section will be more visible on one side than the other. My original is a shawlette, but the pattern can be knit bigger or smaller as desired.
I used three colors, but the basic shawl can be knit in two or more colors; it would also make an excellent scrap yarn shawl.
 model: Sarah Sipe
 photos: Naomi Parkhurst
SIZE
One
FINISHED MEASUREMENTS
Width: 60 inches/150cm
Depth at deepest point: 17.5 inches/44.5cm
MATERIALS
Yarn
Swans Island All American Collection Sport [100% Rambouillet wool; 185 yd/169m per 40g skein];
![]() [MC] Celery; 1 skein
[MC] Celery; 1 skein
![]() [CC1] Honey; 1 skein
[CC1] Honey; 1 skein
![]() [CC2] Flame; 1 skein
[CC2] Flame; 1 skein
Recommended needle size
[always use a needle size that gives you the gauge listed below - every knitter's gauge is unique]
![]() 1 US #4/3.5mm circular needle, 32-40 inches/80-100cm
1 US #4/3.5mm circular needle, 32-40 inches/80-100cm
Notions
![]() 2 regular stitch markers
2 regular stitch markers
![]() 3 locking or removable stitch markers
3 locking or removable stitch markers
![]() yarn needle
yarn needle
GAUGE
23 sts/36 rows = 4 inches/10 cm in stockinette stitch
21 sts/48 rows = 4 inches/10 cm in double garter stitch
PATTERN NOTES
[Knitty's list of standard abbreviations and techniques can be found here.]
kyok: (k1, yo, k1) all into the same st, making three sts from one.
sm: Slip marker.
Jeny’s Surprisingly Stretchy Bind-off: You can find information here
Sk2p: slip 1 stitch knitwise, knit next 2 together, pass slipped stitch over. This makes a double decrease with the middle stitch sitting in back.
Construction Notes:
Disappearing loop cast on: You can find a tutorial here.
Longwing uses no purl stitches; instead, the welts are made by sliding the knitting to the other end of the circular needle after every other row.
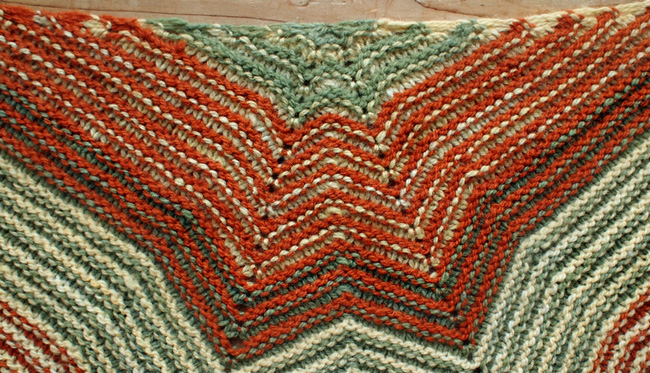
The chevrons in the center of the shawl are formed by alternating columns of increases and decreases. There are increases on every other row in the increase columns. The decreases are made in the decrease columns on every fourth row. This makes the chevrons spread wide to form the butterfly's two lower wings.
Each of these columns is marked in the pattern with a stitch marker. The two outer decrease columns can be marked with regular stitch markers, as these are single decreases. The center decrease column is a double decrease, and the two increase columns are double increases. Each double increase is worked in the column formed by the YO of the KYOK in the row beneath. Each double decrease is centered above the double decrease from four rows beneath. This makes it harder to mark them with regular markers, as the location for the markers keeps shifting, which is why this pattern uses locking stitch markers instead of standard ones.
The locking stitch markers should be clipped into the base of a stitch. I recommend that you move the increase markers up every RS row, once the increase is complete. Clip the marker into the yo, the central element of the kyok. Move the decrease marker up whenever you work the decrease, clipping it into the stitch that results from the decrease. As the shawl grows and you are able to read the fabric, you may find you need to move them less often.
Stripes:
These instructions will allow the knitter to reproduce the stripe sequence from the original shawl, though any order of colors can be used in whatever sequence is desired. Side 1 starts with the cast-on and set up rows; Side 2 starts with Ridge 1. Each number in the list indicates how many ridges were knit in each color before switching to the next color.
Side 1: 3 celery, 8 flame, 8 honey, 13 celery, and 3 flame.
Side 2: 8 honey, 8 celery, 13 flame, and 5 honey, and honey bind-off.
DIRECTIONS
Cast on:
This is a modified Disappearing Loop cast-on, worked flat instead of in the round.
Make a slip-knot in MC and place on left needle. Make 1 loose backwards loop on left needle. (K1, yo, k1, yo, k1) in backwards loop. Slip backwards loop from needle, remove and undo slip-knot, and tighten up the backwards loop. This makes a 5 stitch cast-on.
Set up rows:
Row 1 [RS]: (K1, yo) 4 times, k1. 9 sts.
Row 2 [WS]: Knit.
Slide stitches to the other end of the circular needle so that MC remains attached at the far end of the knitting.
Ridge 1:
Switch to CC1.
Row 3 [WS]: (K1, kyok) 4 times, k1. 17 stitches.
Row 4 [RS]: Knit.
Slide stitches to the other end of the circular needle so that CC1 remains attached at the far end of the knitting.
Ridge 2:
Switch to MC.
Row 5 [RS]: K1, kyok, k2, pm, ssk, kyok, place locking marker in yo of kyok, sk2p, place locking marker in resulting stitch, kyok, place locking marker in yo of kyok, k2tog, pm, k2, kyok, k1. 21 sts.
Row 6 [WS]: Knit.
Slide stitches to the other end of the circular needle so that MC remains attached at the far end of the knitting.
Ridge 3:
Switch to CC1.
Note: As you work the next row, move the locking markers up, following pattern notes for guidance.
Row 7 [WS]: K1, kyok, k to first locking marker, kyok, k to third locking marker, kyok, k to last 2 sts, kyok, k1. 29 sts.
Row 8 [RS]: Knit.
Slide stitches to the other end of the circular needle so that CC1 remains attached at the far end of the knitting.
Ridge 4:
Switch to MC.
Note: As you work the next row, move the locking markers up. See pattern notes for guidance.
Row 9 [RS]: K1, kyok, k to marker, sm, ssk, k to first locking marker, kyok, k to 1 st before second locking marker, sk2p, k to third locking marker, kyok, k to 2 sts before marker, k2tog, sm, k to last 2 sts, kyok, k1. 33 sts.
Row 10 [WS]: Knit.
Slide stitches to the other end of the circular needle so that MC remains attached at the far end of the knitting.
Ridge 5:
Switch to CC1.
Row 11 [WS]: Moving the locking markers up as required, k1, kyok, k to first locking marker, kyok, k to third locking marker, kyok, k to last 2 sts, kyok, k1. 8 stitches increased.
Row 12 [RS]: Knit.
Slide stitches to the other end of the circular needle so that CC1 remains attached at the far end of the knitting.
Ridge 6:
Switch to CC2.
Row 13 [RS]: Moving the locking markers up as required, k1, kyok, k to marker, sm, ssk, k to first locking marker, kyok, k to 1 st before second locking marker, sk2p, k to third locking marker, kyok, k to 2 sts before marker, k2tog, sm, k to last 2 sts, kyok, k1. 4 sts increased.
Row 14 [WS]: Knit.
Slide stitches to the other end of the circular needle so that CC2 remains attached at the far end of the knitting.
Repeat Ridges 5-6 (Rows 11-14) as desired, moving locking markers up as you go.
Original shawl was bound off after a total of 69 ridges.
Bind off in pattern using Jeny’s Surprisingly Stretchy Bind-off (see Pattern notes) with the next color of the sequence, working (k1, p1) in place of any kyoks in the bind-off row.
FINISHING
Weave in ends. Wash and block.
ABOUT THE DESIGNER
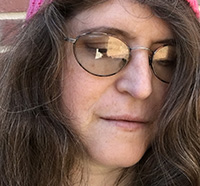 Naomi Parkhurst lives in North Carolina, where she spends her time drinking tea and designing secret code stitch patterns, some of which you can see on her blog.
Pattern & images © 2017 Naomi Parkhurst. Contact Naomi