|
|
|
|
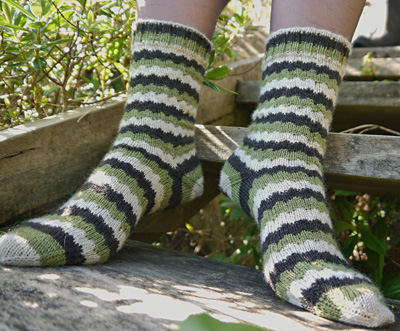
This pattern came about from my desire to knit self-striping sock yarn in a way that was more interesting to knit than a plain vanilla sock. Was there a way to incorporate a pattern that utilized the unique properties of self-striping yarn? While I was pondering this idea, I came across a stitch pattern that used slipped stitches in stranded colorwork. It got me wondering: what if I used a self-striping yarn instead of separate yarns to create this effect? These socks are the result! The pattern is formed by slipped stitches that take into account the color changes in one skein of self-striping yarn, creating a colorwork pattern! No fumbling with different colored yarns required! An afterthought heel keeps the stripe pattern intact. This sock appealed so much to my inner knitting geek that they are named after the feeling experienced from completing this project: geeky joy! This pattern is specifically suitable for self-striping sock yarn with solid stripes. Yarn with differing widths of stripe are suitable as long as there are at least three rounds of the same color per stripe. |
||
|
|
||
|
SIZE |
|
|
FINISHED MEASUREMENTS |
|
MATERIALS Note: If you wish to work a much longer foot or leg, you may require additional yarn. You can also work the cuff, heel and toe in a complementary solid to save having to buy another skein. Notions |
|
GAUGE |
| 32 sts/48 rounds = 4 inches in stockinette in the round 36 sts/48 rounds = 4 inches in color pattern in the round |
|
PATTERN NOTES |
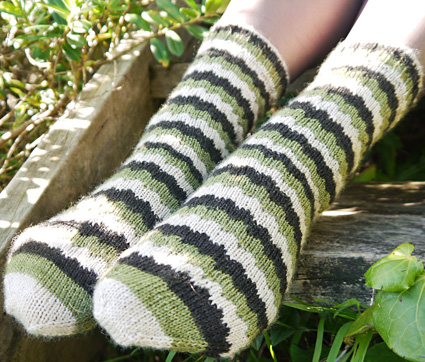
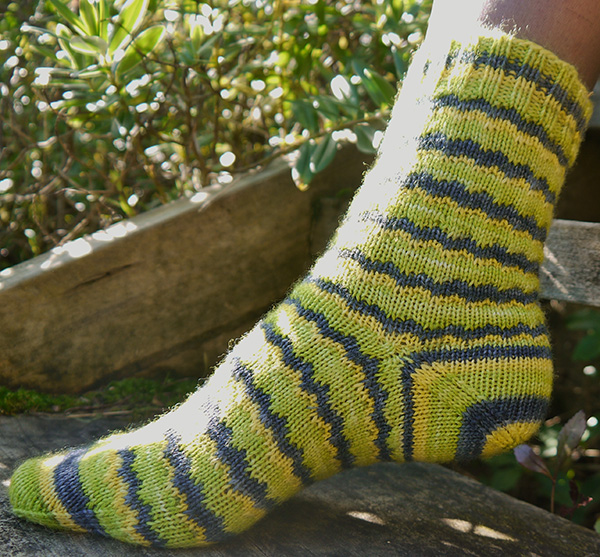
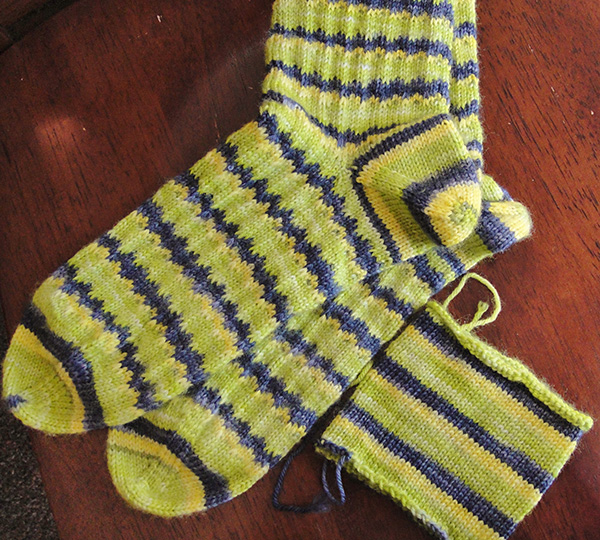
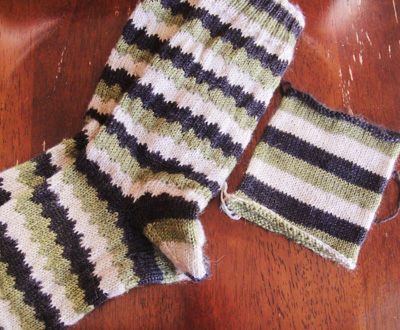
To create the effect seen in this pattern, you will need a self-striping yarn with a minimum of three rounds per stripe when worked in stockinette. Any number of colored stripes (even rainbow!) will work as long as you are able to complete the first three rows of the chart in every color change. In the Limestone version of this sock (green/yellow/gray, shown below), you can see that each color stripe has a different width. The Citrus sock has even thin stripes, and the green/brown/cream has thicker stripes. Note that there is no fixed beginning of round in this pattern. Once you have completed the ribbing and have begun the first color in the chart, follow the chart for the pattern but watch for the color change point in your working yarn. The color change point is your beginning of round. Narrower stripes will have fewer solid color repeat rounds (indicated as row 3) and wider stripes will have more. Gently smooth out the slipped stitches in row 1 as you would when working stranded colorwork. This will keep the fabric even and give a better fit. Or, block them when complete.
Kitchener Stitch Tips for Adjusting the Fit of the Heel If the heel is too long, experiment with altering the frequency of the decrease rounds to achieve the right length for your heel. If the heel is too pointy, rip back one or two rounds, and graft 12[14] stitches on each side instead, or rip back one round to the decrease round and Kitchener Stitch at this point. |
|
|
DIRECTIONS 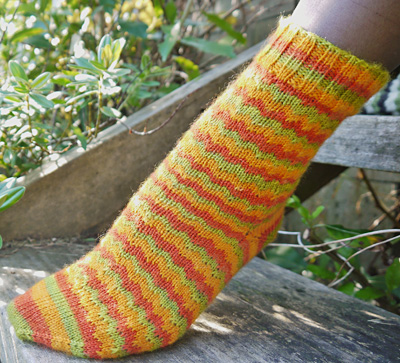
Cast on 64[68, 72, 76] sts. Distribute sts across needles as you prefer and join for working in the round. Ribbing round: [K2, p2] around. Leg Setup for afterthought heel: K32[34, 36, 38]; using waste yarn, k32[34, 36, 38]. Slip those 32[34, 36, 38] sts back to the left needle and work them again in the project yarn. Note: You will need to line the toe stitches up with the position of the heel stitches. Place a marker or arrange your stitches so that you will be able to work to this location. To set up for toe, work in stockinette to start of heel stitches. The first 32[34, 36, 38] sts form the sole, and the rem 32[34, 36, 38] sts form the instep. Toe (worked in stockinette) Using Kitchener stitch, graft toe closed.
 Gently remove the waste yarn from the stitches, putting the stitches back on to two needles (top and bottom) as you go. There will be 32[34, 36, 38]sts on each needle (side one and side two). Use a stitch marker to indicate the beginning of each respective side. The heel edges must match the toe edges. Distribute sts across needles as you prefer and join for working in the round; join the yarn, starting on the color you choose. All rounds are in stockinette. For two smallest sizes only: Knit two rounds. For two largest sizes only:Knit one round, picking up two stitches between the gap on each side as you go (76[80] stitches). Make sure that there are 38[40] stitches positioned on each side (the edges must align with the toe edges) before you begin the heel shaping. For all sizes: Before you break the yarn, ease the sock over your foot and check that the heel is the right fit. Once you are satisfied with the fit of the heel, graft the heel closed.
|
|
FINISHING |
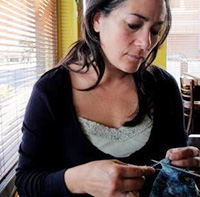
| ABOUT THE DESIGNER |
|
With many thanks for the technical advice of Karen Berthine and some wonderful test knitting from Karen Mackay. |
|
Pattern & images © 2015 Wei S. Leong. Contact Wei |
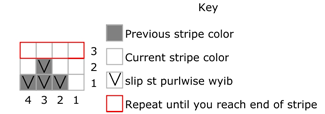 Note on Color Pattern: Start working the chart when you reach the start of a new color in the stripe pattern. Work the first two rows as set, and then work even in stockinette stitch until you reach the end of the stripe. Note that you might not start (or end) the chart at the start of the round.