


Software Engineer, a free knitting pattern from Knitty.com. Free knitting pattern for a DETAILS HERE.
INTRODUCTION
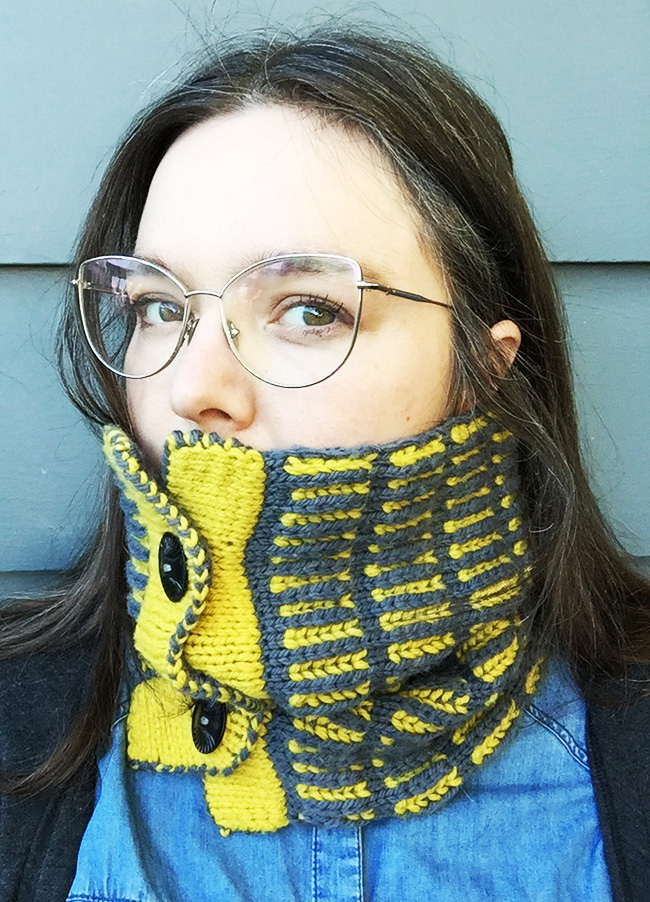
Software Engineer
 by Shanell Papp

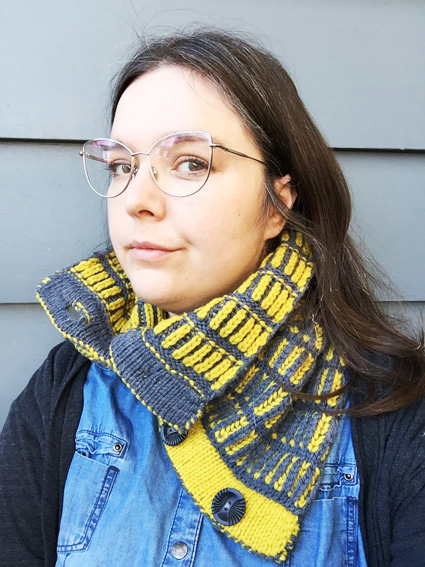
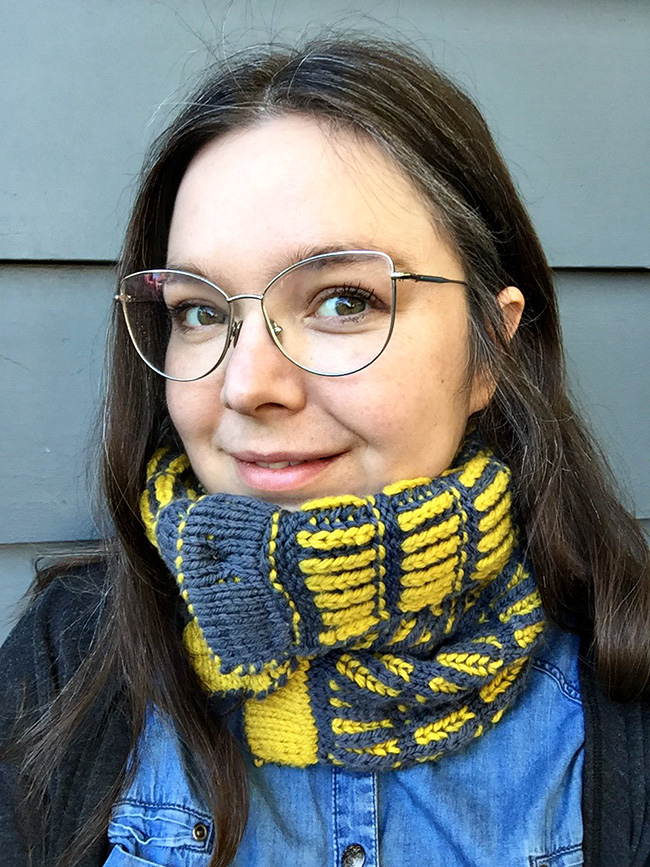
I have many issues with scarves, flying away in the wind, staticy hair, and fogging my glasses. I designed the Software Engineer to make things simpler for myself and resolve my winter scarf issues.
I wanted to make something fun and challenging to knit. It is small/simple garment, but it is made interesting with brioche and double knit. It could be made reversible if buttons are attached to the front and back of the button band. This is my first pattern and I am really happy with the support I received in making it from Knitty, Tech support from Kate Atherley, test knitter Alison Cooley, and moral support from MaryAnne Mctrowe and Amanda Bigford my BFFs and cheerleaders!
 model + photos: Shanell Papp


SIZE
One
FINISHED MEASUREMENTS
19.5 inches/50cm in circumference (when buttoned), 13 inches/33 cm deep
MATERIALS
Yarn
YOTH [100% American Rambouillet Wool; 220yds per 100g skein];
![]() [MC] Black Mission Fig; 1 skein
[MC] Black Mission Fig; 1 skein
![]() [CC] Mustard; 1 skein
[CC] Mustard; 1 skein
Note: the project uses almost all of both skeins. If you don't match gauge, or wish to adjust, you may need more yarn.
Yarn Characteristics:
The yarn is a dense, and fairly tightly twisted worsted weight. The structure of the yarn is important to help the project hold its shape. Work with a Solid or semi solid and pick colours that are complementary or highly contrasting.
Recommended needle size
[always use a needle size that gives you the gauge listed below - every knitter's gauge is unique]
![]() US #7/4.5mm circular needle, 16 inch/40 cm or longer
US #7/4.5mm circular needle, 16 inch/40 cm or longer
Notions
![]() sewing needle and thread
sewing needle and thread
![]() 4 buttons 1.25-inches/3cm
4 buttons 1.25-inches/3cm
![]() cable needle
cable needle
![]() yarn needle
yarn needle
GAUGE
18 sts/27 rows = 4 inches/10 cm in stockinette stitch
16 sts/21 rows = 4 inches/10 cm in brioche pattern stitch
17 sts/24 rows = 4 inches/10 cm in double knit
PATTERN NOTES
[Knitty's list of standard abbreviations and techniques can be found here.]
Sl1 wyif: bring the yarn to the front and slip the stitch purlwise.
sl1yo:
On odd-numbered A rows and even-numbered B rows: Bring the yarn to the front, slip the next st purlwise; and then drape the yarn over the right-hand needle as you knit the following stitch.
On even-numbered A rows and odd-numbered B rows: With the yarn in the front, slip the next st purlwise, take the yarn over the right-hand needle and all the way to the front again, ready to work the following (purl) stitch.
Brioche: there's a good tutorial here.
brk: Knit the stitch together with its accompanying yarnover.
brp: Purl the stitch together with its accompanying yarnover.
In the brioche section, at the start of MC rows, the first stitch is worked with both MC and CC held together; the rest of the row is worked with MC only. In the double knitting section, the last stitch of every row is worked with both MC and CC held together.
Double Knitting
- If you haven't worked double knitting before you may want to practice first with some scrap yarn first and consult this video.
- Each row is worked with both colors, alternating as you go across. The side facing you is always in knit and the side facing away from you is in purl.
- Double-knit BO: K2tog (1 from each side), *k2tog, lift first stitch over second as for a standard bind off; repeat from * until the required stitches have been bound off. (1 st rems on right-hand needle.)
DIRECTIONS
Using MC and long tail method, CO 59 sts.
Set Up Row [WS]: Purl.
Row 1A [RS]: Knit. Slide sts back to start of needle.
Row 1B [RS - CC]: K1, (p1, sl1yo) to last 2 st, p1, slst MC/CC yif. Turn work.
Row 2A [WS - MC]: K1 with MC and CC, (sl1yo, brp1) to 2 last sts, sl1yo, sl1 wyif. Slide sts back to start.
Row 2B [WS - CC]: K1, (brk1, sl1yo) to last 2 sts, brk1, sl1 wyif. Turn work.
Row 3A [RS - MC]: K1 with MC and CC, (sl1yo, brk1) to last 2 sts, sl1yo, sl1 wyif, Slide sts back to start.
Row 3B [RS - CC]: K1, (brp, sl1yo) to last 2 st, brp, sl1 wyif. Turn work.
Rows 4A to 6B: Repeat Rows 2A-3B once, and work 2A-2B once more.
Row 7A [RS - MC]: K1 with MC and CC, (k1, brk1) to last 2 sts, k1, sl1 wyif.
Row 7B [WS - MC]: K1, purl to last st, sl1 wyif.
Row 8A [RS - MC]: K1 with MC and CC, knit to last st, sl1 wyif.
Repeat Rows 1B-8A 12 more times
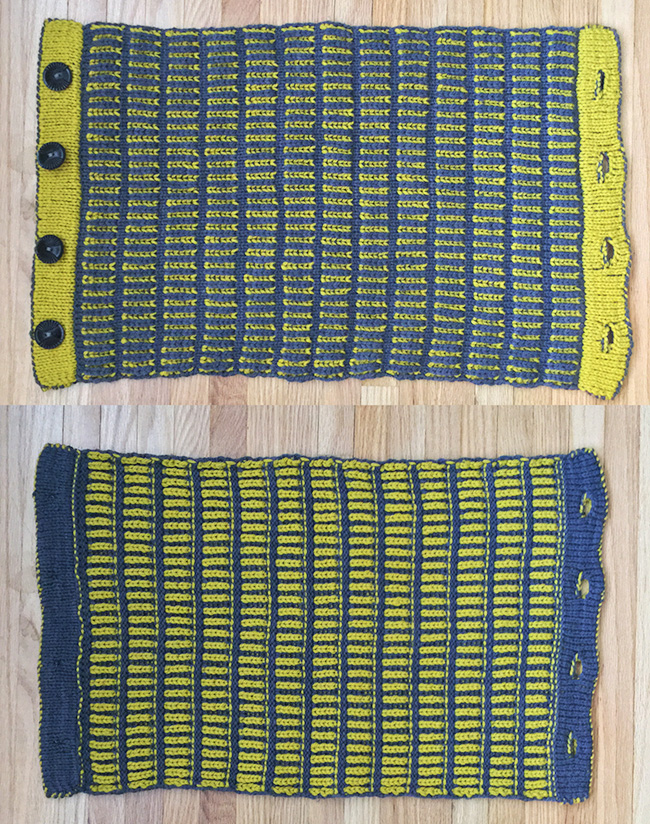
Buttonhole Flap
Row 1 [RS - CC]: [Sl 1 MC, pick up and knit 1 st in the gap with CC] to last st, sl 1. 59 MC sts, 58 CC sts, 117 sts total.
Row 2 [RS]: Sl 1 wyib, double knit to last stitch, k1 with MC and CC.
Row 3 [WS] Sl 1 wyib, double knit to last stitch, k1 with MC and CC
Row 4 [RS] Sl 1 wyib, double knit to last stitch, k1 with MC and CC.
Row 5 [WS, create buttonholes]: Sl1 wyib, double knit 14 sts (7 purl, 7 knit), *double-knit BO 8 sts, (1 st rems on right-hand needle), double knit 16 sts (8 purl, 8 knit); repeat from * 2 more times, double-knit BO 8 sts (1 st rems on right-hand needle), double knit to last st, k1 with MC and CC.
Row 6 [RS, close buttonholes]: Sl1 wyib, *double knit to buttonhole gap, CO 8 sts, alternating CC and MC; repeat from * 3 more times, double knit to last st, k1 with MC and CC.
Work 3 more rows as set.
Bind off, slipping first st wyib, and working double knitting as set, lifting each stitch over as you go, for a standard bind off. Cut yarn and pull through final st to secure.
Button Band
Return to cast-on edge.
With RS facing, rejoin MC, and pick up and knit 59 sts in the CO edge. Slide sts back to start of needle.
Start as for Buttonhole flap, working 10 rows of double knitting.
Bind off, slipping first st wyib, and working double knitting as set, lifting each stitch over as you go, for a standard bind off. Cut yarn and pull through final st to secure.
FINISHING
Block by washing or steaming. Do not pin, stretch or iron. Weave in ends and attach.
ABOUT THE DESIGNER
 Shanell Papp maintains an isolated and intensive art practice, working in textiles, sculpture, photography, and drawing. Papp's work has earned a large following online, shared widely and viral multiple times over. The work blurs/redefines the boundaries of Textile Craft and Fine Art, at times grotesque, horrific and other times painfully funny. Their work can mesmerize with its charming laboured oddness.
See more of their work at their website, and on Instagram.
Pattern & images © 2021 Shanell Papp