Summer's
here and the time is right
for
dancing dyeing in the streets yard.
Dyeing outside has some huge perks this time of
year. First and foremost, it doesn't add
any heat to your home on hot summer days. Secondly,
clean up goes a lot quicker! And third, space,
or a lack of space, won't stand in the way of giving
it a go. So if you have ever been curious to dive
into dyeing, but let the lack of a proper studio
hold you back; this is the season for you! Dyeing
is so much fun, it should and could be accessible
for everyone.
It’s easy to put together a dyeing kit that
you keep in a tub and can whip out as the mood
strikes you. You can get right to dyeing – no
hunting and gathering of equipment.
Handy items to have for dyeing in the wild:
- Safety
gear (rubber gloves, dust mask for when you
mix your dye)
- Old clothes
- Old towels
- Cups and spoons
for mixing dye (ones you will only use for
dyeing)
- Dye + vinegar, of course!
(Any kind of dye will do. Acid dyes, to spite
their scary name, are Non-Toxic... Kool aid,
in essence, is an acid dye.)
- Tarp
- Newspaper
- Plastic wrap
- Black roasting pan (that
won't ever see a turkey again)
- Oven thermometer
- Colander (for draining excess liquids)
- Plastic tub for storing
it all in
|
Just to be
safe, nothing used in dyeing should be used
for food again!
|
Keep your dye kit simple
and compact. That way, when the urge strikes,
you have everything at hand and nothing
holding you back from taking the storage tub
out of the closet. (For more guidance on mixing
up dyes, see Dye
Fingerprint in the fall 06 issue of KnittySpin.)
Setting up your space will hinge on a few factors.
A. What you are gracing with color (yarn, roving,
etc.)
B. How many folks are going to be playing.
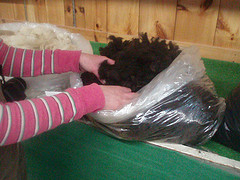
If you are having a gathering, or dyeing a bunch
of yarn, I've found it is handy to lay a big
tarp down over the work area. Place some newspapers
down & depending on how and what is being
dyed, some saran wrap on top of the newspapers.
(Especially useful for handpainting)
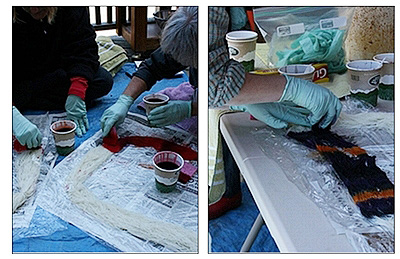
Card or picnic tables are great! But not at all
necessary, as the ground, or porch provides a
huge work space - enough for you and friends
to spread out & collaborate.
Love your mother
Dyeing outside also lends
itself to harnessing some solar power.
In our energy-starved times, we are all [or should
be] thinking about minimizing our environmental
footprints. Making more efforts to turn off our
lights as we leave the room, buying organic,
using canvas shopping bags, carpooling, using
public transport and even
investing in fuel-efficient hybrid cars With
these issues in the forefront of our thoughts,
it becomes apparent that passive solar energy
is a hand dyer's best friend. Not only for hanging
our dyed rovings out in the sun to dry, but utilizing
the sun's rays to set our dyes.
It can be as simple as putting a black roasting
pan in the sun for the day, or as involved as
utilizing a solar cooker to maximize conductivity
and minimize cooking time. For the sake of this
article, to show how simple it can be, I
did both.
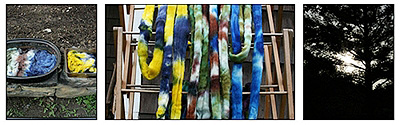
On a day where the high
temperature was in the mid to lower 60s (f)
in the sunniest spot in our yard, I placed
one pound of ready-to-dye top in a conventional
black enameled roasting pan and about 6 ounces
of the same top inside a solar cooker.
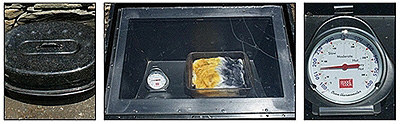
Within one hour, the temperature
inside the solar oven reached about 175(f). For
the sake heat retention, I didn't
open the lid of the roasting pan to check the
temperature often, but when I did, it ran about
100-50 (f) lower.
After three hours, moving the oven hourly to
maximize the angle of the sun, the temperature
reached 250 (f) -- which
is the temperature we need in order to set
the dye. At that point I carefully took
off the plexiglass lid to allow heat to escape
and for the roving to cool off. (And I do mean
carefully, as the inside surfaces of the solar
oven are HOT! I learned the hard way.)
It took significantly longer for the larger amount
of roving in the roasting pan (with an ill-fitting
lid) to heat up to 250 (f) -- about 6-8 hours. In
hindsight, perhaps it wasn't the best control
subject for this test.
With a bit
of tweaking, such as utilizing black plastic
bags to seal in
the heat and aluminum foil reflectors, I suspect
the roasting pan method could have its cooking
time cut by at least a third.
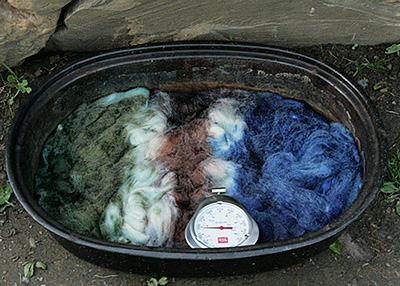
At the end of the day (8 hours, total) I had a over pound of roving
dyed, without having to turn on the oven or crock
pot.
For
tightwads like myself, the prospect of free energy
is terribly exciting. Being able to reduce my
dependency on natural gas and electricity to
further my creative endeavors brings my process
full circle. It may not be as glorious as the
entire solar powered mini mill run by my heroes
at Buckwheat
Bridge Angoras but it is a start.
Special thanks to the Knitting
Studio for
hosting 'Pippi's traveling roadshow and outdoor
dyeing circus. (You can find more pictures of
outdoor dyeing on
my Flickr.)
And to Bridget,
Jane, Sandra & Sarah for
being such joyful participants.
Extra special thanks to the Vermont
solar store for providing me a less than
perfect solar oven for this project.

Solar
ovens
Get into the sun!
Building a solar oven is a great summer project,
something especially fun to do with the kids.
The educational and social lessons to be learned
will last a lifetime. Plus, it's wicked cool.
Have an spinning question
you would like to see answered here? Send email
to Symeon. |