Knitty: little purls of wisdom
Blue Moon
Title
beauty shot
Tangy

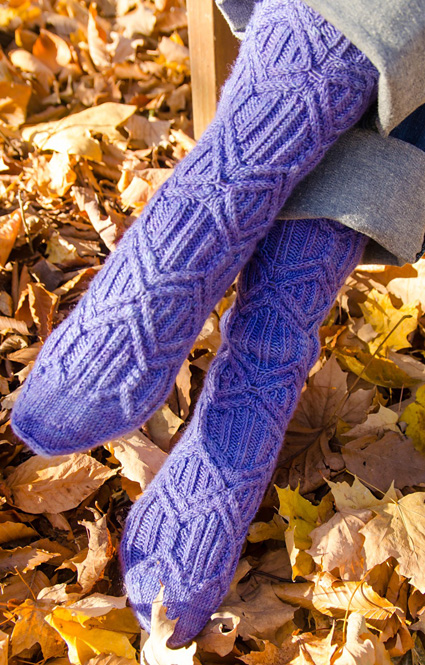
Back in the Dark Ages (1981), we physics students toiled to make simple circuits with relays, transistors, and even vacuum tubes. Technology has changed, but the science behind it hasn't. One of the most simple and elegant is Ohm's Law, which defines Current (I) as the ratio of Voltage (V) to Resistance (R), or I = V/R.

This pattern started as an outline of cables on Stockinette: current (columns of twisted stitches inside the larger diamonds) flows from positive to negative potential; voltage drops as it passed through resistance (rope cables); magnetic fields form and rotate around flowing current.

To promote wear resistance, the heel flap and heel turn are worked using a smaller needle. The pattern texture is very dense and thus stretchy. Be sure to use a stretchy yarn to maximize a comfortable fit.

spacer photos: Gregg Vandivert, Nancy Vandivert
   Pin It!


SIZE
Adult M[L]
shown in size Large, leg 8.5 inches long

FINISHED MEASUREMENTS
Foot circumference: 8[9] inches
Leg length: Adjustable to fit.
Foot length: Adjustable to fit.

spacer

MATERIALS
Yarn

spacer Blue Moon Fiber Arts Socks That Rock [100% superwash merino, 405 yds/370 m per 5.5 ozs/155g skein] 1 skein; color: Star Sapphire

Recommended needle size
[always use a needle size that gives you the gauge listed below -- every knitter's gauge is unique]
spacer US #2/2.75 mm[US #3/3.25] needles for working in the round
spacer US #3/3.25 mm[US #4/3.5 mm] needles for working in the round

Notions
spacer stitch markers
spacer 2 cable needles
spacer yarn needle

spacer

GAUGE

36 sts/48 rounds = 4 inches in Stockinette stitch, using larger needles


PATTERN NOTES
[Knitty's list of standard abbreviations and techniques can be found here.]

C4L: Slip 2 sts to cable needle and hold at front of work, k the next 2 sts, then k sts from cable needle

C4R: Sl 2 sts to cable needle and hold at back of work, k the next 2 sts, then k sts from cable needle

C2/2LDec: Sl 2 sts to cable needle and hold at front of work, k2tog the next 2 sts, then k 2 sts from cable needle

C2/2 RDec: Sl 2 sts to cable needle and hold at back of work, SSK the next 2 sts, then k 2 sts from cable needle.

C2/1/2L: Sl 2 sts to cable needle and hold at front of work, then sl next st to second cable needle and hold at back of work, k the next 2 sts, k 1 st from second cable needle, then k the 2 sts from the first cable needle.

C2/1L: Sl 2 sts to cable needle and hold at front of work, k the next st, then k 2 sts from cable needle.

C2/1R: Sl 1 st to cable needle and hold at back of work, k the next 2 sts, then k the st from the cable needle.

Grafting:
Instructions for grafting can be found here.

spacerCharts
The charts for this pattern are very large and fit on a letter-sized page.
Click here and print the resulting page.


DIRECTIONS

spacer
Cuff
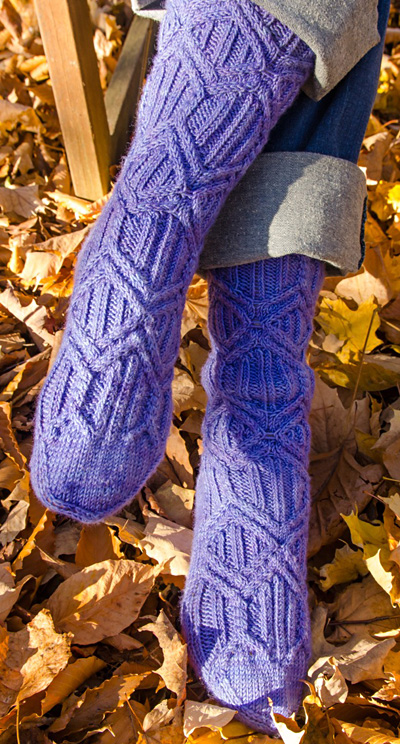
With larger needles, CO 64 sts.

Distribute sts across needles as you prefer and join for working in the round.

Cuff Round: Work Ribbing Chart around.

Work Ribbing as set for 1 inch.

Leg Setup: Work Setup Chart Round 1 around. 80 sts.

Continue as set until Setup Chart is complete.

Leg: Work Rows 1-37 of Main Pattern Chart once, then rows 2-37 once more.

Setup for heel: Work Row 1 of Main Pattern Chart across next 40 sts, reserve these sts for instep.

Heel Flap
Change to smaller needles.

On next 40 sts, begin working back and forth and work Rows 1-10 of Heel Flap Chart, then repeat Rows 7-10 until Heel Flap measures 2.25[2.5] inches (or to desired length), ending after Row 8, 30 sts remain.

Heel Turn
Row 1 [RS]: Sl 1 pwise wyib, k16, SSK, k1, turn.

Row 2 [WS]: Sl 1 pwise wyif, p5, p2tog, p1 turn.

Row 3 [RS]: Sl 1 pwise wyib, k6, SSK, k1, turn.

Row 4 [WS]: Sl 1 pwise wyif, p7, p2tog, p1, turn.

Row 5 [RS]: Sl 1 pwise wyib, k8, SSK, k1, turn.

Row 6 [WS]: Sl 1 pwise wyif, p9, p2tog, p1, turn.

Row 7 [RS]:Sl 1 pwise wyib, k10, SSK, k1, turn.

Row 8 [WS]: Sl 1 pwise wyif, p11, p2tog, p1, turn.

Row 9 [RS]: Sl 1 pwise wyib, k12, SSK, k1, turn.

Row 10 [WS]: Sl 1 pwise wyif, p13, p2tog, p1, turn.

Row 11 [RS]: Sl 1 pwise wyib, k14, SSK, k1, turn.

Row 12 [WS]: Sl 1 pwise wyif, p15, p2tog, p1, turn.
18 sts remain.

Gusset
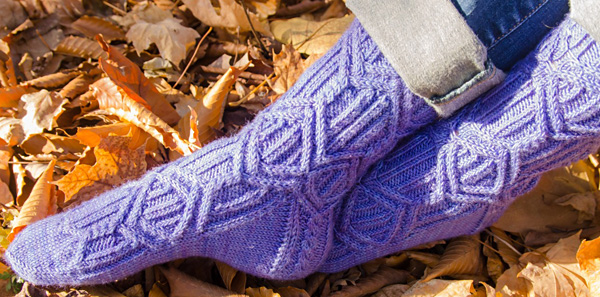
Change to larger needles.

Setup Round: Sl 1, k 17 to end of heel sts; pick up and knit 1 st in each sl st along edge of Heel Flap plus 1 st between Heel Flap and instep, work across held instep sts in pattern as set, pick up and knit 1 st between instep and Heel Flap and 1 st in each sl st along edge of Heel Flap, k8. This puts you in the center of the heel flap, and is the new start of round.


spacer
.spacer
Round 1: K to 2 sts before instep, k2tog, work in pattern as set to end of instep, SSK, k to end of round. 2 sts decreased.

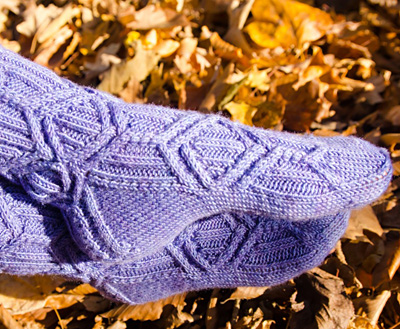
Round 2: Work even in pattern as set.

Repeat Rounds 1 and 2 until 72 sts rem, 40 on instep and 32 on sole.

Foot
Work even in patt as set, repeating Chart Rounds 1-36 as necessary, until foot measures 2 inches less than desired length from back of heel.

Toe
Setup round: K to instep, [k2tog, k2, k2tog, k8, k2tog, k2, k2tog] twice across instep; k to end of round. 64 sts total; 32 each on instep and sole.

Round 1: K to 3 sts before instep, k2tog, k1; k1, SSK, k to 3 sts before end of instep, k2tog, k1; k1, SSK, k to end of round. 4 sts decreased.

Round 2: K all sts.

Repeat Rounds 1 and 2 until 32 sts rem, then work Round 1 only until 8 sts rem.

spacer

FINISHING
Setup for grafting: K to instep sts.
Cut yarn, leaving a 12 inch tail. Use Kitchener stitch to graft sts.

Tip: To avoid "ears" when grafting, at each of the four corners, lift the outside stitch over the second stitch in, sort of like a mini bind off, then graft the remaining stitches.

Weave in at least 2 inches of tail ends on inside of sock, working a tight zig zag pattern across 2 rows of Reverse St st.
Block if desired.

spacer
ABOUT THE DESIGNER

designernamespacer Nancy Vandivert happily admits to being a knitting nerd. She knits, crochets, spins, teaches, sews, and lives outside of Rochester, NY with her husband, two college-age daughters, and three cats. Besides designing, her other knitting passions are ethnic mittens and sharing different knitting traditions with whoever will listen. She is a TKGA certified Master Hand Knitter and has been published in Knitty and CAST ON magazine. Her Lilac Festival Bag pattern won second place in the 2011 TKGA Masters Design contest and is available from Yarnmarket.com.

Her other designs and full teaching schedule can be found here, and she's here on Ravelry.

spacer