
|
|
|

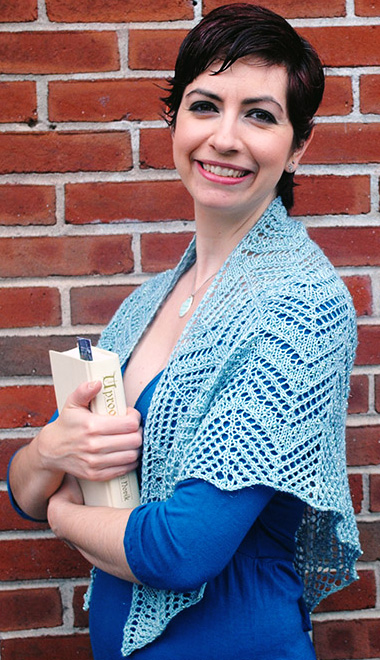
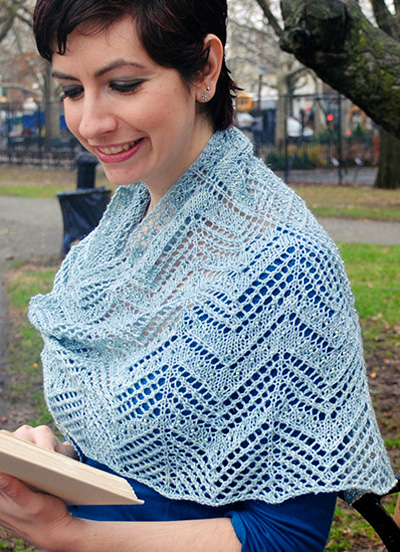
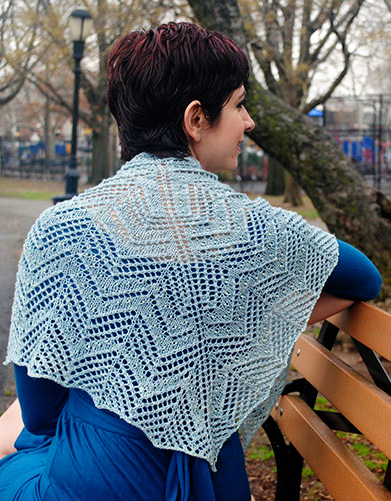
I love finding a single skein of fingering yarn that is special, one with substantial yardage and an element that really makes it shine. I bought this skein of yarn because it looked so ethereal. The stellina running through it was reminiscent of a sky full of stars and the color reminded me of twilight. I wanted to do it justice with a stellar (please pardon the pun!) pattern. I decided to go with an almost starlike repeat with the addition of some shiny beads to really make this shawl twinkle. I used beads that are close in color to the yarn but you can get creative and even make the beads contrast to really make them pop! Having worked with beads a handful of times before I wanted this pattern to be simple enough for a beading novice to enjoy without any frustrations, yet intriguing enough to keep a more advanced knitter interested. To acheive this I decided that the beads would be placed while the knitting is taking place, this means no pre-stringing required! It’s a great technique to take a rest from the constant knitting and there are several rows with no beads, great for a break or to tune back into your favorite TV show! I highly recommend using beads that are smooth inside. Try them out and see if they slide smoothly on the yarn, they have to fit with the crochet hook (or dental floss threader) and the yarn running through them. If you’re asking how I know this well… I bought some beads and I was doing fine at first but they weren’t all the same diameter inside, so one got slightly stuck and I got slightly frustrated and yanked it so hard I actually ripped the yarn. It gets a bit better, I couldn’t even felt the ends together because they were too short so I got a little creative and glued them together. Learn from my mistake! Please stop cringing, find an amazing fingering skein, and let the knitting begin! |
||
|
|
|
Tweet
 |
|
|
||
|
SIZE |
|
|
FINISHED MEASUREMENTS |
|
MATERIALS Notions |
|
GAUGE |
| 14.5 sts/28 rows = 4 inches in pattern stitch, after blocking |
|
PATTERN NOTES |
|
 CDD: Slip one st knitwise, k2tog, pass the slipped stitch over. Knit and Place Bead
Charts |
|
DIRECTIONS 
Garter Tab: Cast on 2 sts. Knit 6 rows. Do not turn at end of last row. Rotate piece 90 degrees and pick up and knit 3 sts along long side of garter strip. Rotate piece 90 degrees and pick up and knit 2 sts in cast on edge. 7 sts. Setup Row 1 [WS]: K2, pm, p1, pm, p1, pm, p1, pm, k2. Setup Row 2 [RS]: K2, sm, yo, k1, yo, sm, k1, sm, yo, k1, yo, sm, k2. 11 sts. Setup Row 3 [WS]: K2, p to last 2 sts, k2. From here, the first and last 2 sts are worked in garter stitch, the center st in stockinette stitch, and the chart is worked twice, between the markers. Note: Because it’s a large chart, we’ve broken it up into smaller pieces. Work the charts in the following order: Chart 1, Chart 2, Chart 3, Chart 4. When working Chart 3, you will work the repeat in the red box three times, and when working Chart 4, you will work the repeat in the blue box five times. Next row, establish chart [RS]: K2, sm, work chart to center st, sm, k1, sm, work chart to last 2 sts, sm, k2. Continue as set until all charts are complete. 263 sts. |
|
FINISHING |
| ABOUT THE DESIGNER |
|
She can be found on Ravelry as KallyA. |
|
Pattern & images © 2015 Kalliopi Aronis. Contact Kalliopi |