NAME, a free knitting pattern from Knitty.com. Free knitting pattern for a DETAILS HERE.
INTRODUCTION
Crockerdile
![]()
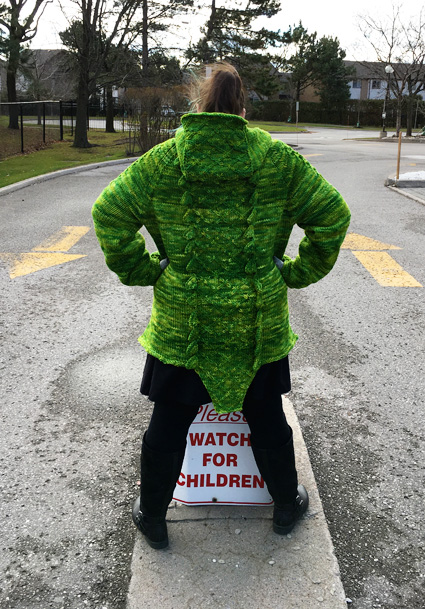
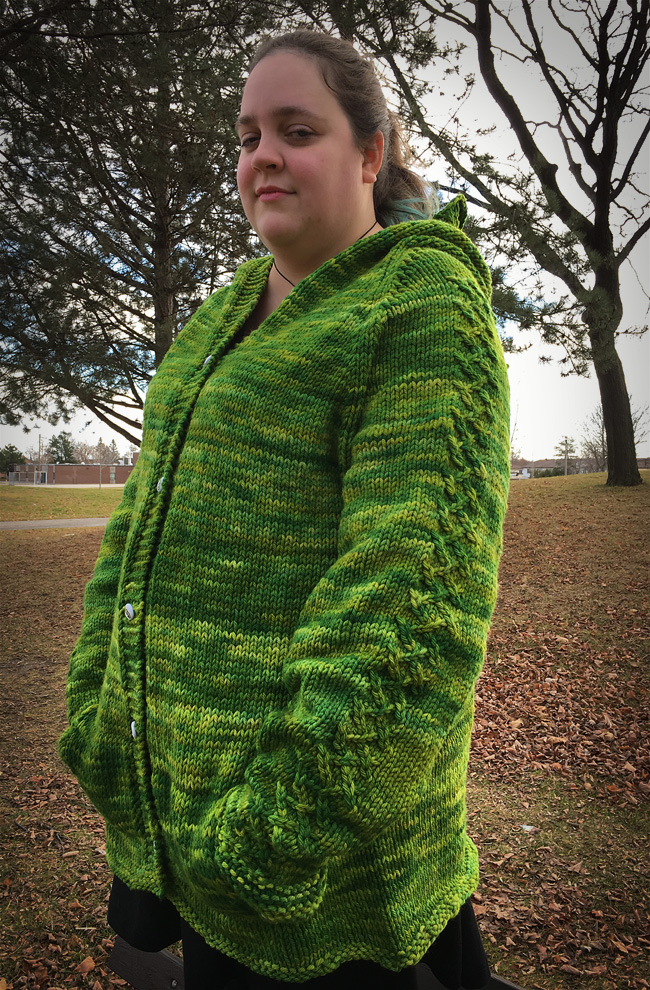
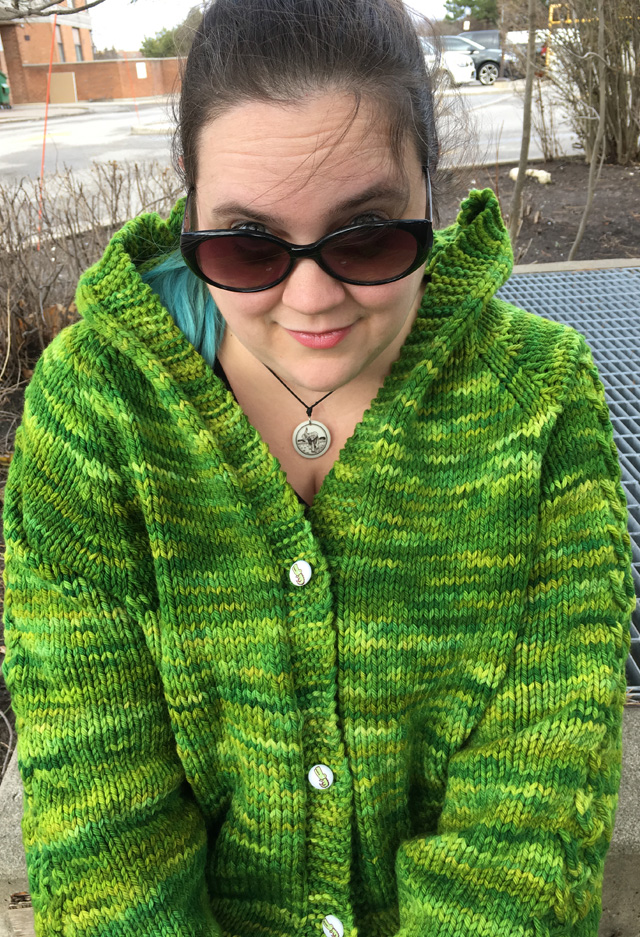
Of all the animals in the local zoo, my wife’s favourite is the Dwarf Nile Crocodile. She’ll hang out for hours with her sharp-toothed friends, but when I went looking for a pattern to make her some crocodile camouflage, the only patterns I could find were written for children’s sizes. So before our next zoo trip, I whipped up this bulky cardigan with bold diamond scales and spikes down the back, to help her blend in at the watering hole.
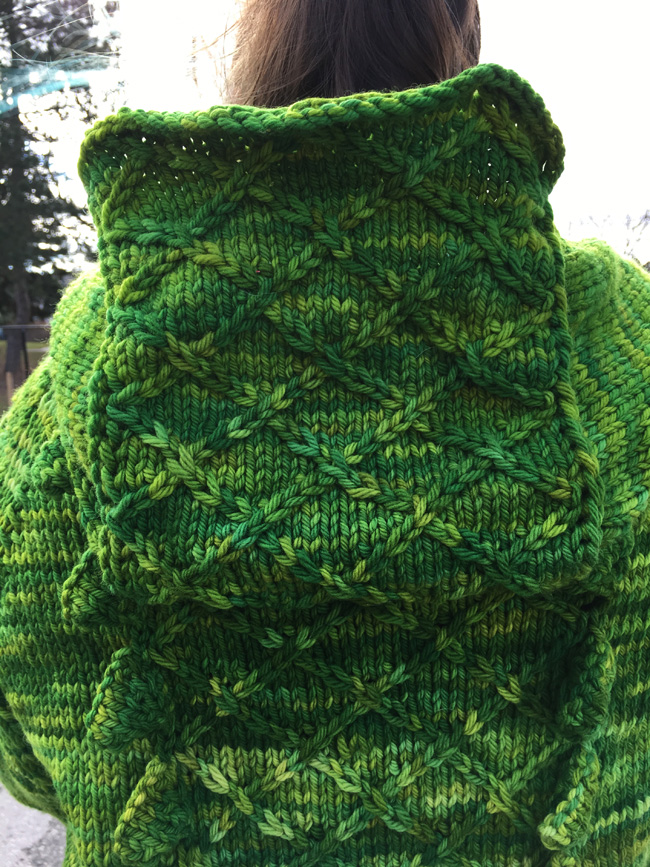
This is a straightforward agender cardigan with a cabled back panel and uniquely constructed spines to turn you or your loved one into a fearsome crocodile with a comfy deep hood and huge pockets. It is knit seamlessly from the bottom up, with practically no finishing.
 model: Rita Morris
 photos: Amy Singer
SIZE
XS[S, M, L, XL, 2X, 3X]
Note: Sweater is designed to be oversized - for a tighter fit, work the next size down.
shown in size 2X with 3 inches of ease.
FINISHED MEASUREMENTS
Chest: 32.5[37.5, 42.5, 45, 47.5, 52.25, 57.25] inches/ 82[95.5, 108, 114.5, 121.5, 132.5, 145.5] cm
Length: 25[26.5, 30.75, 32.75, 35.5, 37] inches/63.5[67.5, 78, 83, 90, 94] cm, not including tail
MATERIALS
Yarn
![]() Dream in Colour Mammoth [100% Wool; 125 yd/ per 100g skein]; colour: Tart; 10[11, 12, 13, 13, 14, 16] skeins
Dream in Colour Mammoth [100% Wool; 125 yd/ per 100g skein]; colour: Tart; 10[11, 12, 13, 13, 14, 16] skeins
Recommended needle size
[always use a needle size that gives you the gauge listed below - every knitter's gauge is unique]
![]() US #10.5/6.5 mm preferred needles (straight or circular) for knitting flat
US #10.5/6.5 mm preferred needles (straight or circular) for knitting flat
![]() US #10.5/6.5 mm preferred needles (circular or DPNs) for medium-diameter knitting
US #10.5/6.5 mm preferred needles (circular or DPNs) for medium-diameter knitting
Notions
![]() stitch holders or waste yarn (4)
stitch holders or waste yarn (4)
![]() stitch markers (6)
stitch markers (6)
![]() 9-10 1-inch buttons
9-10 1-inch buttons
![]() yarn needle
yarn needle
GAUGE
13 stitches/15 rows = 4 inches/10 cm in stockinette stitch
PATTERN NOTES
[Knitty's list of standard abbreviations and techniques can be found here.]
By the time you’re done this sweater, you will be an expert at cabling on the wrong side. . You will also need work short rows and pick up stitches.
C1B [RS]: slip next stitch to cable needle, hold to back of work, knit 1, knit stitch from holder.
C1B [WS:] slip next stitch to cable needle, hold to front, knit 1, knit stitch from holder.
C1F [RS]: slip next stitch to cable needle, hold to front of the work, knit 1, knit stitch from holder.
C1F [WS]: slip next stitch to cable needle, hold to back of the work, knit 1, knit stitch from holder.
kfbf: knit into the front, back, front of stitch
Make Spike:
This is the stitch labelled “Make Spike” on the Back Panel Chart. It does take up only one stitch, and neither increases nor decreases your stitch count.
Row 1 [RS]: kfbf in next st, turn. 3 sts.
Row 2 [WS]: Sl 1, p2,turn.
Row 3: Sl 1, kfb twice, turn. 5 sts.
Row 4: Sl 1, p4, turn.
Row 5: Sl 1, kfb, k1, kfb, k1, turn. 7 sts.
Row 6: Sl 1, p6. Turn.
Row 7: Sl 1, kfb, k3, kfb, k1. Turn. 9 sts.
Row 8: Sl 1, k8. Turn.
Row 9: Sl 1, ssk, k3, k2tog, k1. Turn. 7 sts.
Row 10: Sl 1, p6. Turn.
Row 11: Sl 1, ssk, k1, k2tog, k1. Turn. 5 sts.
Row 12: Sl 1, p4. Turn.
Row 13: Sl 1, ssk, k2tog. Turn. 3 sts
Row 14: Sl 1, p2. Turn.
Row 15: S2KPO. 1 sts.
You are left with what would look, if laid flat off the needle, like a stockinette diamond with a purl row bisecting it. Make sure this piece is lying on the RS of the work.
Attach Spike:
The diamond will have folded along the purl ridge, giving you a slightly rounded triangle of doubled-up fabric. You will see four selvedge sts along each edge of the triangle.
Insert your right-hand needle into the selvedge st nearest the base of the triangle and the selvedge st facing it - there should be four loops (2 for each selvedge st) on your needle. Knit the two selvedge sts together - one stitch of the spike attached to sweater back.
Slip this newly created st back to the left hand needle and k2tog with next st.
CHARTS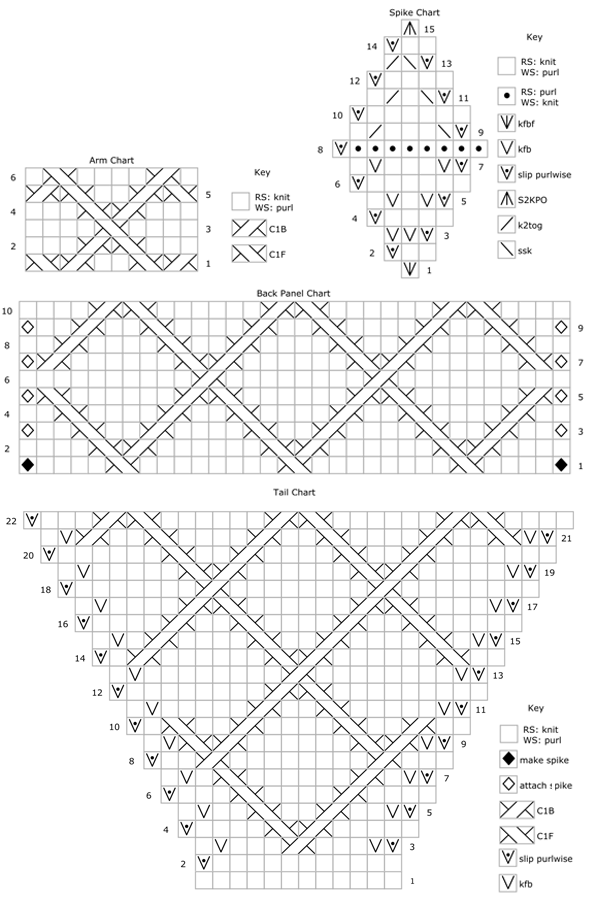
DIRECTIONS
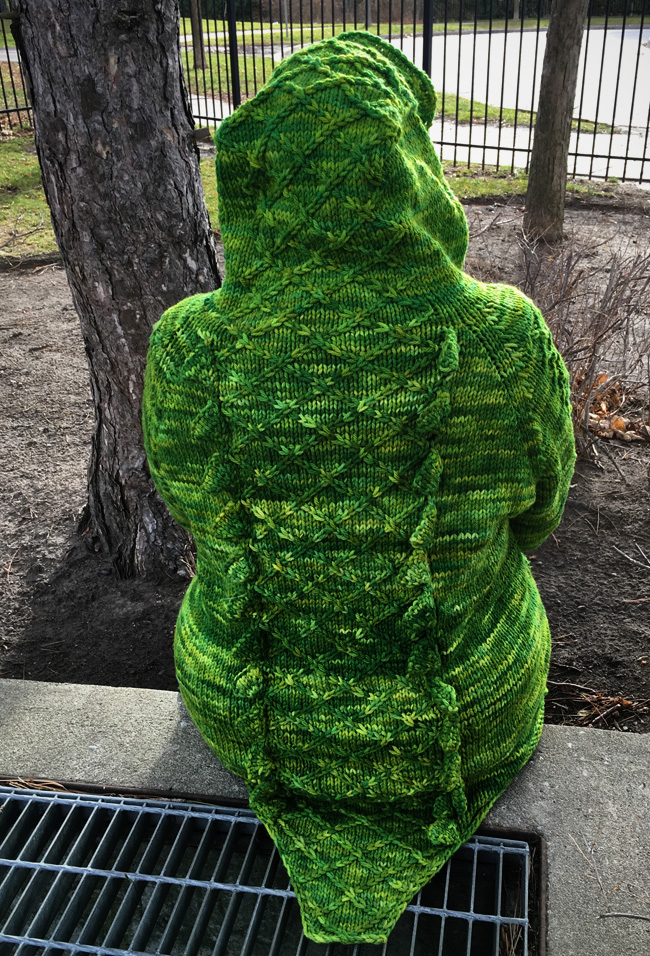
Tail
Cast on 12 sts using the cable cast-on.
Row 1 [RS]: Knit.
Rows 2-22: Work tail, starting with Row 1 of the tail chart. Work through Row 21 of the tail chart.
Row 23 [WS]: Work final row of tail chart. Without turning, CO 40[48, 56, 60, 64, 72, 80] sts using the backwards loop cast-on. Turn.
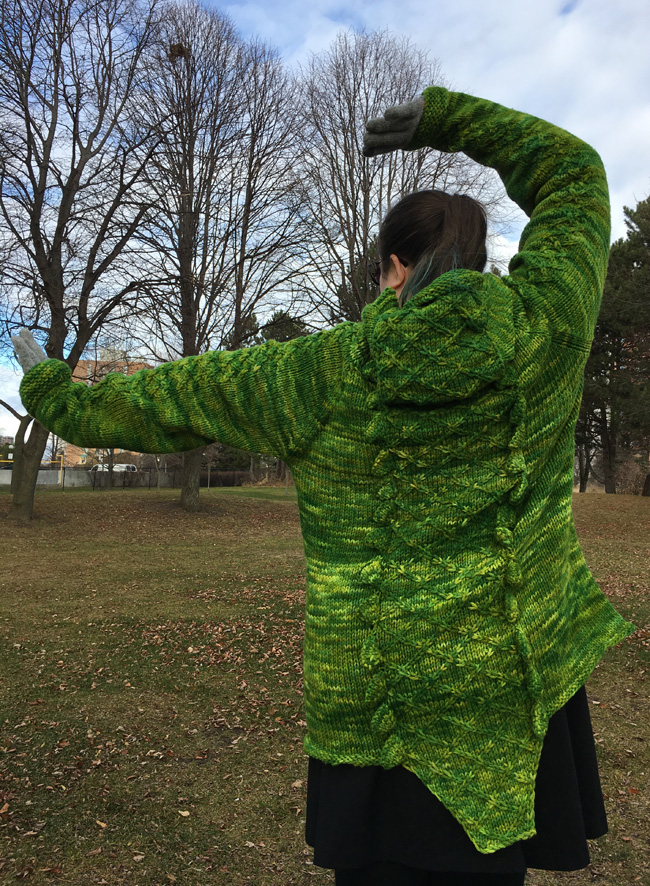
Body
Row 1 [RS]: K 40[48, 56, 60, 64, 72, 80], pm, work Row 1 of Back Panel Chart (see Pattern Notes for Make Spike instructions), pm, CO 40[48, 56, 60, 64, 72, 80] sts using a cable or knitted cast-on. 112[128, 144, 152, 160, 176, 192] sts and two markers on the needle.
Row 2 [WS]: K6, purl to marker, sm, work next row of Back Panel Chart, sm, purl to last 6 sts, k6.
Row 3 [RS]: Knit to marker, sm, work next Row of Back Panel Chart (see Pattern Notes for Attach Spike instructions), sm, knit to end of row.
Rows 5-10: Repeat Rows 3-4 three more times, for eight rows total. The final Attach Spike will be at the corner of the spike, just below the purl row of the diamond.
Row 11 (buttonhole row) [RS]: On next row, k2, ssk, yo twice, k2tog, k2, knit to marker, sm, work next row of Back Panel Chart, sm, knit to end.
From this point forward, repeat the Buttonhole row every 18 rows.
Row 12 [WS]: K6, purl to marker, sm, work next row of Back Panel Chart, sm, purl to last 6 sts, k6.
Begin pocket:
Note: You will need four stitch holders as you are creating a flap of stockinette which will hang on the outside of the sweater as you’re working.
Row 13: K6, kfb 16[16, 20, 20, 20, 20, 20] times, slipping newly-created sts to a stitch holder held in back. Turn.
Pocket row 1 [WS]: Sl 1, p 15[15, 19, 19, 19, 19, 19] , turn.
Pocket row 2 [RS]: Sl 1, k 15[15, 19, 19, 19, 19, 19] , turn.
Repeat Pocket rows 1-2 a total of 10[10, 11, 11, 11, 11, 12] times. Place all sts on a new holder and cut yarn.
Return sts from first holder (at the back and bottom of the flap) to the right needle and join the yarn after the new sts. Continue knitting to marker, sm, work next row of Back Panel Chart, sm, knit to last 22[22, 26, 26, 26, 26, 26] sts.
Start second pocket:
Kfb 16[16, 20, 20, 20, 20, 20] times, slipping newly-created stitches to a stitch holder held in back. Turn.
Work Pocket rows 1-2 10[10, 11, , 11, 11, 11] times. Place all sts on a holder and cut yarn.
Return sts from first holder back to the right needle and join yarn after the new sts. K6.
You should now have two stockinette rectangles flopping down from the RS of your sweater.
Row 14: Repeat Row 12.
Row 15: K6, pick up and knit one st from pocket selvedge. Slip picked up st back to left needle and k2tog with next st. K 14[14, 18, 18, 18, 18, 18] , pick up and knit one st from pocket selvedge. Slip picked up st back to left needle and k2tog with next st. Knit to marker, sm, work next row of Back Panel Chart, sm, knit to last 22[22, 26, 26, 26, 26, 26] st. Pick up and knit one stitch from pocket selvedge. Slip picked up st back to left needle and k2tog with next st. K 14[14, 18, 18, 18, 18, 18] , pick up and knit one st from pocket selvedge. Slip back to left needle and k2tog with next st, knit to end.
Row 16: Repeat Row 12.
Row 17-20: Repeat Rows 15-16 twice, for a total of 3 times. You will have attached three selvedge stitches at each side of the pocket.
Row 21: K6, pick up and knit one stitch from the pocket selvedge. Slip back to left needle and k2tog with next stitch. Knit to marker, sm, work next row of Back Panel Chart, sm, knit to last 7 sts. Pick up and knit one stitch from pocket selvedge. Slip back to left needle and k2tog with next stitch. Knit to end.
Row 22: Repeat Row 12.
Repeat Rows 21-22 a total of 7[7, 8, 8, 8, 8, 9] times or until you run out of pocket selvedge, whichever comes first.
Row 23: K6, *slip first st from holder onto left needle and k2tog with next st. Repeat from * until all sts from the holder have been worked. Knit to marker, sm, work next row of Back Panel Chart, sm, knit to last 22[22, 26, 26, 26, 26, 26] sts. *Slip first st from holder onto left needle and k2tog with next st. Repeat from * until all sts from the holder have been worked. Knit to end.
Row 24: Repeat Row 12.
Row 25: Knit to first marker, sm, work next row of Back Panel Chart, sm, knit to end.
Row 26: Repeat Row 12.
Repeat Rows 25-26 until work measures 18[18, 20, 20, 20, 21, 21] inches/ 45.5[45.5, 51, 51, 51, 53.5, 53.5] cm, or desired length from hem to underarm. End with a WS row. Set aside.
SLEEVES (make two)
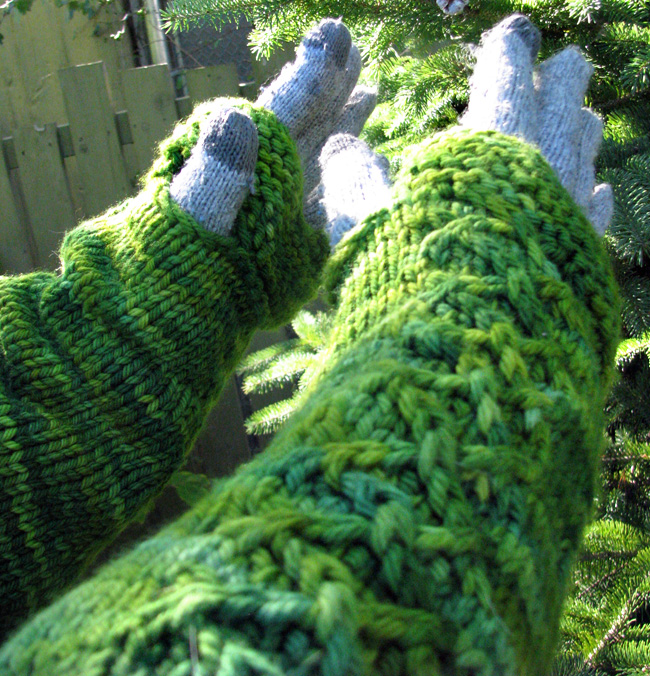
CO 28[30, 32, 32, 34, 36, 38] stitches and join to work in the rnd. Knit two inches in garter st, ending on a purl row.
Right Thumbhole:
Next rnd: K 4[5, 5, 5, 6, 6, 7] , bind off next 5 sts, knit to end.
Next rd: purl to gap, cast on 5 sts, purl to end.
Left Thumbhole:
Next rnd: K 19[20, 21, 21, 23, 23, 26] , bind off next 5 sts, knit to end.
Next rnd: purl to gap, cast on 5 sts, purl to end.
Continue to work arm:
Rnds 1-4: K 9[10, 11, 11, 12, 13, 14] , work next row of Arm Chart, knit to end.
Rnd 5 (Inc rnd): K1, kfb, k 7[8, 9, 9, 10, 11, 12] , work next row of Arm Chart, knit to last 2 sts, kfb, k1.
Continuing to work Arm Chart as established, work 5[4, 3, 3, 2, 2, 2] rows.
Repeat the last 6[5, 4, 4, 3, 3, 3] rnds 4[5, 7, 9, 10, 11, 12] more times. 38[42, 48, 52, 56, 60, 64] sts.
Continuing with the Arm Chart as established, work until sleeve reaches 16.5[17, 17.25, 17.5, 17.5, 18, 18] inches/42[43, 44, 44.5, 44.5, 45.5, 45.5] cm or desired length. Cut yarn and set aside.
Yoke
Starting at the right side of the body, k 24[28, 32, 34, 36, 40, 44] , pm, place next 4 sts on a holder or waste yarn. Pick up the right sleeve with the cable section facing out, away from the body of the sweater, and the thumb slit facing towards you. Place the first and last 2 sts of the right sleeve on a holder or waste yarn. Work across the sleeve sts, working the Arm Chart as established to end, pm, continue working body to marker, sm, work next row of Back Panel Chart, sm, k 12[16, 20, 22, 24, 28, 32] , pm, slip next 4 sts onto a holder or waste yarn. Pick up the left sleeve with the cable section facing out, away from the body of the sweater, and the thumb slit facing towards you. Place the first and last 2 sts on a holder or waste yarn. Work across the sleeve sts, working the Arm Chart as established, to end, pm, continue work body to end. 172[188, 212, 232, 256, 280, 304] stitches.
Row 1 [WS]: K6, purl to marker, sm, purl across sleeve, working Arm Chart as established, sm, purl to marker, sm, work next row of Back Panel Chart, sm, purl to marker, sm, purl across sleeve working Arm Chart as established, sm, purl to last 6 sts, k6.
Row 2 [RS]: K to marker, sm, knit across sleeve, working Arm Chart as established, sm, knit to marker, sm, work next row of Back Panel Chart, sm, knit to marker, sm, knit across sleeve working Arm Chart as established, sm, knit to end.
Repeat Rows 1-2 a total of 2[2, 2, 3, 3, 4, 4] times, then Row 1 once more.
Raglan Shaping
Dec Row [RS]: K to 3 sts before m, ssk, k1, sm, k1, k2tog, work across sleeve, working Arm Chart as established, to 3 sts before m, ssk, k1, sm, k1, k2tog. Knit to m, sm, work next row of Back Panel Chart, sm, knit to 3 sts before m, ssk, k1, sm, k1, k2tog, work across sleeve, working Arm Chart as established, to 3 sts before m, ssk, k1, sm, k1, k2tog. Knit to end. 8 sts dec, 164[180, 204, 224, 248, 272, 296] sts.
Row 2 [WS]: K6, purl to Arm Chart, work Arm Chart, purl to Back Panel Chart, work Back Panel Chart, purl to last 6 sts, k6.
Repeat Rows 1-2 until 76[76, 80, 80, 80, 88, 88] sts remain. You will run out of arm chart stitches before you run out of arm. When your decrease stitches use up the last stitch before the chart, stop working the chart for all subsequent rows.
Stop making buttonholes at this point and remove shoulder markers. You will also stop making spikes from this point on. Work spike stitch on the chart as a normal knit stitch.
Hood
Row 1 [RS]: knit to marker, sm, work next row of Back Panel Chart, sm, knit to end.
Row 2 [WS]: k6, purl to marker, sm, work next row of Back Panel Chart, sm, purl to last 6 sts, k6.
Repeat Rows 1-2 until the hood measures 9 inches/23 cm. Begin short row shaping to give the hood some shape and turn you into a fierce crocodile.
Short Row 1 [RS]: knit to marker, sm, work next row of Back Panel Chart to last stitch. Ssk using last st of chart and next st after marker, removing the marker. Turn.
Short Row 2 [WS]: Work next row of Back Panel Chart to last chart st, p2tog using last st of chart and next st after marker, removing the marker. Turn.
Repeat Short Rows 1-2 until 32 sts rem. Bind off loosely.
FINISHING
Put eight underarm sts from body and sleeve back on the needles and graft together.
Sew on buttons.
Weave in all ends.
Block lightly.

A: 32.5[37.5, 42.5, 45, 47.5, 52.25, 57.25] inches/ 82.5[95.5, 108, 114.5, 120.5, 132.5, 145.5] cm
B: 18[18, 20, 20, 20, 21, 21] inches/ 45.5[45.5, 51, 51, 51, 53.5, 53.5] cm
C: 11.75[13, 14.75, 16, 17.25, 18.5, 19.75] inches/ 30[33, 37.5, 40.5, 44, 47, 50] cm
D: 8.5[9.25, 9.75, 9.75, 10.5, 11, 11.75] inches/ 21.5[23.5, 25, 25, 26.5, 26.5, 28] cm
E: 16.5[17, 17.25, 17.5, 17.5, 18, 18] inches/ 42[43, 44, 44.5, 44.5, 45.5, 45.5] cm
F: 9 inches/23 cm
ABOUT THE DESIGNER
 DH Morris is a Toronto-based administrator who writes and designs in their free time. More of their designs can be found on Ravelry.
Most of DH’s crafty works are inspired by their animal-loving wife of several years. DH’s hobbies include crafting, learning to cook, tortoise husbandry, and owning too many cats.
Pattern & images © 2016 DH Morris. Contact DH