Skew Too a free knitting pattern from Knitty.com. Free knitting pattern for a pair of bias-knit fingerless gloves inspired by the famous Skew Socks.
INTRODUCTION
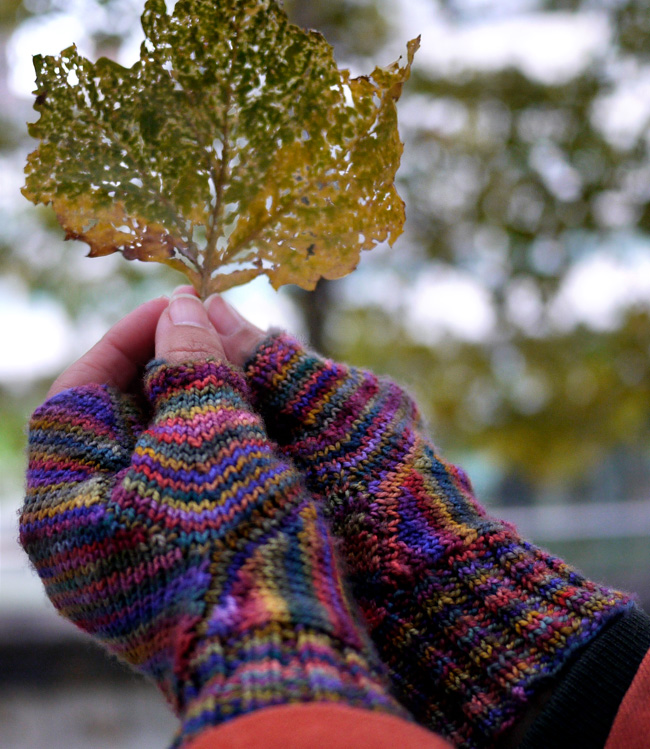
Skew Too
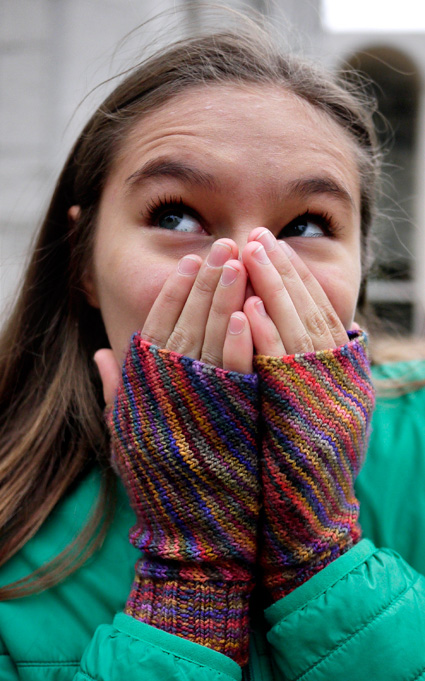

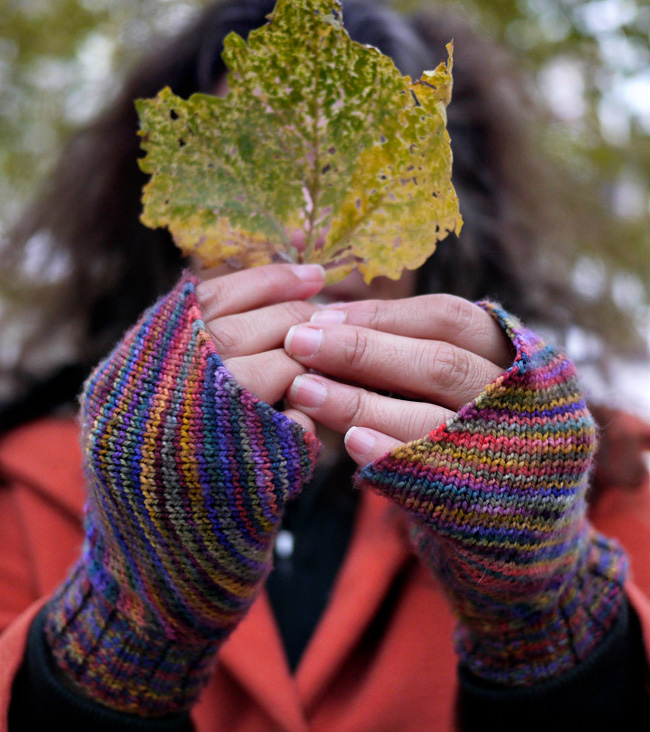
My dear friend Sue often works long days and nights defending the rights of indigent New Yorkers. I thought about what I would like to design for her to support her compassionate work. I remembered staying late at the office and having cold hands while I worked on the computer researching and writing. I decided she needed fingerless mitts to keep her hands warm, but not impede her fingers. I found a beautiful Koigu Painter's Palette Premium Merino (KPPPM) yarn with warm earth colors that reminded me of her. I had just knit a pair of Skew Socks by Lana Holden and didn't want regular vertical or horizontal stripes. I found a way to make these mitts at a slant so that the stripes would be skewed too. When I gave them to Sue, she told me that one of her nicknames was Skew! Kismet.
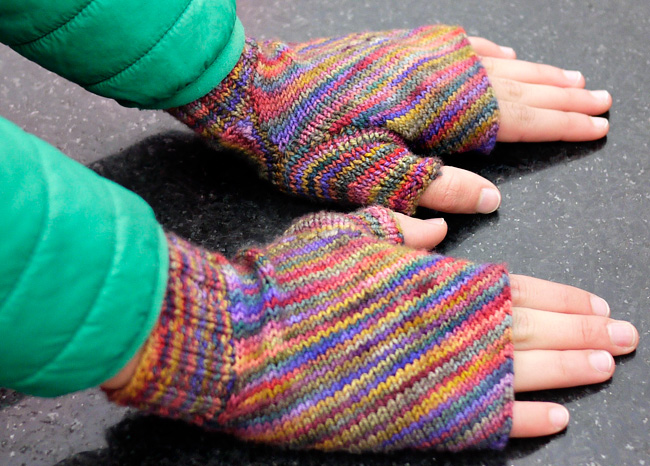
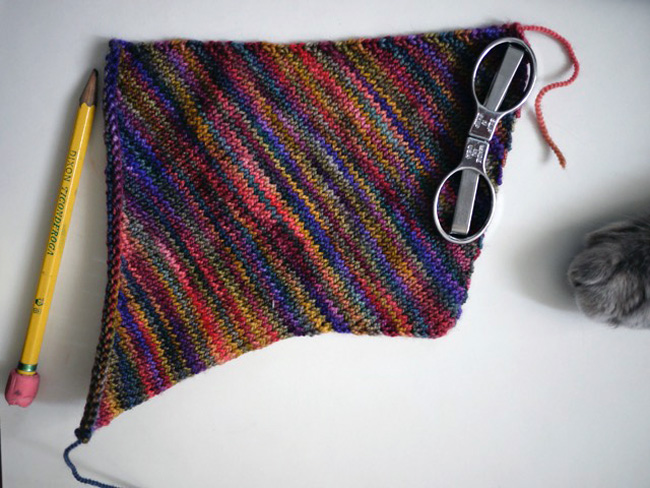
These mitts are knit at an angle with increases that eventually form a rectangular shape (really more of a rhombus to be precise). The rectangle is sewn together at the shorter sides, leaving an opening for the thumb. After the rectangle is sewn into a cylinder, stitches are picked up at the bottom and worked in the round in a (k2, p2) rib. Stitches are picked up for the thumb and also worked in the round.
 model + photos: Lucia Alexeyev, Eva Landeo
SIZE
S[M, L]
FINISHED MEASUREMENTS
Circumference: 6.5[7, 7.25] inches/ 16.5[18, 18.5] cm
Depth: 6.25[7, 8] inches/ 16[18, 20.5] cm
Choose the size closest to but not bigger than your hand circumference. The mitten should fit with a little negative ease.
MATERIALS
Yarn
![]() Koigu Painter's Palette Premium Merino (KPPPM) [100% merino; 175yd/160m per 1.76 oz/50 g skein]; color: Color: 623P; 1 skein
Koigu Painter's Palette Premium Merino (KPPPM) [100% merino; 175yd/160m per 1.76 oz/50 g skein]; color: Color: 623P; 1 skein
[always use a needle size that gives you the gauge listed below - every knitter's gauge is unique]
Notions
![]() yarn needle
yarn needle
![]() stitch marker
stitch marker
GAUGE
28 sts/42 rows = 4 inches/10 cm in stockinette stitch
PATTERN NOTES
[Knitty's list of standard abbreviations and techniques can be found here.]
PATTERN
kfbf: knit into the front, the back, and the front of a stitch, increase 2 stitches
DIRECTIONS
Hand – Increase Section
Using needles for working flat, place a slip knot on the needle. (Note: If you leave a long tail, you can use this to sew up the mitt seam.)
Row 1 [RS]: Kfbf. 3 sts.
Row 2: and all following even-numbered rows [WS]: Purl.
Row 3: Kfb, k to last st, kfb. 2 sts increased.
Repeat rows 2 & 3 15[18, 19] more times, ending with a RS row. 35[41, 43] sts
Hand – Straight Section
Row 1 [WS]: Purl.
Row 2 [RS]: Kfb, k to last 3 sts, k2tog, k1.
Repeat the last 2 rows until piece measures 6.5[7, 7.25] inches/ 16.5[18, 18.5] cm, ending with a RS row.
Hand – Short Row Shaping
Row 1 [WS]: P to last 2 sts, w&t.
Row 2: and all following even-numbered rows [RS]: Knit.
Row 3: P to last 4 sts, w&t.
Row 4: Knit.
Row 5: P to 2 before previously wrapped st, w&t.
Repeat the last 2 rows, until only 1 st remains unwrapped at the start of the row, ending with WS facing for next row.
Next Row [WS]: Purl across row, picking up wrapped stitches and purling them along with stitch.
Next Row: Kfb, knit to last 3 stitches, k2tog, k1.
Final Row: Purl.
BO and leave a long tail for seaming the mitt.
Note: The finished shape is rhombus-like (not a perfect rectangle). Laying it flat right side up, it measures about 6.5[7, 7.25] inches/ 16.5[18, 18.5] cm on the side to the right of the cast on and 4.5[5, 5.5] inches/ 11[13, 14] cm on the side to the left of the cast-on point. The bind-off edge measures 5.5[6.5, 7] inches/ 14[16.5, 18] cm, the bottom edge measures 6.25[7, 7.25] inches/ 15.5[18, 18.5] cm
Using safety pins or removable stitch markers, pin the bind-off edge to the side with the increases. Try the mitten open to determine thumb position. Seam up from the bottom and down from the top edges, leaving an opening of about 1.75[2.5, 2.75] inches/ 4[6.5, 7] cm.
Note: Because the bind-off edge is longer than the opposite side to the left of the cast-on point, you'll need to ease the two edges together.
Wrist/cuff
Using smaller needles for working in the round, with RS facing, join yarn at the seam and pick up and knit 44 (48, 52) sts around the bottom edge of the mitt. Note: the bottom edge is not a neat edge and should be below the shorter of the two seams that left an opening for the thumb. Please refer to photo of rhombus noting the bottom edge or the base of the cuff. Distribute sts across needles as you prefer and join for working in the round.
Ribbing round: (K2, p2) around.
Work ribbing as set for 2 inches/5cm.
BO in pattern.
Thumb
Using larger needles for working in the round, with RS facing, rejoin yarn at the seam, at the top edge of the thumb and pick up and knit 24[32, 36] sts around the thumb opening. Distribute sts across needles as you prefer and join for working in the round.
Knit 5 rounds.
Decrease round 1: [K2tog, k 4[6, 7] , ssk, k 4[6, 7] ] twice. 20[28, 32] sts.
Knit 2 rounds.
Decrease round 2: [K2tog, k 3[5, 6] , ssk, k 3[5, 6] twice. 16[24, 28] sts.
Knit 6[2, 2] rounds.
For Medium and Large sizes only:
Decrease round 3: [K2tog, k4 (5), ssk, k4 (5)] twice. -[20, 24] sts.
Knit 2 rounds.
Decrease round 4: [K2tog, k3 (4), ssk, k3 (4)], twice. –[16, 20] sts.
Knit –[4, 6] rounds.
Change to smaller needles for working in the round.
Ribbing round: (K2, p2) around.
Work 1 more round of ribbing. BO in pattern.
FINISHING
Wash to block and weave in ends.
ABOUT THE DESIGNER
 In 2001, I was speaking at a hospital when I spied a resident knitting using these very cool metal needles. The resident was paying attention and asking insightful questions all while creating fabric. I was mesmerized. Being a fidgety person, finding something that would allow me to fidget, pay attention, and create something was a dream. That weekend, I found my LYS, bought yarn, and set about teaching myself to knit with a book. My first project was an alpaca sweater. (I still wear it.) Once I started knitting, I really couldn't stop. Everyone got handknit scarves, capelets, and hats. My mom took to calling me “Arañita” (pronounced aran-yita) because in Spanish, industrious little spiders knit their webs.
I live in NYC where I continue to learn and knit and much of my free time is happily spent as cat furniture. I'm here on Ravelry.
Pattern & images © 2017 Eva Landeo.