Tuonela River, a free knitting pattern from Knitty.com.
INTRODUCTION
Tuonela River
 by Artesanitarium Designs

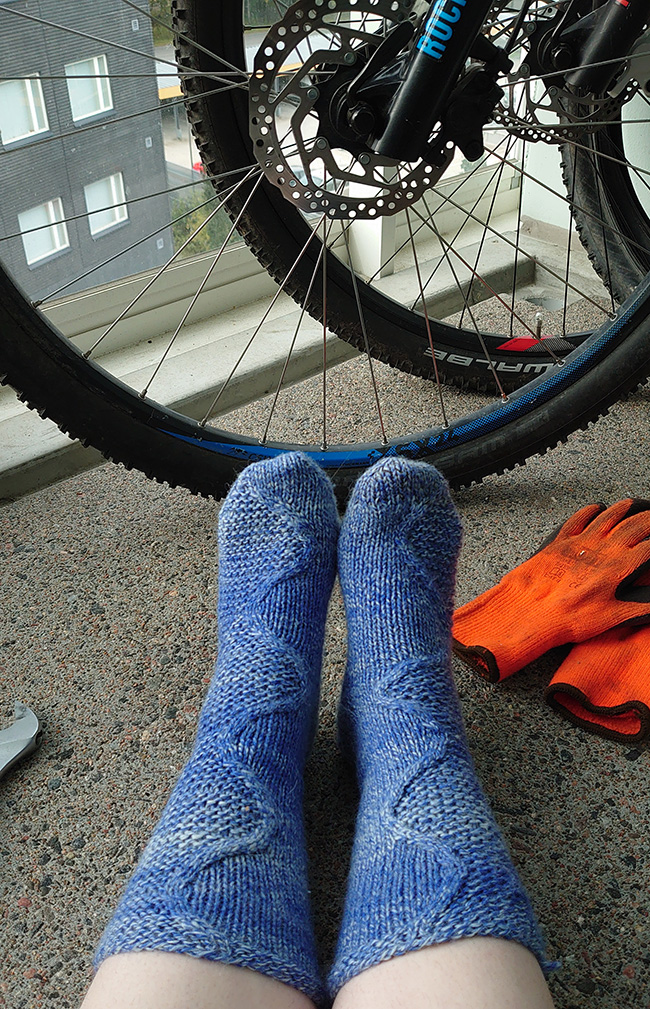
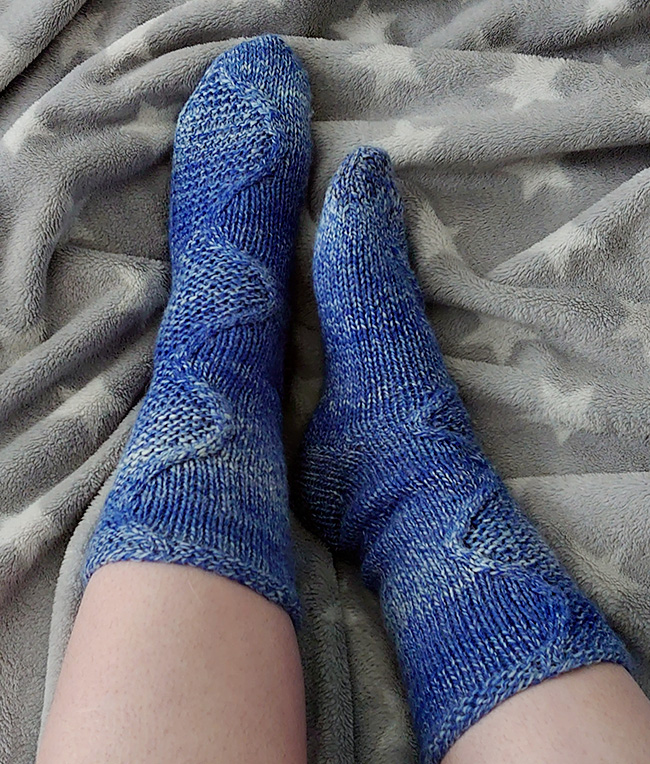
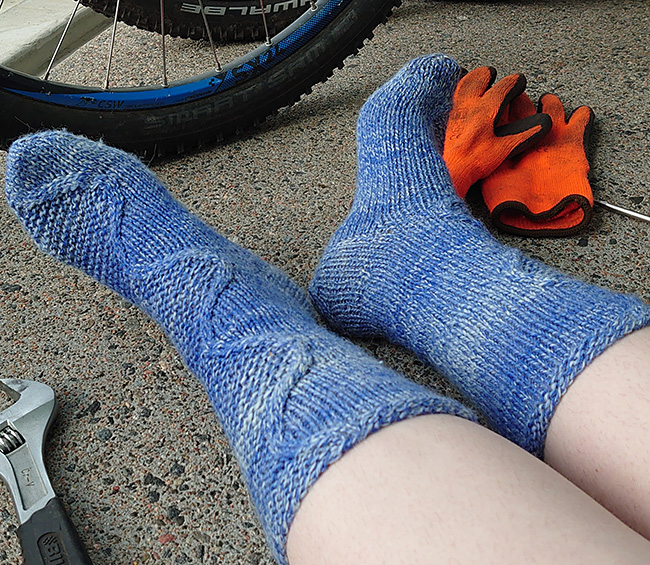
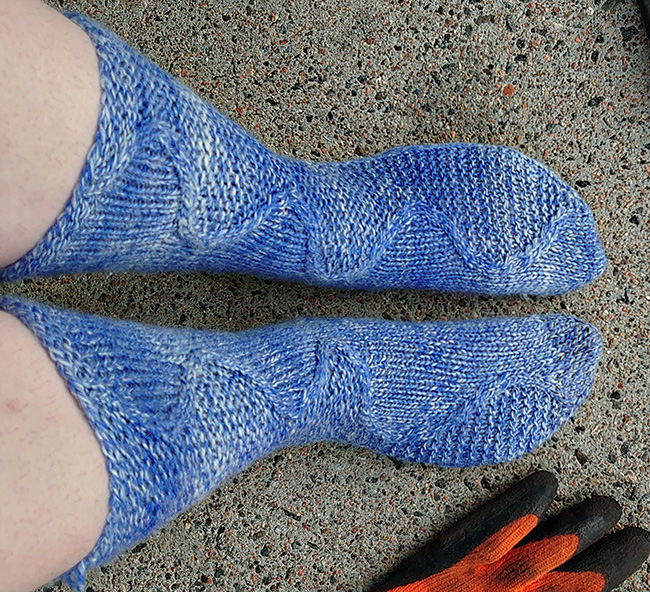
I was delighted by the texture of garter stitch and challenged my self to use it on a sock, instead of reversed Stockinette as I always do. The more uneven texture reminded me of a fogg and the contrast to the Stockinette stitch side was very apparent, like night and day, good and bad or the living and the not guite dead. The dividing cable in the middle runs in front and on the back of the leg separating stockinette stitch from garter stitch like the river Tuonela separates the living from the dead in Finnish mythology.
The socks are worked as mirror images, the garter stitch is intended to be on the outsided, but who am I to tell you how to wear your socks! And that’s the beauty of diversity. We are different, like garter and stockinette and the line between is thin and wavering.
 photos: Artesanitarium Designs
SIZE
Child/Woman XXS[XS, S, M, L, XL, XXL]
FINISHED MEASUREMENTS
Leg length from top of heel to top of the cuff: 11 inches/28.5 cm
Leg length from bottom of heel to top of the cuff: 13[13.5, 14, 14.25, 14.5, 14.75, 15.25] inches/ 32.75[34.5, 35.5, 36, 37, 37.5, 39] cm
Cuff circumference: 7.25[8, 8.5, 9.5, 10, 10.75, 11.5] inches/ 18.25[20, 21.5, 24, 25.5, 27.5, 29] cm
Foot circumference: 5.75[6.5, 7.25, 7.75, 8.5, 9.25, 10] inches/ 14[16.5, 18.5, 19.5, 21.5, 23.5, 25.5] cm
The best fit is achieved with half an inch/1 cm of negative ease in the foot. That is, choose the size that is about half an inch /1 cm smaller than your actual foot measurement.
MATERIALS
Yarn
![]() Novita 7 Veljestä Pohjola [75% wool, 25% nylon; 218 yd/199m per 3.53 oz/100 g skein]; color: Ruka; 1[2, 2] skeins
Novita 7 Veljestä Pohjola [75% wool, 25% nylon; 218 yd/199m per 3.53 oz/100 g skein]; color: Ruka; 1[2, 2] skeins
Yarn Characteristics
![]() The sample shown uses an aran-weight sock yarn, wool blended with nylon. The yarn is tweedy and it has a subtle color hue change from light to dark blue. A great substitute is a semi-solid with long runs of color, or self-striping with subtle color changes.
The sample shown uses an aran-weight sock yarn, wool blended with nylon. The yarn is tweedy and it has a subtle color hue change from light to dark blue. A great substitute is a semi-solid with long runs of color, or self-striping with subtle color changes.
Recommended needle size
[always use a needle size that gives you the gauge listed below - every knitter's gauge is unique]
![]() US #6/4mm needles for working small circumferences in the round
US #6/4mm needles for working small circumferences in the round
Notions
![]() 4 stitch markers
4 stitch markers
![]() cable needle
cable needle
GAUGE
22 sts / 28 rounds = 4 inches/10 cm in stockinette stitch
PATTERN NOTES
[Knitty's list of standard abbreviations and techniques can be found here.]
Grafting
Instructions for grafting can be found here and here.
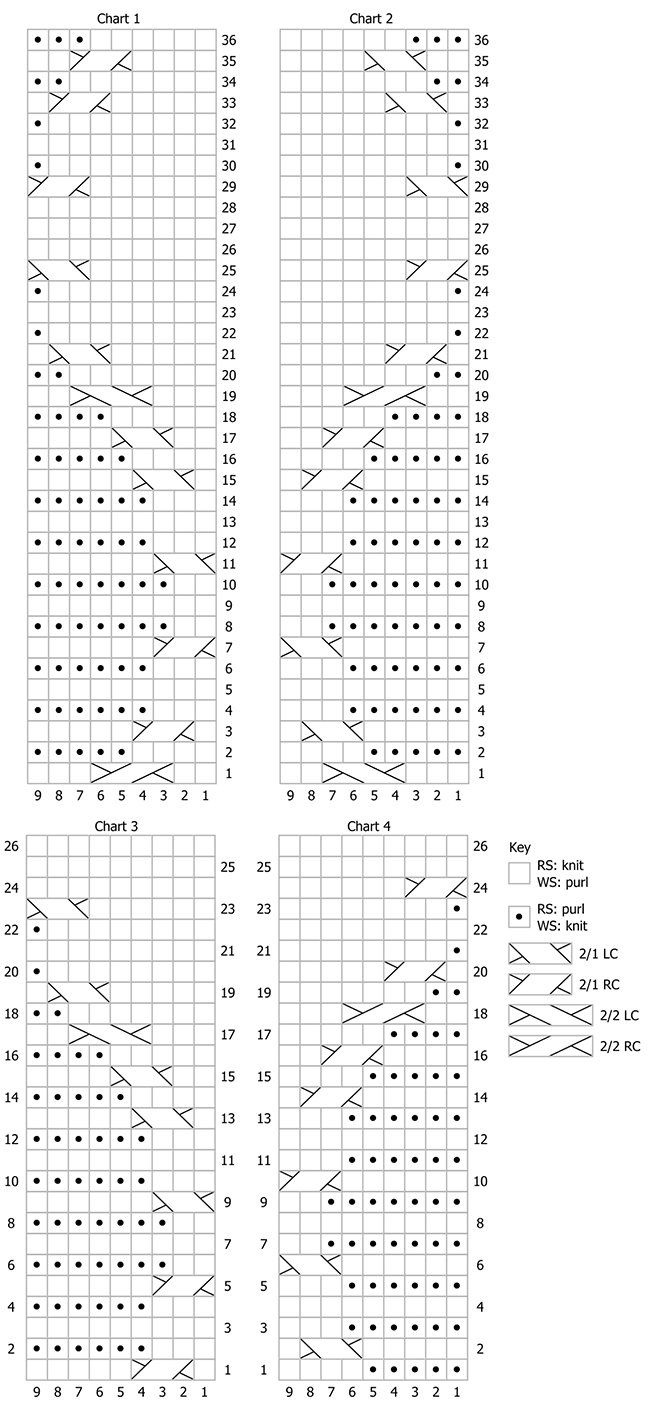
CHARTS
2/1 LC = Slip 2 sts to cable needle and hold at front of work; k1, then k2 from cable needle
2/1 RC = Slip 1 st onto cable needle and hold at back of work; k2, then k1 from cable needle
2/2 LC = Slip 2 sts to cable needle and hold at front of work; k2, then k2 from cable needle
2/2 RC = Slip 2 sts to cable needle and hold at back of work; k2 then k2 from cable needle
DIRECTIONS
Cuff
CO 40[44, 48, 52, 56, 60, 64] distribute sts across needles as you prefer and join for working in the round, noting or marking start of round.
Round 1: K 5[6, 7, 8, 9, 10, 11] place marker for chart, k6, p3, k 6[7, 8, 9, 10, 11, 12] , place marker or distribute sts so that you can identify the midpoint of the round. P 6[7, 8, 9, 10, 11, 12] , place marker for chart, p3, k to end.
Round 2: K to end of round.
Round 3: *K to m, k6, p past midpoint of round to next chart marker, p3, k to end of round.
Leg
Round 1: K to chart marker, work Chart 1, k past midpoint of round to next chart marker, work Chart 2, k to end of round.
Round 2: K to chart marker, work Chart 1, p past midpoint of round to next chart marker, work Chart 2, k to end of round.
Repeat Rounds 1–2 19 more times.
Round 3, leg shaping decreases: Ssk, k to m, work Chart 1, k to 2 before marker/midpoint of round, k2tog; ssk, k to m, work Chart 2, k to 2 sts before the end of round, k2tog. 4 sts decreased.
Round 4: K to m, work Chart 1, p past midpoint of round to next chart marker, work Chart 2, k to end of round.
Repeat Rounds 1–2 5 more times.
Repeat Rounds 3–4 once more, removing the midpoint of round marker, if you used one. 32[36, 40, 44, 48, 52, 56] sts rem.
Work Rounds 1–2 10 more times, ending with row 2 of the chart.
Heel Flap
Right Sock only.
The heel is worked on the first half of the sts. Arrange the first 16[18, 20, 22, 24, 26, 28] sts onto one needle. Rem 16[18, 20, 22, 24, 26, 28] sts will be held for the instep.
Setup row [RS]: Sl1 wyib, k to m, work Chart 3, pm, p to end of the heel sts, turn work.
Row 1 [WS]: Sl1 wyif to m, sm, work Chart 3, p to end of row, turn work.
Row 2 [RS]: Sl,1 wyib, k to m, work Chart 3, k to m, turn work.
Repeat Rows 1-2, 8[9, 10, 11, 12, 13, 14] more times.
Repeat Row 1 one more time.
Left Sock Only
The heel is worked with the second half of sts. Arrange the last 16[18, 20, 22, 24, 26, 28] sts onto one needle, turn work. Rem 16[18, 20, 22, 24, 26, 28] sts will be held for the instep.
Setup row [WS]: Sl1 wyif, k to m, work Chart 4, pm, p to end, turn work.
Row 1 [RS]: Sl1 wyib, k to m, sm, work Chart 4, k to end.
Row 2 [WS]: Sl1 wyib, k to m, work Chart 4, p to end.
Repeat Rows 1-2, 9[10, 11, 12, 13, 14, 15] more times.
Heel Turn
Both Socks
Setup row [RS]: K 10[11, 12, 14, 15, 16, 17] , ssk, turn work.
Row 1 [WS]: Sl1 wyif, p 4[4, 4, 6, 6, 6, 8] p2tog, turn work.
Row 2 [RS]: Sl1 wyib, k 4[4, 4, 6, 6, 6, 8] , ssk, turn work.
Rep Rows 1-2 until all heel sts have been worked. Last row is a WS row. 6[6, 6, 8, 8, 8, 10] sts rem.
Gusset
Right Sock only – Gusset setup round: K 6[6, 6, 8, 8, 8, 10] sts of the heel turn, pick up and knit 10[11, 12, 13, 14, 15, 16] sts along edge of the heel flap; work Chart 1, k to end of instep (the previous end of round); pick up and knit 10[11, 12, 13, 14, 15, 16] sts from along the edge of the heel flap, k 3[3, 3, 4, 4, 4, 5] to centre of heel. This is the new start of round – rearrange and stitches and place marker as you prefer. 42[46, 50, 56, 60, 64, 70] sts.Left Sock only – Gusset setup round: K 6[6, 6, 8, 8, 8, 10] sts of the heel turn, pick up and knit 10[11, 12, 13, 14, 15, 16] sts along edge of the heel flap; k 7[9, 11, 13, 15, 17, 19] , pm, work Chart 2 to end of instep (the previous end of round); pick up and knit 10[11, 12, 13, 14, 15, 16] sts from along the edge of the heel flap, k 3[3, 3, 4, 4, 4, 5] to centre of heel. This is the new start of round – rearrange and stitches and place marker as you prefer. 42[46, 50, 56, 60, 64, 70] sts.
Both socks, continue:
Round 1: K to two sts before instep, k2tog; work across instep in pattern as set; ssk, k to end of round. 2 sts decreased.
Round 2: Work even in pattern as set.
Repeat Rounds 1-2 4[4, 4, 5, 5, 5, 6] more times. 32[36, 40, 44, 48, 52, 56] sts rem.
Foot
Work even in pattern as set until the foot measures 1.25[1.5, 2, 2, 2, 25, 2.5] inch/ 3[4, 5, 5, 5.5, 6.5, 6.5] cm less than the desired length.
Toe
The chart is worked on the toes as long as possible, depending on the foot length the ability to do so wary. When it is no longer possible to work the chart, continue to knit all the stitches that aren't decrease sts.
Decrease round: K to 2 sts before instep, k2tog; ssk, work in pattern as set to last 2 sts of instep, k2tog; ssk, k to end of round. 4 sts decreased.
Following round: Work even in pattern as set.
Rep Rounds 1-2 until 12[12, 12, 16, 16, 16, 20] sts rem, ending with a Decrease round.
Knit to the start of the instep, arrange sts on needles as follows: next 6[6, 6, 8, 8, 8, 10] sts on one needle and the rem 6[6, 6, 8, 8, 8, 10] sts on a second needle. Close the toe gap with grafting the live stitches together.
FINISHING
Weave in the loose ends. Soak the socks in lukewarm water for at least an hour, squeeze out as much water as you can, lay the socks on a flat surface, pull them gently into shape and let them air dry.
ABOUT THE DESIGNER
 Artesanitarium Designs is a one woman show run by Annina from Finland, a distant cold land. She creates her designs thinking outside the box. They are made to be practical, beautiful, and easy to make and maintain. They often have a secret feature or are multi-purpose in some way or another and they are most often inspired by nature, fantasy, or sci-fi.
Annina has been designing since she was a little girl, and she now has a portfolio of 100 designs.
You can find her on Ravelry as Artesanity, Instagram or on the web.
Pattern & images © 2021 Artesanitarium Designs