Incurvatus, a free knitting pattern from Knitty.com.
INTRODUCTION
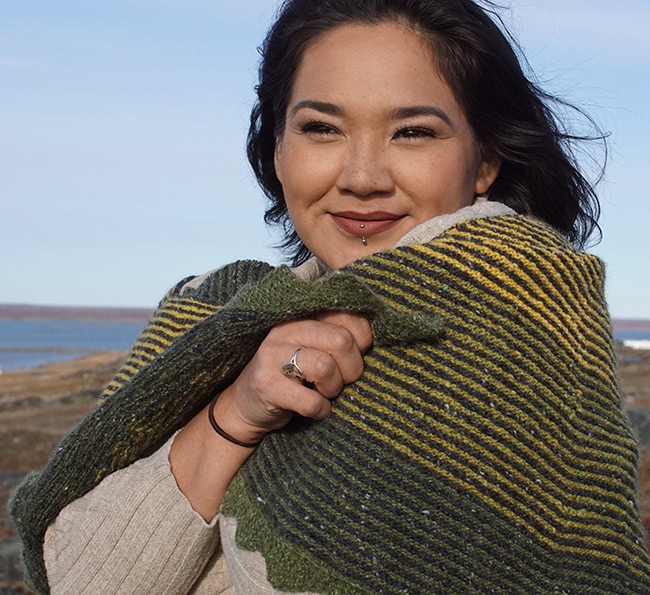
Incurvatus
by Rebecca Osborn

Migraines stop me in my tracks. Sometimes it seems like they are the only thing that does. For a long time, I blamed myself for my migraines, believing that I got sick because I was so curved in on myself – Incurvatus in Se, an old Latin phrase – that I created the tension that triggered my migraines. I've learned in the years since to be kinder to myself, and accept a migraine as an opportunity to stop, and allow that Incurvatus tendency to relax when it's ready.
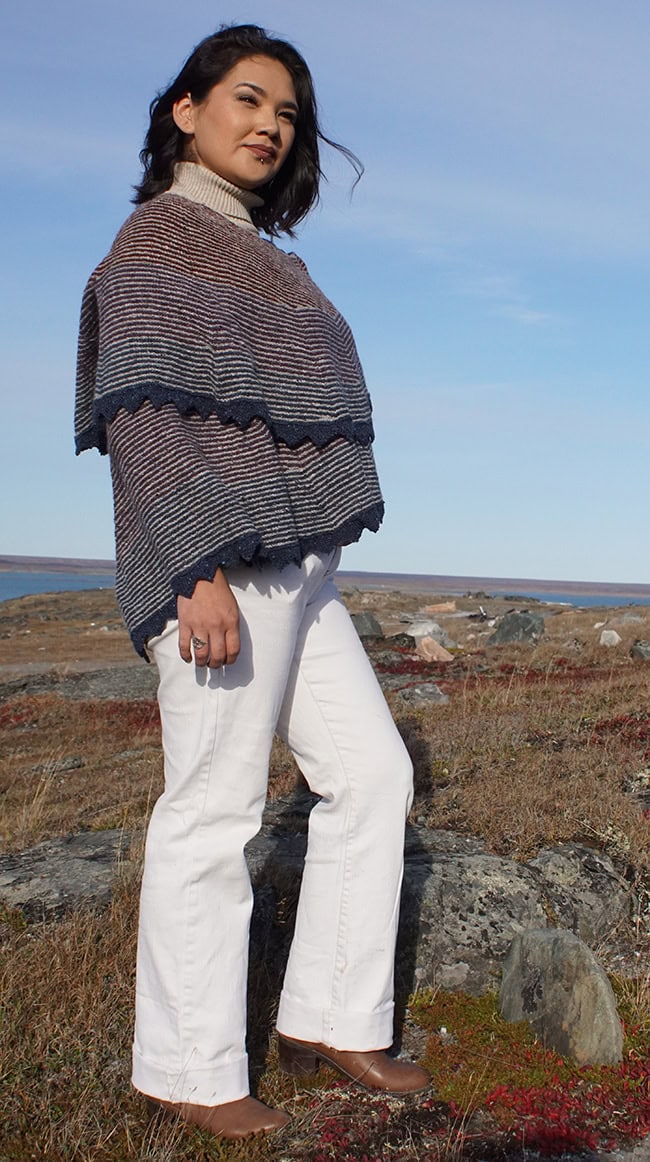
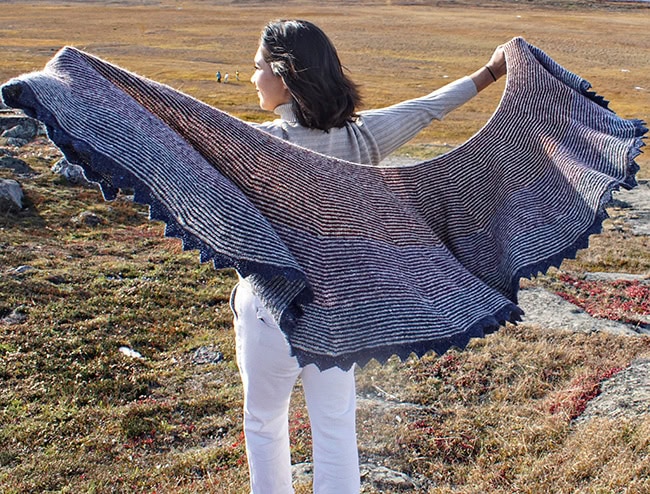
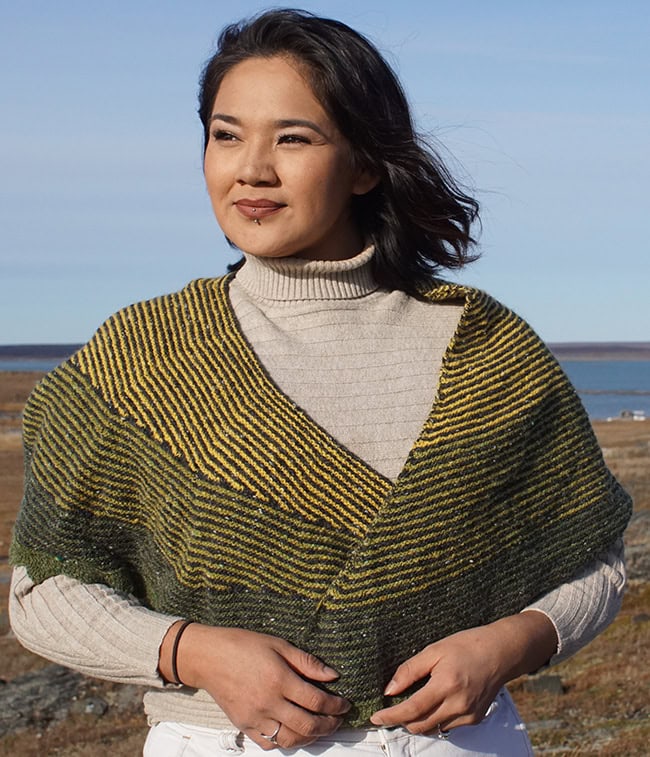
I decided to knit that curved-in shape into a shawl, large and easy to knit while sick in bed. Now I can take that shape and wrap it around my shoulders for comfort and beauty, or stretch it into relaxed ruffles when I'm feeling free.
 model: Akumalik Netser
photos: Rebecca Osborn
SIZE
S[L]
FINISHED MEASUREMENTS
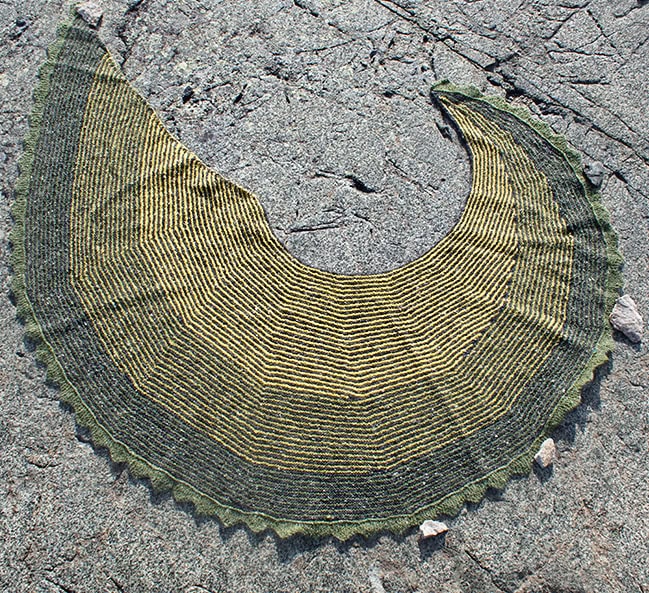
Small size (green/yellow sample shown above):
33 inches/84 cm along cast-on edge, 57 inches/145 cm total wingspan, 18 inches/43 cm deep
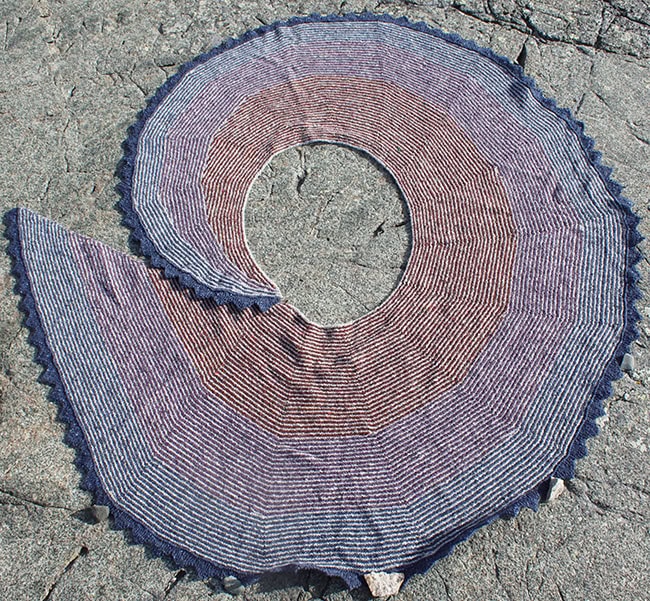
Large Size (red/purple sample shown below): 50 inches/127 cm along cast-on edge, 82 inches/208 cm total wingspan, 19 inches/46cm deep
Size can be adjusted by working with a different yarn at a different gauge; this will affect yardage required.
MATERIALS
Yarn
Kate Davies Designs Milarrochy Tweed [70% Wool, 30% Mohair; 109yd/100m per .88oz/25g skein]:
Screen Time (green/yellow) colourway (shown in small size above)
![]() [MC] Bruce; 6 skeins
[MC] Bruce; 6 skeins
![]() [CC1] Cowslip; 2 skeins
[CC1] Cowslip; 2 skeins
![]() [CC2] Stockiemuir; 3 skeins
[CC2] Stockiemuir; 3 skeins
![]() [CC3] Garth; 3 skeins
[CC3] Garth; 3 skeins
Berry Jam (red/purple) colourway (shown in large size below)
![]() [MC] Birkin; 10 skeins
[MC] Birkin; 10 skeins
![]() [CC1] Backen; 3 skeins
[CC1] Backen; 3 skeins
![]() [CC2] Gloamin'; 4 skeins
[CC2] Gloamin'; 4 skeins
![]() [CC3] Lochan; 5 skeins
[CC3] Lochan; 5 skeins
Yarn Characteristics
![]() This is a light, woolen-spun, singles yarn. Mohair makes the final fabric surprisingly durable.
This is a light, woolen-spun, singles yarn. Mohair makes the final fabric surprisingly durable.
This design looks best in strongly contrasting solid or semi-solid colours. If you choose a multi or gradient for your contrasting colours, choose a solid main colour that is not present at all in your contrast colours.
Recommended needle size
[always use a needle size that gives you the gauge listed below - every knitter's gauge is unique]
![]() US #3/3.25mm circular needles, 32-40 inch/80-100 cm long
US #3/3.25mm circular needles, 32-40 inch/80-100 cm long
Notions
![]() 10[16] stitch markers
10[16] stitch markers
![]() yarn
needle
yarn
needle
GAUGE
26 sts/50 rows to 4 inches/10 cm in garter.
Gauge need not be strictly followed, but a significantly larger gauge will affect the amount of yarn needed.
PATTERN NOTES
[Knitty's list of standard abbreviations and techniques can be found here.]
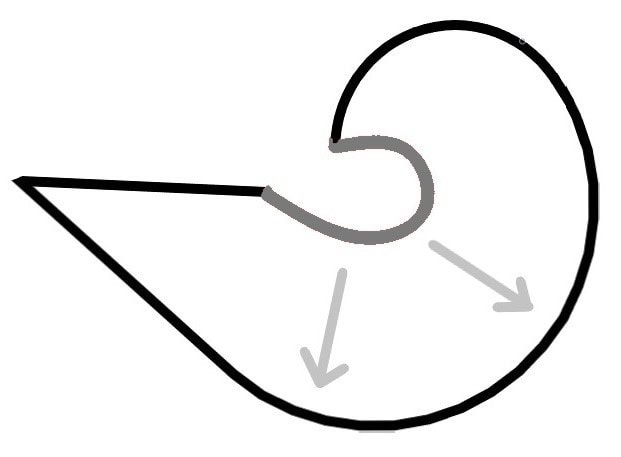
Construction method: This shawl is worked from the top down, using short rows to create a sharp point at one end, and increases to create a deep edge at the other.
A Note About Stitch Counts
Precise stitch counts have been given to you below, in case you'd like to keep track of your progress. However, this is a simple, large shawl, with lots of stitches, and lots of increases. If you are missing some m1s here and there, this will be completely invisible in the final shawl. Feel free to not worry about your stitch count if everything looks good.
Schematic
Grey line indicates cast on edge, and grey arrows indicate direction of knitting.
Techniques:
- Make 1 – Backwards Loop
You may use whatever m1 (make 1) stitch you prefer. However, I found that I preferred to m1 by making one backwards loop CO st. This was a little faster, and keeps the fabric subtly looser. - Slipped Stitches
All slipped stitches in this pattern are slipped purlwise with yarn in front. - Short Rows
This pattern uses German Short Rows (video tutorial). - Make DS: Bring the yarn to the front and slip the next st, purlwise; tug on the yarn upwards, bringing it up and over the needle and down to the back, into knit position. This makes a doubled stitch. When you next encounter the doubled stitch, knit into both “legs” as if it's a single stitch, to “resolve” it.
DIRECTIONS
Setup
Using MC and the long tail or the cable method, CO 150[240] sts as follows: (CO 15, pm) 9[15] times; CO 15.
Setup row [WS]: K to end, slipping markers.
CC1 section
Row 1 [RS]: With CC1, sl1, k1, m1, (k to marker, m1, sm) to last marker, k until 2 sts remain, turn. 10[16] sts increased.
Row 2 [WS]: With CC1, make DS, k to end.
Row 3 [RS]: With MC, sl1, k1, m1, k to DS, turn.
Row 4 [WS]: With MC, make DS, k to end.
Row 5: With CC1, sl1, k1, m1, (k to marker, m1, sm) to last marker before DS, k to DS, turn.
Row 6: With CC1, make DS, k to end.
Work Rows 3-6 once more. 3 CC1 ridges.
182[290] sts total: 23 before first marker; 15 after last marker; 18 between remaining markers.
Row 7 [RS]: With MC, sl1, k1, m1, k to 1 st before DS, turn.
Row 8 [WS]: With MC, make DS, k to end.
Row 9: With CC1, sl1, k1, m1, (k to marker, m1, sm) to last marker before DS, k to 1 st before DS, turn.
Row 10: With CC1, make DS, k to end.
Work Rows 7-10 10 more times, until you have 14 total CC1 ridges.
You should have 56 sts before first marker, and 29 sts between the first and second markers.
With RS facing, add a stitch marker 27 sts from the beginning of the row. This adds an additional increase point; this new marker is now the first marker.
Work Rows 7-10 9 more times, until you have 23 CC1 ridges.
At this point, your last turn will have been worked 28 sts before the 8th[14th] marker.
Conclude the CC1 section as follows:
Row 11 [RS]: With MC, sl1, k1, m1, k to two markers before DS (first turn at 6th[12th] marker); turn.
Row 12 [WS]: With MC, make DS, k to end.
Row 13: With CC1, sl1, k1, m1, (k to marker, m1, sm) to last marker before DS, k to 2 st before DS, turn.
Row 14: With CC1, make DS, k to end.
Work Rows 11-14 2[5] more times; the final turn will be at the 2nd marker.
Break CC1.
Row 15 [RS]: With MC, sl1, k1, m1, k to end, working each DS as 1 st. 1 st increased.
Row 16 [WS]: With MC, sl1, k to end.
388[640] sts total:
64[73] before marker 1
40[43] between markers 1 and 2
40[42] between markers 2 and 3
39[42] between markers 3 and 4
39[41] between markers 4 and 5
38[41] between markers 5 and 6
38[40] between markers 6 and 7
31[40] between markers 7 and 8
24[39] between markers 8 and 9
20[39] between markers 9 and 10
Large size only:
38 between markers 10 and 11
38 between markers 11 and 12
38 between markers 12 and 13
31 between markers 13 and 14
24 between markers 14 and 15
20 between markers 15 and 16
Both sizes: 15 after last marker.
CC2 section
Attach CC2.
Row 17 [RS]: With CC2, sl1, k1, m1, (k to marker, m1, sm) to last marker before DS, k to last 2 sts, turn.
Row 18 [WS]: With CC2, make DS, k to end.
Row 19 [RS]: With MC, sl1, k1, m1, k to 2 sts before DS, turn.
Row 20 [WS]: With MC, make DS, k to end.
Row 21: With CC2, sl1, k1, m1, (k to marker, m1, sm) to last marker before DS, k to 2 sts before DS, turn.
Row 22: With CC2, make DS, k to end.
Work Rows 19-22 10 more times, until you have 12 CC2 ridges.
At this point, your last turn will have been worked 6 sts before the 7th[14th] marker.
Conclude the CC2 section as follows:
Row 23 [RS]: With MC, sl1, k1, m1, k to two markers before DS (first turn at 5th[12th] marker); turn.
Row 24 [WS]: With MC, make DS, k to end.
Row 25: With CC2, sl1, k1, m1, (k to marker, m1, sm) to last marker before DS, k to 3 sts before DS, turn.
Row 26: With CC2, make DS, k to end.
Work Rows 23-26 1[4] more time(s); the final turn will be at the 3rd[2nd] marker.
Break CC2.
Row 27 [RS]: With MC. Sl1, k1, m1, k to end, working each DS as 1 st. 1 st increased.
Row 28 [WS]: With MC. Sl1, k to end.
525[886] sts total:
106[127] before marker 1
54[60] between markers 1 and 2
53[58] between markers 2 and 3
52[58] between markers 3 and 4
51[56] between markers 4 and 5
50[56] between markers 5 and 6
50[54] between markers 6 and 7
42[54] between markers 7 and 8
30[52] between markers 8 and 9
23[52] between markers 9 and 10
Large size only:
50 between markers 10 and 11
50 between markers 11 and 12
50 between markers 12 and 13
42 between markers 13 and 14
30 between markers 14 and 15
22 between markers 15 and 16
Both sizes: 15 after last marker.
CC3 section
Attach CC3.
Row 29 [RS]: With CC3, sl1, k1, m1, (k to marker, m1, sm) to last marker, k to last 2 sts, turn.
Row 30 [WS]: With CC3, make DS, k to end.
Row 31 [RS]: With MC, sl1, k1, m1, k to 4 st before DS, turn.
Row 32 [WS]: With MC, make DS, k to end.
Row 33: With CC3, sl1, k1, m1, (k to marker, m1, sm) to last marker before DS, k to 4 sts before DS, turn.
Row 34: With CC3, make DS, k to end.
Work Rows 31-34 4 more times, until you have 6 CC3 ridges.
At this point, your last turn will have been worked 25 sts before the 9th[14th] marker.
Conclude the CC3 section as follows:
Row 35 [RS]: With MC, sl1, k1, m1, k to two markers before DS (first turn at 7th[12th] marker); turn.
Row 26 [WS]: With MC, sl1, k to end.
Row 37: With CC3, sl1, k1, m1, (k to marker, m1, sm) to last marker before DS, k to 4 sts before DS, turn.
Row 38: With CC3, sl1, k to end.
Work Rows 35-38 3[5] more times; the final turn will be at the 1st[2nd] marker.
Row 39 [RS]: With MC, sl1, k1, m1, k to end, removing markers and working each DS as 1 st. 1 st increased.
Row 40 [WS]: With MC, sl1, k to end.
Break MC. Continue in CC3 only.
607[1035] sts total:
133[162] before first marker
63[71] between markers 1 and 2
61[69] between markers 2 and 3
60[68] between markers 3 and 4
57[66] between markers 4 and 5
57[65] between markers 5 and 6
56[63] between markers 6 and 7
48[62] between markers 7 and 8
33[60] between markers 8 and 9
24[59] between markers 9 and 10
Large size only:
57 between markers 10 and 11
57 between markers 11 and 12
56 between markers 12 and 13
48 between markers 13 and 14
33 between markers 14 and 15
24 between markers 15 and 16
Both sizes: 15 after last marker.
If you decided not to worry about your stitch count, take the time here to count your stitches. On Row 41, instead of working as written, increase or decrease evenly across as necessary so as to end up with a multiple of 20 stitches.
Row 41 [RS]: Sl1, k to end, decreasing 7 sts [increasing 5 sts] evenly along row. 600[1040] sts.
Row 42 [WS]: Sl1, p to end.
Pointed edging:
The edging is worked perpendicularly to the body of the shawl. On each RS row, one stitch is consumed from the body of the shawl with an ssk decrease.
Setup: with RS facing, using backwards loop method, cast on 4 sts on left needle.
Row 1 [RS]: K1, kfb, k1, ssk. Turn. 5 working sts.
Row 2 and all following even-numbered rows [WS]: Sl1 wyif, k to end.
Row 3: K1, kfb, k2, ssk. Turn. 6 working sts.
Row 5: K1, kfb, k3, ssk. Turn. 7 working sts.
Row 7: K1, kfb, k4, ssk. Turn. 8 working sts.
Row 9: K1, kfb, k5, ssk. Turn. 9 working sts.
Row 11: K1, k2tog, k5, ssk. Turn. 8 working sts.
Row 13: K1, k2tog, k4, ssk. Turn. 7 working sts.
Row 15: K1, k2tog, k3, ssk. Turn. 6 working sts.
Row 17: K1, k2tog, k2, ssk. Turn. 5 working sts.
Row 19: K1, k2tog, k1, ssk. Turn. 4 working sts.
Row 20: Sl1 wyif, k to end.
Repeat Rows 1-20 until you have consumed all working sts: if you matched stitch counts as given, there will be 60[104] total scallops worked. Bind off all sts evenly, with a firm tension, to enhance the point at this end of the shawl.
FINISHING
Weave in all ends to the back of work, but do not trim. Soak shawl in tepid water for 20 minutes. Gently squeeze out excess water, and press between towels. Lie shawl flat and pin out as follows: Using pins, secure the cast on edge into a gentle spiral shape, as shown in the schematic. Using curved wires and pins, or pins alone, starting from the center of the spiral, stretch the scalloped edge into a deeper spiral shape, stretching it firmly to open up the pattern, ensuring the scallops are evenly spaced. Using wires and pins, or pins alone, pin the right edge to a straight line. Once the shawl is fully pinned out, leave it to completely dry. Unpin, and trim the ends.
ABOUT THE DESIGNER
 Rebecca Osborn lives, makes, and writes in Rankin Inlet, Nunavut, in Arctic Canada. She has been writing about knitting, spinning, and life on her blog, for over sixteen years, and working on the Wool n' Spinning podcast for two years.
Her new collection of knitting patterns for accessories, Migraneur, will be coming out in 2025.
Pattern & images © 2025 Rebecca Osborn