Knitty: little purls of wisdom
Phat Fiber
Title
beauty shot

Tangy

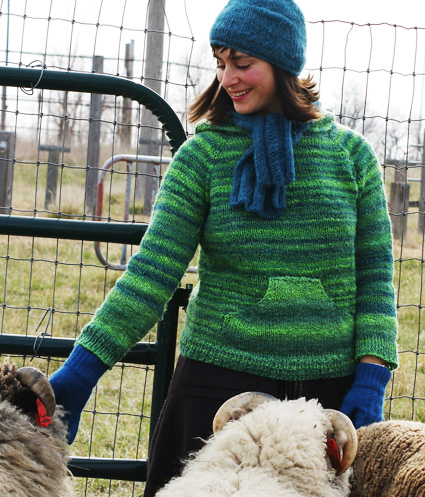
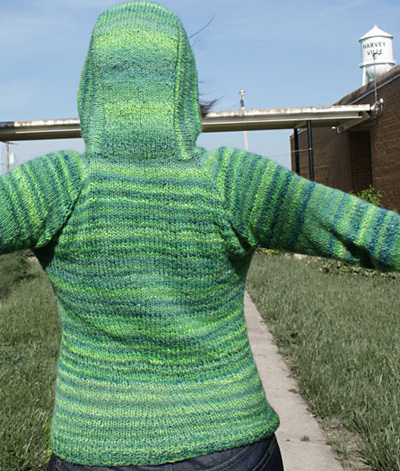
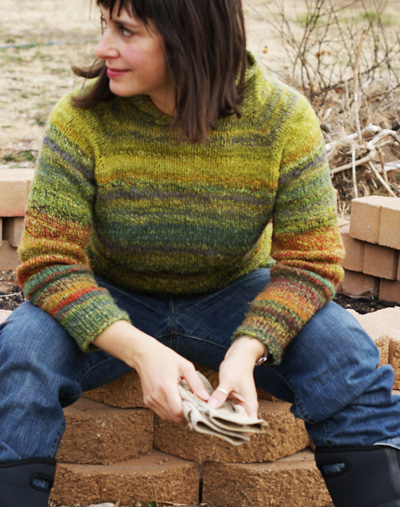
Sometimes when I buy or make fiber, I know exactly what it will become, and spin the yarn accordingly. Other times, I just let the fiber spin itself. For those occasions, it’s great to have some all-purpose recipes you can fall back on. This seamless hoodie is just such a recipe. I’ve included a traditional pattern, written for a specific weight (worsted) and with specific sizes, but I’ve also included the general recipe, so you can knit it a little more freely, to the fit and length that suit your yarn or mood. Make it longer or shorter, with different edges, with or without the pocket. Once you get a feel for the basic pattern, you’ll see it really it works at any gauge and fit you like, and guidelines are given at the end for adapting to different weights.

Like all top-down raglans, the charm of this is that you can try it on as you go. Sporto starts with the hood. From there, you pick up sts and work down to your pits with raglan increases, then work the torso and the sleeves and finally, the kangaroo pocket. And since the sleeves and pocket come at the end, if you run out of yarn, you can simply shorten the sleeves or skip the pocket and be no worse off for your effort.

Sporto is a basic, any-size, unisex pattern that lends itself to personalization with shaping, edging or stitchwork. The fit as written is like a t-shirt--relaxed but not too baggy. If you prefer more of a roomy sweatshirt fit, hop up a size or two, keeping in mind that you might follow the length guidelines for your usual size.

I’ve given yardage for a light to medium worsted yarn. The bright green sample is one ply of a brightly-dyed hand-dyed Art Club combed top plyed with a solid heather combed top (Art Club Succulent); the continuous solid ply softens the color shifts and unifies the whole. The murky green sample was a two-ply spun randomly from a Decadent Fibers Jelly Roll batt. I spun it without direction, then plied it to itself. Afterwards, I eyeballed the colors to re-order the skeins so I believe they proceed as they were plied.

How much fiber you need will depend on how you spin, but on average, you’ll need a pound and a quarter spun as worsted for up to a medium, then an extra quarter to half a pound from each size up from there. If you’re spinning bulkier, you’ll need more fiber for the same size.


spacer model + photos: Nikol Lohr


SIZE
XS[S, M, L, 1X, 2X, 3X]
(shown in size M with 1 inch of negative ease)

FINISHED MEASUREMENTS
Chest: 30[32, 34, 38, 42, 46, 50] inches
Length: 19.5[21, 23, 25, 27, 29, 30] inches

spacer
MATERIALS
Fiber:
Pattern version
[shown above]
spacer [MC] Art Club Hand-Dyed Combed Top [100% wool; combed top]; color: Feelin’ Froggy; 6[7, 8, 10, 13, 16] ounces
spacer [CC] Art Club Succulent Combed Top [85% wool, 15% nylon; small mill combed top]; color: Succulent; 6[7, 8, 10, 13, 16] ounces

Recipe version [shown below]
spacer Decadent Fibers Jelly Roll[100% corriedale wool; batt]; color: one-of-a-kind festival colorway 12[ 14, 16, 20, 26, 32] ounces 


Finished Yarn:
Pattern version
spacer Wraps per inch: 10-14
spacer Ply: 2 (one ply of each fiber)
spacer Yardage used: 820[850, 900, 1050, 1200, 1300, 1400] yds

Recipe version
spacer Wraps per inch: 9 (or as desired)
spacer Ply: 2 (or as desired)
spacer Yardage used: Approx 1.25 lbs of fiber for a medium size sweater, with 0.25-0.5 lbs more for each additional size, allowing extra fiber for each size if spinning a bulkier yarn.

gearbox

Spinning Tool: Fricke Double Treadle; scotch tension
Skeinwinder: Fricke
Lazy Kate: Fricke

Drafting Method:
Pattern version
spacer Worsted

Recipe version
spacer Supported long draw. Spun entire batt as it presented itself, then plied it to itself, keeping the resulting 2-ply in order for a continuous product

Commercial Yarn Alternative

Pattern version
spacer Worsted weight wool of your choice

Recipe version
spacer Yarn of your choice

Recommended needle size
[always use a needle size that gives you the gauge listed below -- every knitter's gauge is unique]
spacer 16-inch and 24-inch US #8/5mm circular needles
spacer 16-inch and 24-inch US #6/4mm circular needles
OR
spacer one long needle of each size, for magic loop
Note: for Recipe version, choose needles that will work with your chosen yarn

Tools
spacer Yarn Needle
spacer Locking stitch markers
spacer stitch holders or waste yarn

spacer

GAUGE

Pattern version
15 sts/22 rows = 4" in stockinette stitch using larger needles

Recipe version
13 sts / 20 rows = 4" in stockinette stitch (or as desired)


PATTERN NOTES
[Knitty's list of standard abbreviations and techniques can be found here.]

spacer
The pattern version [shown above], written for worsted weight yarn, is followed by a general recipe that you can use for any weight/gauge. Plan on greater yardage (but less weight/fiber) for a lighter weight yarn or less yardage (but probably more weight/fiber) for a bulkier yarn.

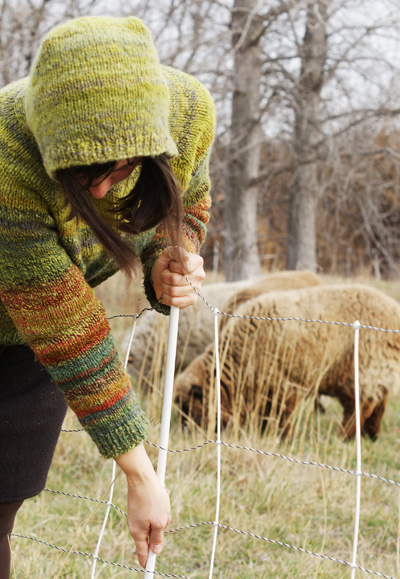
I’ve given specific sizing information, but I really do encourage you to use that as a rough guide and to try the sweater on to determine your size. The strength of this recipe is that it really eliminates the need for a strict pattern and works itself to your own body.

The recipe version [shown at right] uses a different gauge yarn with the general recipe below (same as the pattern, but written in general terms). Instead of switching to smaller needles and working rib, I used the same size needles, started a bit sooner, and worked a lace rep at edge of hood, hem, and cuffs.

PATTERN NOTES
K1, p1 rib:
Rnd 1: *P1, k1; rep from * around.
Rep rnd 1 for patt.

DIRECTIONS

PATTERN VERSION

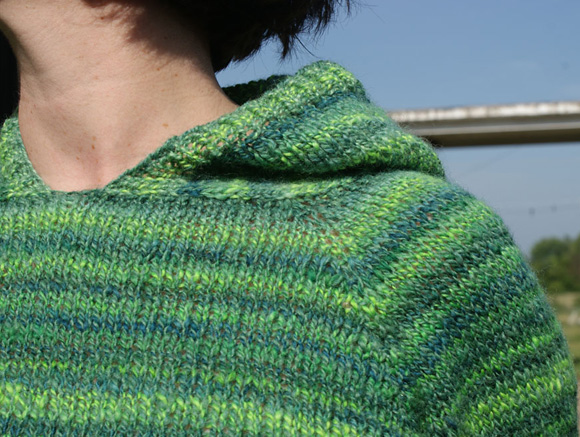
Hood

With larger needles, CO 16[16, 16, 16, 20, 20, 20] sts.

Row 1 [RS]: Sl 1, knit to end.
Row 2 [WS]: Sl 1, purl to 1 st from end, k1.
Rep Rows 1 and 2 5 times.

Inc Row [RS]: Sl 1, M1, knit to 1 st from end, M1, k1. 2 sts inc

Cont to rep Rows 1 and 2, working Inc Row every 11 rows until piece measures 10[10, 10, 10, 11, 11, 11] inches, ending after a WS row.

Without turning work, pick up and knit 1 st through the top loop only of each of the slipped sts along the side. Turn work, and knit back up side and across top. Without turning work, pick up and knit 1 st through the top loop only of each of the slipped sts along the other side. Turn work, purl to end.

Work in St st until piece measures 7[7, 7, 7, 8, 8, 8] inches from pick up row, ending with a RS row.

Change to smaller needles and work in k1, p1 rib for 1 inch. BO in patt, leaving last st live.

Yoke
Change to larger needles. Turn with RS facing and pick up and knit 36[36, 36, 36, 40, 40, 40] sts (including that first live st) along side of hood, 16[16, 16, 16, 20, 20, 20] sts along back section, and 36[36, 36, 36, 40, 40, 40] sts on other side of hood. 88[88, 88, 88, 100, 100, 100] sts

Join in the rnd. K14[14, 14, 14, 16, 16, 16], pm, k16[16, 16, 16, 18, 18, 18], pm, k28[28, 28, 28, 32, 32, 32], pm, k16[16, 16, 16, 18, 18, 18], pm, k14[14, 14, 14, 16, 16, 16]. NOTE: Don’t place a marker here, at center front--it can lead to confusion when working the raglan increases.

Next Rnd: Knit.
Inc Rnd: *Knit to 1 st before marker, kfb, slip marker, kfb; rep from * 3 times more, knit to end. 8 sts inc
Rep last 2 rnds 14[16, 18, 22, 24, 27, 31] times or until piece measures approx 5.5[6, 7, 8, 9, 10, 11] inches from center front, or to desired length for custom fit.

spacer
NOTE: This pattern calls for 1 inch of negative ease for a close, T-shirt-like fit. At this point piece should be approx 2[2, 3, 3, 4, 4, 4] inches below your armpit—more if you prefer a looser fit. 200[216, 232, 264, 292, 316, 348] sts

To try it on, transfer sts to waste yarn and pop the yoke on overhead. You want it long enough for the sleeve markers to meet at your armpits. If you’re not quite there, continue as established until you are.

Divide for Sleeves
Transfer 44[48, 52, 60, 66, 72, 80] sleeve sts to waste yarn or holder, knit across 56[60, 64, 72, 80, 86, 94] back sts, transfer 44[48, 52, 60, 66, 72, 80] sleeve sts to waste yarn or holder, knit across 56[60, 64, 72, 80, 86, 94] front sts. Pm to mark beg of rnd. 112[120, 128, 144, 160, 172, 188] body sts

Center Back Shaping (optional, shown at right):
This adds a gentle decrease towards the lower back, and a slightly sharper increase from the lower back to the hem.

Dec Rnd: Pm at center back. Knit to 2 sts before marker, ssk, slip marker, k2tog, knit to end. 2 sts dec
Rep Dec Rnd every 10 rnds until piece measures 7[8, 9, 9.5, 10, 10] inches from sleeve division.

Inc Rnd: Knit to 1 st from marker, M1, k1, slip marker, k1, M1, knit to end. 2 sts inc
Rep Inc Rnd every 7 rnds until there are 112[120, 128, 144, 160, 172, 188] sts. At the same time, work Torso as follows:

spacer
Torso
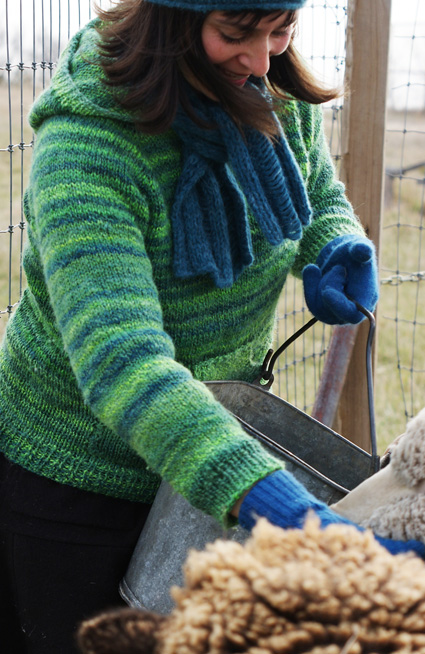
Work in St st, with or without above shaping as desired, until piece measures 12[13, 14, 15, 16, 17, 17] inches from sleeve division or 2 inches shorter than desired length.

Change to smaller needles. Work in k1, p1 rib for 2 inches.

BO in patt.

Sleeves
Transfer sleeve sts to larger 16-inch circular needles.
Pick up and knit 2 sts at the center armpit gap, working into the piece two rows below the edge, and pm between them. 46 [50, 54, 62, 68, 74, 82] sts
Work in St st for approx 2 inches.

Dec Rnd: Ssk, knit to last 2 sts, k2tog. 2 sts dec.
Rep Dec Rnd every 12 rnds until sleeve measures 13[14, 15, 16, 17, 17] inches or 2 inches shorter than desired length.

Change to smaller needles. Work 2 inches in K1 P1 rib and BO in patt.
Rep with other sleeve.

Kangaroo Pocket
With a locking stitch marker, mark center front just above hem rib. Measure 4.5[5, 5.5, 6, 6.5, 7, 7.5] inches on each side of marker and mark. Remove center marker.

Decide how far up you want the bottom of your pocket to be (I chose about half an inch above the end of the ribbing) and, with a contrasting yarn and a yarn needle, thread a guideline through the row just below the future pocket bottom.

Pick up and knit 1 st for each st between markers, working through bar between sts just above guideline. Be sure to stay on the same row and only pick up 1 st for each knit st (it’s easy accidentally to pick up the bars both inside and between sts if you don’t pay attention). At the end of the row, pick up the next st in the row above.

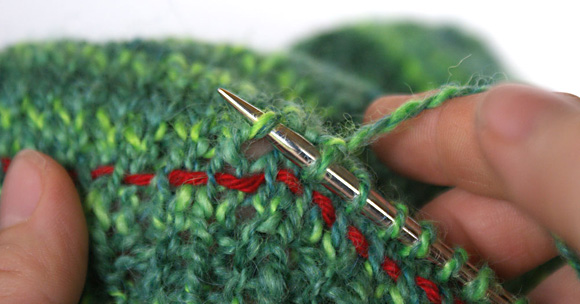
Next Row [WS]: P2tog, then purl across. At the end of the row, pick up the next st in the row above as before. Turn.

Next Row [RS]: Ssk, then knit across; at the end of the row, pick up the next st in the row above as before (above the last st, working up the side of the pocket); turn; cont as established until pocket measures 2[2.5, 3, 3, 3.5, 3.5, 4] inches, ending with a RS row and skipping the final pick up st.

Next Row [WS]: Sl 1, k1, ssk, purl to last 4 sts, k2tog, k2. 2 sts dec
Next Row [RS]: Sl 1, k1, ssk, knit to last 4 sts, k2tog, k2. 2 sts dec
Rep last 2 rows until pocket is approx half as wide as base, ending with a WS row.

Next Row [RS]: Sl 1, knit to end.
Next Row [WS]: Sl 1, k2, purl to last 3 sts, k3.
Rep last 2 rows for 1[1.5, 1.5, 1.5, 2, 2, 2] inches.

BO and seam top edge of pocket to sweater, taking care that the flap is centered, not stretched, and seaming occurs along the same row.

spacer
RECIPE VERSION

Find Gauge
Knit a swatch in a needle size that seems appropriate to your yarn. If you like the fabric, use it to calculate your gauge; otherwise, try different needles until you’re happy. Mostly, you’ll use the gauge to cast on for the hood, and the pattern resolves itself from there.

Hood
CO sts to produce around 4 - 5 inches (4 inches for XS - L; 5 inches for XL - 3X or for larger heads).

Work in St st with a slipped-st edge, increasing periodically on both sides to create a shape that’s about 2 inches wider at the top and 10 - 11 (same size breakdown as above) inches long, ending with a WS row.

Tip: Your number of increase rows will equal your number of sts per inch. (Just divvy them up roughly evenly over your allotted inches).

Without turning work, pick up and knit 1 st through the top loop only of each of the slipped sts along the side; turn work, and knit back up side and across top; without turning work, pick up and knit 1 st through the top loop only of each of the slipped sts along the other side; turn work, purl to end. Work until piece is 8 - 9 inches from “seam,” including edging.
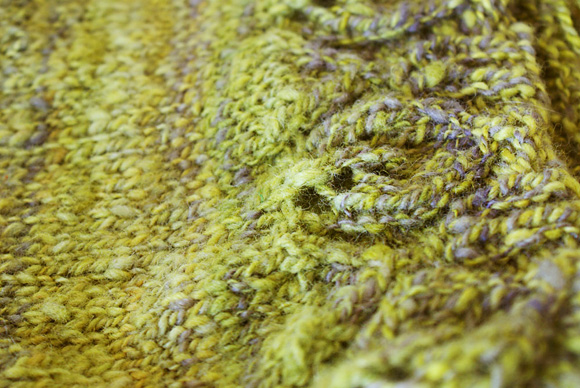
Yoke
With RS facing, pick up and knit sts along bottom of hood for collar, picking up 3 sts for every 4 rows along the sides and 1 st for every 1 along the back section. (This will be about 5 - 5.5 times the number you cast on at the very beginning.) Join in the rnd and divide for raglan increases, allotting 18-20% for each sleeve and 30-32% each for front & back (remember, you’ll work half of the front, around to the sleeves and body, then the other half of the front). If you have a couple of odd sts because your number doesn’t divide evenly, put the extra sts on the front/back.

Inc before and after each marker every other rnd until yoke reaches 3-4 inches below your armpit, or longer for looser fit.

Divide for Sleeves
Transfer sleeve sts to waste yarn or holders and knit around front and back sections, joining in the rnd. If you want some extra room, you can CO additional sts at the underarms (between front and back sections, under where you’ve transferred sleeve sts).

Torso
Shape with waist decreases and hip increases or bust short rows if you like, or just knit straight. Work to desired length, including edging, and BO.

Sleeves
Pick up reserved sts. Pick up and knit 2 sts at armpit gap a couple rows down (and extra sts if you CO at the armpit). Pm at center armpit. Your ending circumference should be 3 - 4 inches narrower than the starting circumference (or to your own taste). As a rule, this means your decrease rnds will equal 1.5 x 2 times your sts per inch (or 1.5 – 2x the number of increase rows you used in the hood). Space decrease rows evenly (see patt for guide). Finish with edging of choice. BO.

Kangaroo Pocket
Use the instructions above, adjusting for your size.

spacer

FINISHING
Weave in ends, soak in warm water, spin out excess and dry flat.

spacer
ABOUT THE DESIGNER

designernamespacer Nikol Lohr wishes she had time to make cat versions of all her sweaters. She lives and works at The Harveyville Project with her partner, 2 cats, 7 sheep, and 5 hens.

She’s the author of Naughty Needles and the founder of Yarn School. She blogs at The Thrifty Knitter, tweets as thriftyknitter, is cupcake on Ravelry and QueenieVonSugarpants on flickr.

spacer