|
|
 |
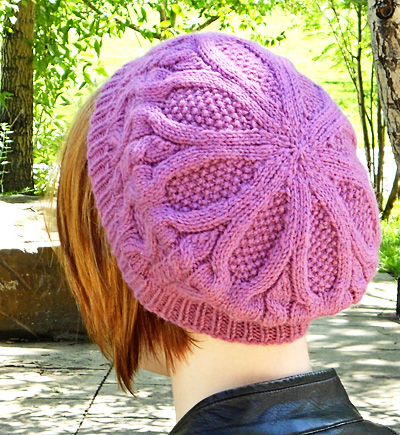
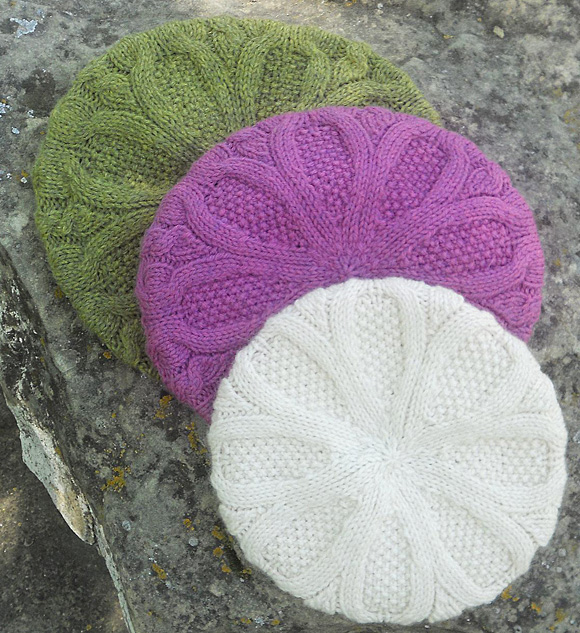
I love hats. Since learning to knit, I've become a collector. I recently noticed that I have tons of lace hats, tons of beanies, tons of slouches, but not one hat with cables. Instead of dwelling on it, I decided to fix my problem. The result is a nice thick hat that is as visually interesting as it is warm. Eight small cables twist up the body of the hat before tapering off like vines, while larger panels accented with moss stitch weave in and out before opening up to form the bloom covering the top of the hat. There are no cables in the decrease rows, which take up most of the body of the hat. The whole thing looks way more complicated than it really is! By knitting more or fewer of the pattern rows and through the magic of blocking, the hat can be imagined as a snug beanie, a light slouch or a giant tam. I've added all three to my hat collection, and I'm sure one of these versions could use a place in yours! |
|
|
|
FINISHED MEASUREMENTS |
|
 Yarn Version 1: Short hat Version 2: Medium-length hat Version 3: Long hat Notions GAUGE |
|
PATTERN NOTES |
|

The different lengths are achieved by working more or fewer body pattern rows, before beginning crown shaping. 1x1 Rib (Worked in the round over an even number of sts): C4F: Slip 2 sts to cable needle and hold to front of work; k2 from left needle, k2 from cable needle. C6B: Slip 3 sts to cable needle and hold to back of work; k3 from left needle, k3 from cable needle. C6F: Slip 3 sts to cable needle and hold to front of work; k3 from left needle, k3 from cable needle. skp: Sl 1 knitwise, k1, pass slipped st over. 1 st decreased. Directions for running stitch can be found here. |
The chart for this pattern is very large and fits on a letter-sized page. Click here and print the resulting page. |
|
DIRECTIONS 
Using smaller circular needle, CO 96[104, 112] sts. Place marker and join to work in the round, being careful not to twist. Work 12 rounds 1x1 Rib. HAT BODY Size S: *[K1, kfb] five times, kfb, kfb; repeat from *
seven times more. 152 sts. From this point on, all sizes are worked in the same way. Work Body Chart, beginning with Round 16 for a short hat,
Round 9 for a medium-length hat, or Round 1 for a long
hat; all hat lengths end with Round 29. CROWN Break yarn and draw through remaining sts. Pull tight, then draw yarn through sts again to secure. |
|
FINISHING To prevent stretching the ribbed hat band, waste yarn was basted in a running stitch along the round between the ribbed band and the hat body. After the hat was soaked and placed over the blocking form, the waste yarn was cinched, to firmly stretch the cabled hat body. The ribbed band was then pulled vertically by hand and left to dry for a perfect finish. |
| ABOUT THE DESIGNER |
|
|
|
Pattern & images © 2010 Amanda Muscha. Contact Amanda |


