The town of Ringwood was a glove-manufacturing hot spot in Victorian
England, and this easy textured stitch was a traditional pattern
that knitters used for their wares.
In his book A History of Hand Knitting, Richard
Rutt reproduced an old pattern for the traditional gloves.
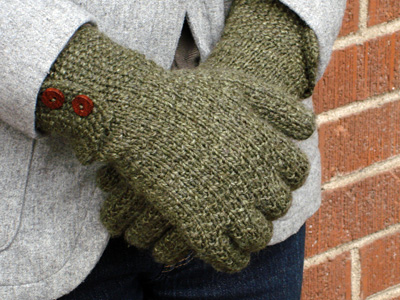
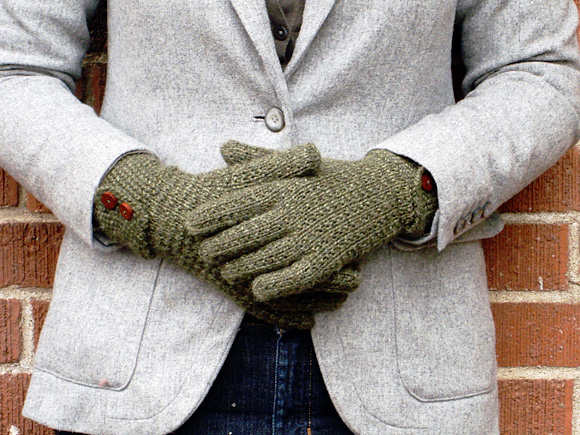
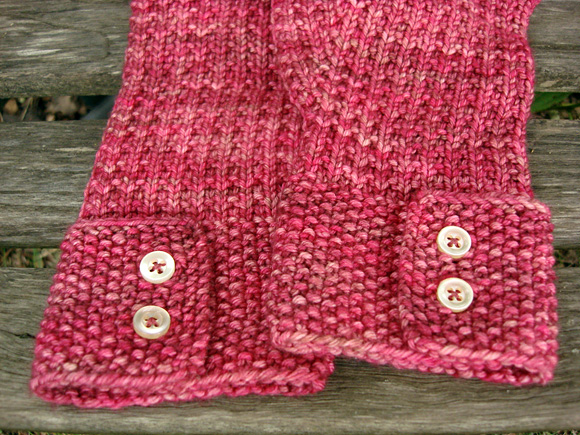
I have updated it here with a range of adult sizes, and a
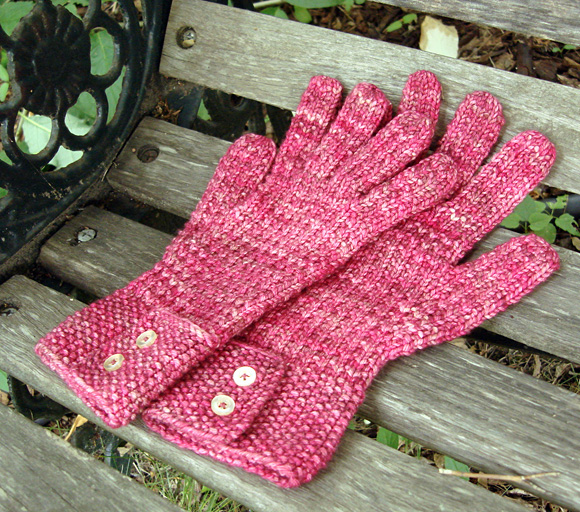
smart buttoned seed stitch cuff inspired by the tidy tabbed
wrist closures of equestrian gloves.
The Ringwood Stitch
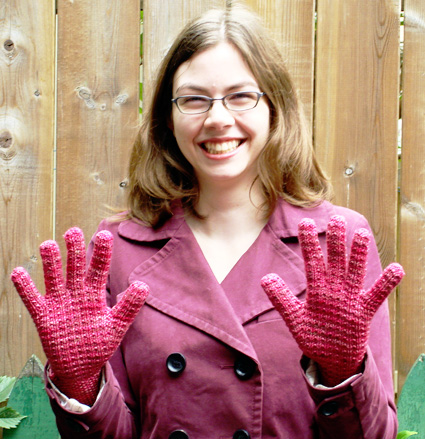
is stretchy and cozy by itself, and pure merino wool yarn
makes the gloves thick and soft. They are thoroughly practical
and perfect for ushering in winter.
model: Rebecca
Blair photos:
Jeremy Livingston
SIZE
S, M, L
FINISHED MEASUREMENTS
7[8, 9] inches around knuckles
Finger/hand length adjustable to fit.
MATERIALS
Yarn Pink version
Madelinetosh
Tosh DK [100% merino, 225 yards/206m
per 4oz skein]; color: Fragrant. 1[2,
2] skeins
Green version
Belfast
Mini-Mills Island Collection Pure Merino
[100% merino wool; 250m per 100g skein];
color: Green; 1 skein
Recommended needle size [always use a needle
size that gives you the gauge
listed below -- every knitter's
gauge is unique]
1
set US #6/4mm double-point needles OR
1
32 inch or longer US #6/4mm circular
needle for magic loop method OR
2
shorter US #6/4mm circular needles
for two circular methods
Notions
Yarn
needle
4
buttons Note: Buy buttons after
gloves are complete to ensure correct size.
stitch marker
stitch holder
several
lengths of scrap yarn
darning needle
matching
thread
PATTERN NOTES [Knitty's list of standard abbreviations and techniques can be found here.]
The Ringwood stitch pattern is very
stretchy. If in doubt, err on the side of making gloves that
are too small around -- they will stretch to fit.
Seed Stitch: Worked back and forth over
an odd number of stitches. All rows: [K1, p1] to end.
Ringwood Stitch: Worked
in the round over a multiple of 2 sts. Round 1: Knit. Round 2:
[K1, p1] to end. Round 3: Knit.
DIRECTIONS
LEFT GLOVE
CO 51[55, 61] sts. Do not join.
Work Seed Stitch for 7 [7, 9] rows.
Buttonhole row: K1, p1, k2tog,
yo, [k1, p1] to end.
Work Seed Stitch for 7 [7, 9] rows.
Work Buttonhole row again.
Work Seed Stitch for 7 [7, 9] rows.
Next row [RS]: BO 11 sts, k to end. 40[44, 50] sts remain.
Divide sts across your needles as you prefer and join
for working in the round, being careful not to twist. Note
or mark the beginning of the round.
From here you will work in Ringwood Stitch.
Work Rounds 1-3 of pattern 3[3, 4] times.
Next round, establish thumb gusset position:
Sizes S & M only: Work in established pattern for 20[22,
-] sts, PM, m1, k1, m1, PM, work in established pattern
to end of round.
Size L only: Work in established pattern
for -[-, 25] sts, PM, m1, p1, m1, PM, work in established
pattern to end of round.
All sizes: Work 2 rounds even, incorporating new sts into
pattern. (Make sure that the knit and purl columns inside
and outside the markers line up -- this will sometimes
require that you knit 2 sts in a row in the area between
the gusset markers.)
Increase round: Work to first marker in established
pattern, sl marker, m1, work to second marker in pattern,
m1, sl marker, work to end in established pattern.
Work 2 rounds even, incorporating new
sts into pattern.
Repeat the previous 3 rounds 5[6,7] more times until there
are 15[17, 19] sts between markers.
Next round: Work to first gusset marker in pattern, remove
marker, sl the next 15[17, 19] sts to a st holder or scrap
of yarn, CO 1 st over the gap, remove second marker, work
to end of round. 40[44, 50]
Work in Ringwood Stitch as established for 12[15, 18]
more rounds, or until hand of glove is
long enough to cover knuckles.
Pinky finger
Work first 4[5, 6] sts of round in Ringwood
Stitch. Sl next 32[34, 38] sts of round onto scrap yarn.
CO 2 sts over the gap, and work remaining 4[5, 6] sts
of round in pattern. 10[12, 14] sts total. Divide sts
across your needles and mark the beginning of the round.
Work in Ringwood Stitch for 2[2.5, 2.75] inches or until
the finger is desired finished length. Decrease round: K2tog around.
5[6, 7] sts.
Break yarn and thread it through the
remaining sts. Fasten off.
Ring finger
Return the 4[5, 6] sts closest to the
pinky finger on each side to your needles. With RS facing,
working away from the pinky finger, join yarn and work
in pattern across 4[5, 6] sts, CO 2 sts over the gap,
work across the next 4[5, 6] sts, and pick up and knit
2 sts over the CO edge of the previous finger worked.
12[14, 16] sts. Divide sts across your needles and mark
the beginning of the round.
Work in Ringwood Stitch for 2.5[3, 3.5] inches or until
the finger is the desired finished length.
Decrease round: K2tog around. 6[7, 8] sts.
Break yarn and thread it through the
remaining sts. Fasten off.
Middle finger
Return the 6[6, 6] sts closest to the pinky finger on each side
to your needles.
With RS facing, working away from the ring finger, join
yarn and work across 6[6, 6] sts, CO 2 sts over the gap, work across
next 6[6, 6]sts, and pick up and knit 2 sts over the CO edge of the previous
finger worked. 16[16, 16] sts. Divide sts across your needles and mark
the beginning of the round.
Work in Ringwood Stitch for 3[3.5, 4] inches or until
finger is desired finished length.
Decrease round: K2tog around. 8[8,8] sts.
Repeat Decrease round. 4[4, 4] sts.
Break yarn and thread it through the
remaining sts. Fasten off.
Index finger
Place the remaining 12[12, 14] hand sts
on your needles. Working away from the middle finger,
rejoin yarn and work across sts, then pick up and k 2
sts over the CO edge of the previous finger worked. 14[14,
16] sts. Divide sts across your needles and mark the
beginning of the round.
Work in Ringwood Stitch for 2.5[3, 3.5] inches or until
the finger is the desired finished length.
Decrease round: K2tog around. 7[7, 8] sts. Decrease round 2: K2tog 3[3,
4] times, k1[1, 0]. 4[4, 4] sts.
Break yarn and thread it through the
remaining sts. Fasten off.
Thumb
Return 15[17, 19] held thumb sts to your
needles. Join yarn and work in pattern across sts, then
pick up and k 3 sts over the open edge of the hand. Divide
sts across your needles and mark the beginning of the
round.
Next round: Work 15[17, 17] sts in pattern,
sk2p. 16[18, 18] sts remain.
Work even in Ringwood Stitch until thumb
measures 2[2.5, 3] inches, or desired finished length.
Decrease round: K2tog around. 8[8, 9] sts.
Break yarn and thread it through the
remaining sts. Fasten off.
RIGHT GLOVE Cuff
CO 51[55, 61] sts. Do not join.
Work Seed Stitch for 7 [7, 9] rows. Buttonhole row: Work seed
st to last 5 sts, k2tog, yo, k1, p1,
k1.
Work Seed Stitch for 7 [7, 9] rows.
Work Buttonhole row again.
Work Seed Stitch for 6 [6, 8] rows. Next row [WS]: BO 11 sts, p to end. 40[44, 50] sts remain.
Divide sts across your needles as you prefer and join
for working in the round, being careful not to twist. Note
or mark the beginning of the round.
Work remainder of right glove the same
as for left glove.
FINISHING
Weave in all ends, using the ends at the base of each finger
to mend any holes in this area if necessary. Block gloves by
washing in lukewarm water, squeezing out excess water in a towel,
and laying flat to dry.
When gloves are completely dry, cut off loose
ends. Fold over cuff flaps and mark button locations by
putting a pin through each buttonhole and into the cuff
fabric beneath. Using matching thread, sew on buttons.
ABOUT THE DESIGNER
Rebecca lives and knits in Canada, where
her favourite things to make are lace and
warm winter accessories.