Rhombus Lamina, a free knitting pattern from Knitty.com. Free knitting pattern for a self-striped Rhombus-shaped cape, lap blanket or throw.
INTRODUCTION
Rhombus Lamina
![]()
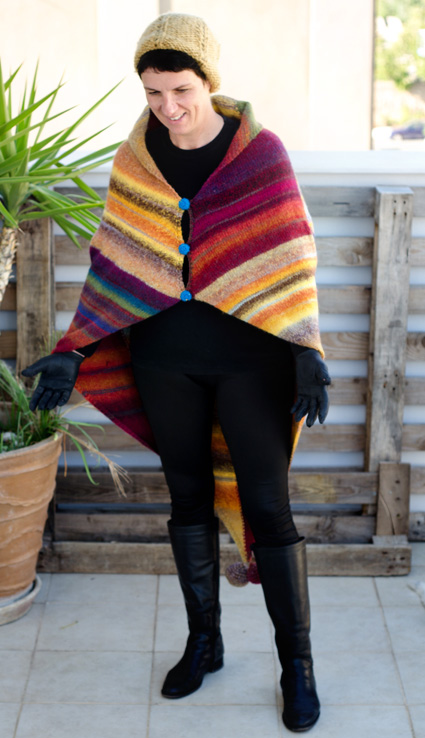
One of my favorite processes is playing with color and with variegated yarns. Having some at hand, I sought to create a shape that would highlight the yarn's fabulous colors.
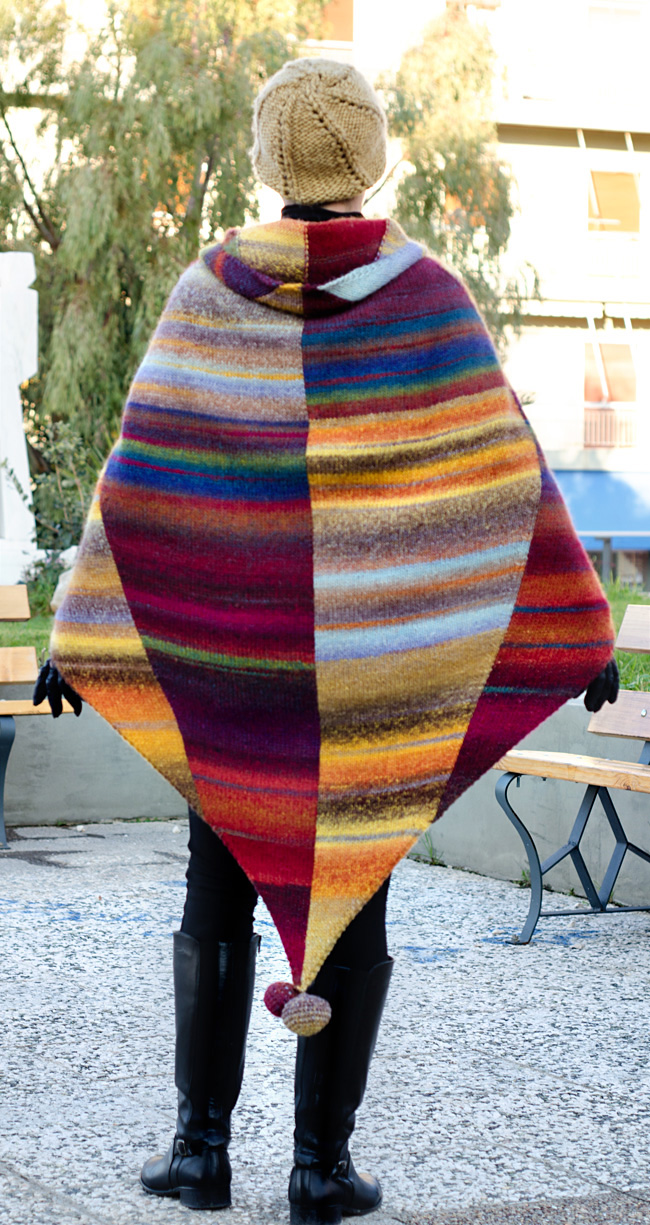
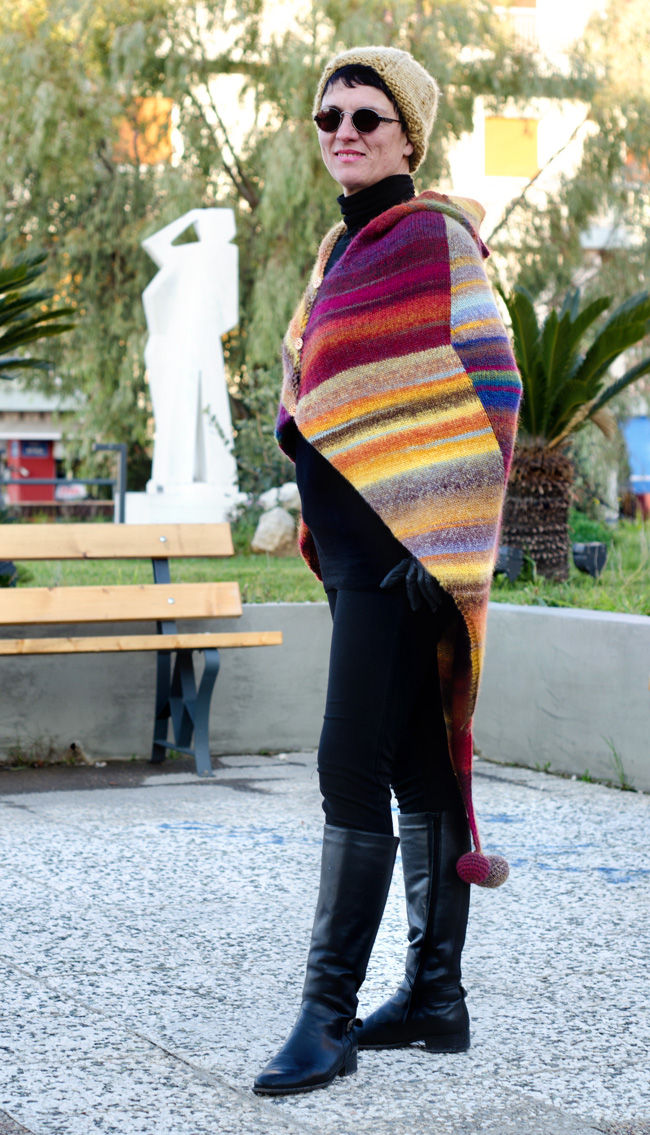
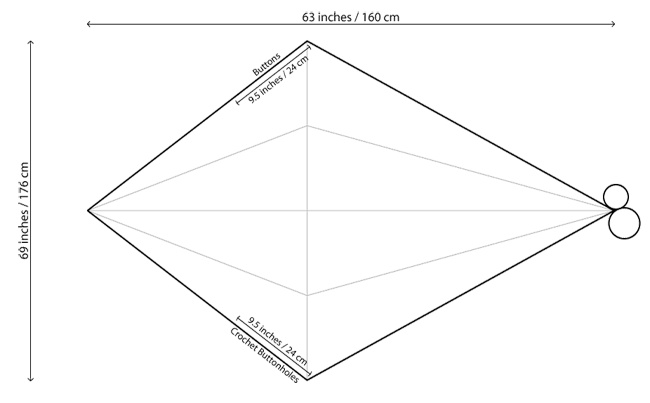
The result is a rhombus, a versatile shape that can be used in various ways. With a few buttons attached, it is transformed to a cape. Without the buttons, it can be used as a lap blanket or throw. The same shape worked in fingering or laceweight yarn can produce an elegant wrap. To make it a bit more fun and help the shape keep its drape, a pair of stuffed crochet balls can be added to one (or every) edge. I have opted to avoid pom-poms, as they get destroyed easily, and because crochet balls are not just durable, they also highlight the yarn's color changes.
Because the main effect is created with the use of intarsia and simple increases-decreases, it is easy to substitute with solid colored yarns for a more color-block effect.
 model: Eleni Liakopoulou
 photos: Asimina Saranti
SIZE
One
FINISHED MEASUREMENTS
Rhombus
Width: 69 inches/ 176 cm
Length: 63 inches/ 160 cm
Crochet Ball #1
Circumference: 8 inches/ 21 cm
Crochet Ball #2
Circumference: 7 inches/ 17 cm
MATERIALS
Yarn
Katia Azteca [53% wool, 47% acrylic; 197yd/ 180m per 100g skein];
![]() [A] 7847; 3 skeins
[A] 7847; 3 skeins
![]() [B] 7850; 3 skeins
[B] 7850; 3 skeins
Recommended needle size
[always use a needle size that gives you the gauge listed below - every knitter's gauge is unique]
![]() US #8/5mm needles for working flat
US #8/5mm needles for working flat
Notions
![]() US H-8/5mm crochet hook
US H-8/5mm crochet hook
![]() 3 stitch markers
3 stitch markers
![]() 3 buttons, 1 inch/20-25mm in diameter
3 buttons, 1 inch/20-25mm in diameter
![]() sewing needle and thread for attaching buttons
sewing needle and thread for attaching buttons
![]() yarn needle
yarn needle
![]() approximately 1oz/30gm polyester filling
approximately 1oz/30gm polyester filling
GAUGE
17 sts/23 rows = 4 inches/10 cm in stockinette stitch
PATTERN NOTES
[Knitty's list of standard abbreviations and techniques can be found here.]
Construction notes
The piece is worked flat. It starts with a few stitches and is increased until the widest part of the shape. Then, decreases of different frequencies occur until only a few stitches remain. A crochet edge is added for buttonholes and a pair of crochet balls at the longest edge of the rhombus.
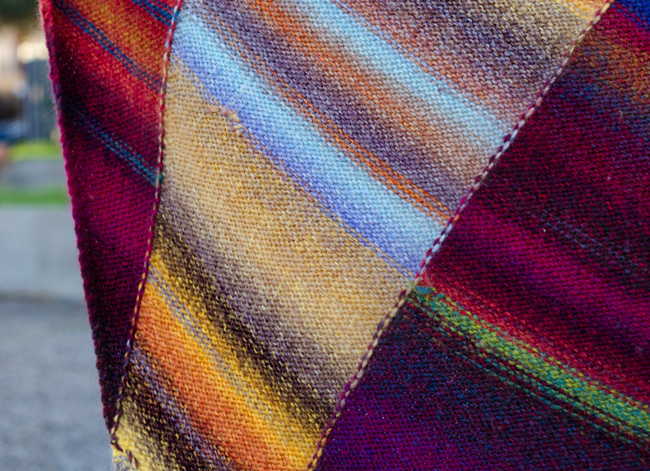
This piece is worked with the intarsia method. Each color section is worked with a different strand of yarn. When changing colors, twist the two yarns around each other. For the same effect as shown in the sample, when you change the colors for Section 2, start at a different point in the color sequences so that there is sufficient contrast.
You will be working in four different sections, two each in Color A and Color B. The sections are designated A1 and A2, B1 and B2, to distinguish. Use separate balls for each of these sections.
Crochet-Free Version
Instead of crochet buttonholes, sew in a zipper or use a hook and eye closure. Instead of the crochet balls, you could use similar size pom-poms.
Abbreviations:
EOR: end of round
sc2tog: single crochet 2 together
Crochet Techniques:
Chain, Slip Stitch & Single Crochet
DIRECTIONS
CO 2 sts with A1, 2 sts with B1, 2 sts with A2, 2 sts with B2, next to one another. 8 sts.
Set-up Row 1 [WS]: Knit, twisting the strands around each other when you change color.
Set-up Row 2 [RS]: [K1, M1, k1, pm] three times, k1, M1, k1. 3 sts in each section, 12 sts total.
Set-up Row 3 [WS]: K2, p to last 2 sts, k2.
Section 1 - Increases
Row 1 [RS]: K2, M1, k to m, slm, k1, M1, k to m, slm, k to 1 st before m, M1, k1, slm, k to last 2 sts, M1, k2. 4 sts increased, 1 in each section.
Row 2 [WS]: K2, p to last 2 sts, k2.
Repeat Rows 1-2 until there are 63 sts in each section, 252 sts total, ending with a WS row. Cut yarns.
Section 2 - Color change and decreases
As you work across Row 1, join yarns to each section, swapping A and B. The first section is worked with B1, the second with A1, the third with B2 and the fourth with A2.
Row 1 [RS]: K2, k2tog, k to m, slm, k1, k2tog, k to m, slm, k to 3 sts before m, ssk, k1, slm, k to last 4 sts, ssk, k2. 4 sts decreased, 1 in each section.
Row 2 [WS]: K2, p to last 2 sts, k2.
Row 3 [RS]: K across.
Row 4 [WS]: K2, p to last 2 sts, k2.
Repeat Rows 1-4 11 more times, ending with Row 4. 51 sts in each color. 204 sts total.
Section 3 - Change in decrease frequency for the outer panels
In this section, the color panels are worked differently. The two outer panels are decreased by 1 st every RS row. The two inner panels, same as in previous section, are decreased by 1 st every other RS.
Row 1 [RS]: K2, k2tog, k to m, slm, k1, k2tog, k to m, slm, k to 3 sts before m, ssk, k1, slm, k to last 4 sts, ssk, k2. 4 sts decreased, 1 in each section.
Row 2 [WS]: K2, p to last 2 sts, k2.
Row 3 [RS]: K2, k2tog, k to m, slm, [k to m, slm] twice, k to last 4 sts, ssk, k2. 2 sts decreased, 1 each in outer sections.
Row 4 [WS]: K2, p to last 2 sts, k2.
Repeat Rows 1-4 23 more times, and work Row 1 once more. 2 sts in each of the outer sections, 26 stitches in each of the inner sections. 56 sts total.
Next Row [WS]: BO 2 sts, rm, k2, p to m, slm, p to 2 sts before m, rm, k2, BO 2 sts. 52 sts
Only the inner two sections remain at this point. Cut the yarns from the outer two sections.
Section 4 - Last set of decreases
Row 1 [RS]: K2, k2tog, k to m, slm, k to last 4 sts, ssk, k2.2 sts decreased, 1 in each section.
Row 2 [WS]: K2, p to last 2 sts, k2.
Repeat Rows 1-2 23 more times, and then work Row 1 once more. 2 sts in each color, 4 sts total, ending with a RS row.
BO all sts.
Crochet Ball #1
With Color B, ch 3 sts and join with sl st.
Round 1: Ch1, sc 6 sts in ch loop, join with sl st. 7 sts
Round 2: Ch1, sc twice in each st, join with sl st. 13 sts
Round 3: Ch1, *sc1, sc twice in next st, repeat from * to EOR, join with sl st. 19 sts
Round 4: Ch1, *sc1 twice, sc twice in next st, repeat from * to EOR, join with sl st. 25 sts
Round 5: Ch1, *sc1 three times, sc twice in next st, repeat from * to EOR, join with sl st. 31 sts
Rounds 6-7: Ch1, sc1 in each st to EOR, join with sl st.
Round 8: Ch1, *sc1 three times, sc2tog in next st, repeat from * to EOR, join with sl st. 25 sts
Round 9: Ch1, *sc1 twice, sc2tog in next st, repeat from * to EOR, join with sl st. 19 sts
Round 10: Ch1, *sc1, sc2tog in next st, repeat from * to EOR, join with sl st. 13 sts
Round 11: Ch1, sc2tog in each st, join with sl st. 7 sts
Round 12: Ch1, sc2tog three times, join with sl st. 3 sts
Fasten off and close the top and bottom holes
Crochet Ball #2
With Color A, ch 3 sts and join with sl st.
Work Rounds 1-4 as per Crochet Ball #1.
Rounds 5-6: Ch1, sc1 in each st to EOR, join with sl st.
Complete as per Crochet Ball #1 starting with Round 9.
FINISHING
Crochet Buttonholes
With RS facing, working on left edge, starting 18 inches/45cm up from CO edge – approximately 9.5 inches/24cm from the widest point, join yarn and create buttonloop along edge of work as follows: sc1 in next st, *ch3, skip 1 st, sc in next 18 sts, repeat from * once more, ch3, skip 1st, sc in next 2 sts, sl st, fasten off and secure yarn.
Buttons
Fold work so that left and right edges are together; attach buttons to match buttonholes.
Block. Attach crochet balls and weave in ends.
ABOUT THE DESIGNER
 Asimina Saranti is a Computer Engineer and a Web Developer. She likes to travel, immerse in other cultures, and, of course, knit!
You can find her designs on Ravelry and follow her knitting and life adventures on her blog.
Pattern & images © 2017 Asimina Saranti. Contact


