Grandma Knitty Home
Knitty®: little purls of wisdom
what's the editor up to lately?feature articlesKnitty's generous selection of patternsKnittyspinşarchive of previous issuesMeet other Knitty readers and chat in our coffeeshop!sign up for the free Knitty newsletterLooking for an ad fromone of our advertisers? Click here!Our tiny, perfect online shopping mallGet yourself a little Knitty treat!read the behind-the-scenes news at Knitty


Find exactly what you're looking for

The answer to your question about Knitty is probably here!

Take home something Knitty today

Advertise with Knitty

Get your cool stuff reviewed in Knitty

Full information about how  to get published in Knitty

Read exactly what FREE PATTERNS really means...respect our designers and authors rights [and thank you]

Knitty is produced in a pro-rabbit environment

© Knitty 2002-2008. All rights reserved. Unauthorized reproduction prohibited. This means you.


<click for more!
 
Zen of Socks

My latest knitting passion has been socks using hand-painted yarns. I have also been meaning to try out a modular project, and Posey was the outcome of the marriage of the two ideas. My biggest concern with the project was how to work squares into the foot, since squares cannot be knit in the round. At least, I could not figure out how to knit squares in the round! After reading Jane Sowerby’s, Victorian Lace Today, her “single join” technique for working a lace border onto a previously completed center panel stuck in my head as a way to address the problem.

The two-color mitered square, called “half square triangles” in the quilting world, is adapted from Maie Landra’s Knits From a Painter’s Palette, with additional instructions shown here for working the squares with two colors. The heel flap used  is the “Heel Stitch with German Chain Selvage,” from Charlene Schurch’s More Sensational Knitted Socks.

A note on choosing colors: The first prototypes of the Posey squares used a purple hand-paint and a pink hand-paint. However, the two colorways were too closely related, the purple having some pink and the pink having some purple. The skeins seemed “made for each other,” but the overlap in color made them disappear into each other when knitted together. When choosing colors, avoid picking hand-paints that have any colors in common. Contrasting colors work best.

photos: Lisa Kay, Chris Wilson

SIZE

Made for an average women’s foot, approx size 9.
Length of foot may be changed by working more or fewer rows of squares; directions are given within pattern.

 
FINISHED MEASUREMENTS

Circumference: 8 inches
Foot length: 8 inches

 
MATERIALS

Koigu Painter’s Palette Premium Merino (KPPPM) [100% merino wool; 175yd/160m per 50g skein]; 2 skeins each color
[MC] #P503 (greens)
[CC] #P217 (purple/pink)
Recommended needle size:
1 set US #1.5/2.5 mm double-point needles
[always use a needle size that gives you the gauge listed below -- every knitter's gauge is unique]

Tapestry needle

GAUGE

One 17 st mitered square = 1 inch
34 sts/38 rows = 4 inches in stockinette st

 
PATTERN NOTES

[Knitty's list of standard abbreviations and techniques can be found here]

The mitered square used in this pattern has four minor variations, differing only in the way the stitches are cast on or picked up.
Square A: The first square in the project.
Square B: All subsequent squares in the first column of squares (lower edge sts picked up, side edge sts cast on).
Square C: The first square in a new column of squares (lower edge sts cast on, side edge sts picked up).
Square D: All other squares (sts of both lower and side edges picked up).

The Knitted Cast On is recommended for the mitered squares.

Yf: Bring yarn between needles to front of work.
Yb: Bring yarn between needles to back of work.

Square A
CO 8 sts using MC and 9 sts using CC. 17 sts.
*Row 1 [WS]: Sl 1 knitwise, using CC k8 tbl, yf; using MC, k7 tbl, p1.
Row 2 [RS]: Sl 1 purlwise, using MC k tbl to last MC st, sl 1 purlwise, yf; using CC k2tog tbl, pass slipped st over, k tbl to last st, p1. 2 sts decreased.
Row 3 [WS]: Sl 1 purlwise, using CC k tbl all CC sts, yf; using MC k tbl to last st, p1.
Repeat Rows 2 and 3 five times more. 5 sts remain.

Next Row [RS]:  Sl 1 purlwise, sl 1 purlwise, yf using MC; using CC k2tog tbl, pass second slipped st over, yb using MC, p1 using CC. 3 sts.
Next Row [WS]: Sl 1 purlwise, using CC yf, using MC p2tog, pass slipped st over. 1 st.*
Do not break yarn.

Square B
Note: Read ahead before proceeding.
Hold previous square with RS facing, so that attached yarn is at upper right corner. There is 1 st on the needle. Using MC, pick up and k 7 sts along upper edge of previous square, weaving attached strand of CC over and under MC at back of work, so that it is handy when the corner is reached. Yf using MC. Using CC, pick up and k 1 st in corner of square, then CO 8 more sts. 17 sts.

Work from * to * as for Square A.
Do not break yarn until you have worked the last square in the column. When this last square is complete, break yarn, draw through last st and pull tight.

Square C
The CC sts for Square C will be picked up along the right edge of another square, beginning at the lower right corner. Pick up sts with RS facing.
Using MC, CO 9 sts. Slip last CO st to left needle. Yf using MC. Insert tip of left needle into CO st at corner of square; picked-up st will be at right of CO st. Using CC, k these 2 sts together. Continuing with CC, pick up and k 8 more sts along edge of square. 17 sts.

Work from * to * as for Square A. Do not break yarn.

Square D
Sts for Square D will be picked up along upper edge of previous square and right edge of adjacent square, with RS facing.
There is 1 st on the needle. Using MC, pick up and k 7 sts along upper edge of previous square, weaving attached strand of CC over and under MC at back of work, so that it is handy when the corner is reached. Yf using MC. Using CC, pick up and k 1 st in corner between squares, then 8 more sts along right edge of adjacent square. 17 sts.

Work from * to * as for Square A.
Do not break yarn until you have worked the last square in the row. When this square is complete, break yarn, draw through last st and pull tight.

Instructions for grafting can be found here.

Instructions for sewing down a picot hem can be found here.

Information about blocking can be found here and here.

DIRECTIONS

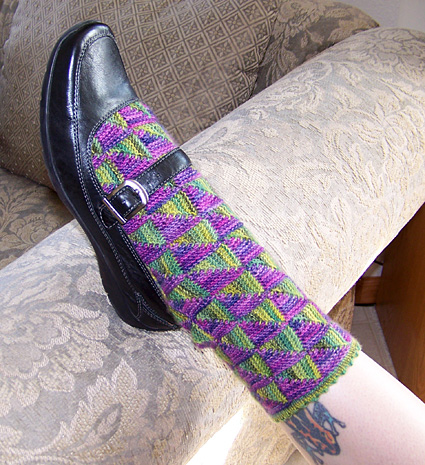
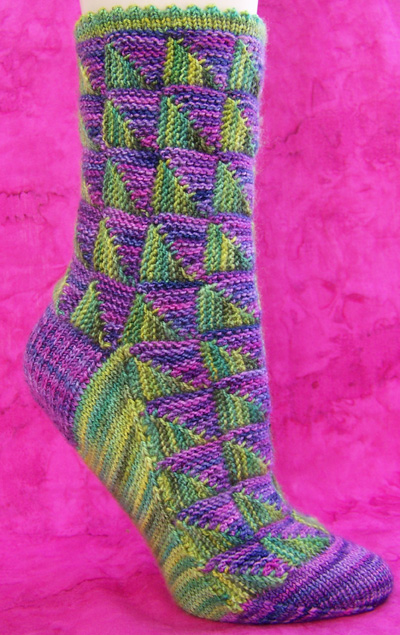
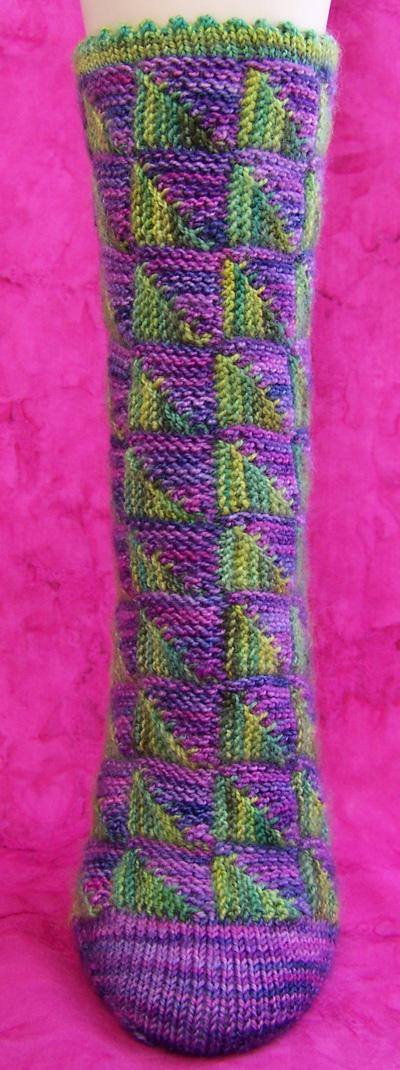
MITERED SQUARE PANEL

Leg Squares:
Work a column of 8 squares, working Square A, followed by 7 of Square B.
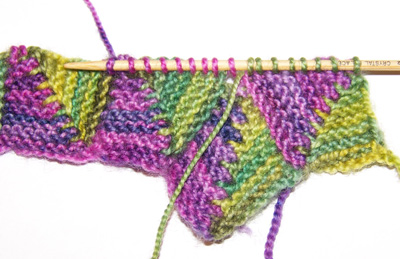
Work 4 further columns of squares, each formed by working Square C, followed by 7 of Square D. You will have a rectangle that is 5 squares wide and 8 squares deep.

Note: If you wish to make the leg of the sock longer, work more columns of squares. 
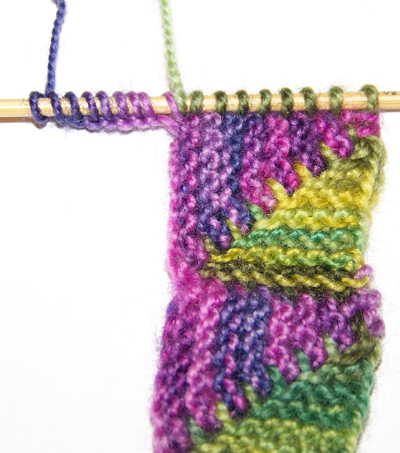
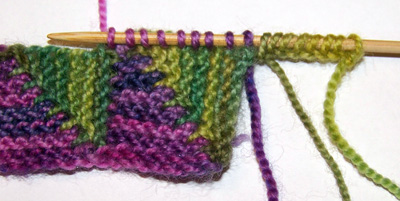
It is a good idea to weave in ends after each column of squares is completed.

Instep Squares:
Beginning at edge of 4th square from bottom of previous column, work a column of 4 squares (see diagram above). Each column is formed by working Square C, followed by 3 of Square D.
Work 4 further columns of squares; instep is 5 columns wide.

Note: To lengthen sock by 1 inch or more, work an additional column of squares. To shorten foot, work one fewer colum of squares. Length may be fine-tuned by working more rows of stockinette st before working toe.

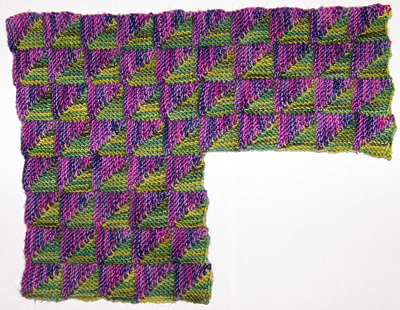
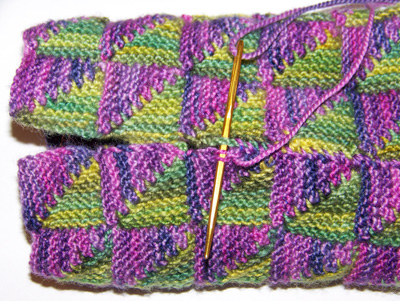
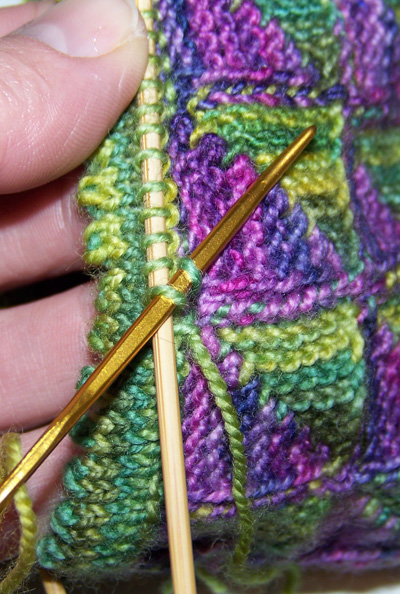
Referring to diagram above, join edges of panel labeled “Join For Calf” together to form leg of sock, sewing as shown in photo below. The seam will show, but will be inobtrusive and will lay flat on both inside and outside of sock.

HEEL FLAP
Using CC and with RS facing, pick up and k sts along edge of mitered square panel marked “Heel Flap Begins Here” in diagram above, as follows: 1 st in first corner, 8 sts in each square, 1 st in corner. 34 sts.

Work heel flap over these sts as follows:
Row 1 [WS]: K1, p to last st, sl 1.
Row 2 [RS]: K1, [sl 1, k1] to last st, yf, sl1.
Repeat these 2 rows 16 times more. There are 17 slipped sts along each side edge of flap.

TURN HEEL
Row 1 [WS]: Sl 1, p16, p2tog, p1. Turn work.

Row 2 [RS]: Sl 1, k2, ssk, k1. Turn work.

Row 3 [WS]: Sl 1, p3, p2tog, p1. Turn work.

Row 4 [RS]: Sl 1, k4, ssk, k1. Turn work.

Row 5 [WS]: Sl 1, p5, p2tog, p1. Turn work.

Row 6 [RS]: Sl 1, k6, ssk, k1. Turn work.

Row 7 [WS]: Sl 1, p7, p2tog, p1. Turn work.

Row 8 [RS]: Sl 1, k8, ssk, k1. Turn work.

Row 9 [WS]: Sl 1, p9, p2tog, p1. Turn work.

Row 10 [RS]: Sl 1, k10, ssk, k1. Turn work.

Row 11 [WS]: Sl 1, p11, p2tog, p1. Turn work.

Row 12 [RS]: Sl 1, k12, ssk, k1. Turn work.

Row 13 [WS]: Sl 1, p13, p2tog, p1. Turn work.

Row 14 [RS]: Sl 1, k14, ssk, k1. Turn work.

Row 15 [WS]: Sl 1, p15, p2tog. Turn work.

Row 16 [RS]: Sl 1, k16, ssk. Do not turn work.

18 sts remain.

Break CC.

GUSSET
Join MC at end of last row (where CC was cut).

Using a new needle and with RS facing, pick up and k 17 sts (1 st in each slipped st) along adjacent edge of flap and 3 sts in space between flap and insole. 20 sts on this needle.

Turn work.

Next Row [WS]: Use tip of needle to pick up 1 st in edge of adjacent square of instep; p this st together with first st on needle, p to end of needle, p first 9 sts of heel; using a second needle, p remaining 9 sts of heel, pick up and p 17 sts along remaining edge of heel flap and 3 sts in space between top of flap and instep. 58 sts: 29 sts on each needle.

In the directions that follow, when instructed to pick up a st, use the tip of the left needle to pick up a st in the adjacent square of the instep flap. Pick up 8 sts in each square before proceeding to the next square. Do not pick up sts in the corner of each square, as the point where the colors meet will tend to pull and leave a hole.

Work gusset, joining work to edges of instep flap as follows:

Row 1 [RS]: Pick up st and [k2tog] with first st on needle, k2tog, k to last 3 sts on second needle, ssk, pick up st and [k2tog] with last st on needle. 56 sts.

Row 2 [WS]: Pick up st and [p2tog] with first st on needle, p to last st on second needle, pick up st and [p2tog] with last st on needle.

Row 3 [RS]: Pick up st and [k2tog] with first st on needle, ssk, k to last 3 sts on second needle, k2tog, pick up st and [k2tog] with last st on needle.

Repeat Rows 2 and 3 nine times more. 36 sts; 18 sts on each needle.

SOLE
Row 1 [WS]: Pick up st and [p2tog] with first st on needle, p to last st on second needle, pick up st and [p2tog] with last st on needle.

Row 2 [RS]: Pick up st and [k2tog] with first st on needle, k to last st on second needle, pick up st and [k2tog] with last st on needle.

Repeat these 2 rows until end of instep flap is reached, ending with a RS row.

Break MC.

TOE
Try on sock to determine whether extra length is needed. The toe should be worked when sock is 1.5 inches less than desired length; if the sock at this point is not long enough, extra rounds will need to be worked in the next step.

Using a new needle and CC, pick up and k 18 sts along edge of first two squares at end of instep flap; using another needle, pick up and k 18 sts along edge of remaining 2 squares. These needles will be designated Needles 3 and 4; the needles which hold the sts of the sole will be designated Needles 1 and 2.
72 sts: 18 sts on each needle.

K 1 round.

If necessary, continue in stockinette st until work measures 1.5 inches less than desired length.

Decrease Round: K1, ssk, k to end of Needle 1; k to last 3 sts of Needle 2, k2tog, k1; k1, ssk, k to end of Needle 3; k to last 3 sts of Needle 4, k2tog, k1.

K 1 round.

Repeat these 2 rounds 8 times more. 36 sts; 9 sts on each needle.

Work Decrease Round 4 times more. 20 sts; 5 sts on each needle.

Slip sts from Needle 2 to Needle 1. Slip sts from Needle 3 to Needle 4.
Graft sts on Needle 1 to sts on Needle 4.

CUFF
Using MC and with RS facing, pick up and k 60 sts (15 sts for every 2 squares) around upper edge of sock.

Distribute sts so that each needle holds an even number of sts, and join to work in the round.

K 5 rounds.

Next Round: [Yo, k2tog] to end.

K 5 rounds.

Break yarn, leaving a tail approx. 36 inches long.

Turn sock inside out.

Sew live sts to inside of cuff as directed in linked article (see Pattern Notes).
FINISHING

Weave in ends.
Wet block socks.

References:
Fanihi, Jeannie, Sewing Down a Picot Edge, internet blog article, http://jeanniefanihi.blogspot.com, August 2007.

Landra, Maie, Knits From A Painter’s Palette (Modular Masterpieces in Handpainted Yarn), Sixth&Spring Books, New York, NY, 2006.

Schurch, Charlene, More Sensational Knitted Socks, Martingale & Company, Woodinville, WA, 2007.

Sowerby, Jane, Victorian Lace Today, XRX Books, Sioux Falls, South Dakota, 2006.

ABOUT THE DESIGNER

Lisa Kay is an engineer, a wife, and a mother of one. She quilts, documents her son in digital scrapbooking, and, of course, knits. She has collected frogs all her life.

Her blog can be found here.